Privileges
Overview
The purpose of this tutorial is to implement a new POS function that is protected by privileges. The tutorial will simulate a new POS function, first checking that the user is allowed to run the function and second checking that the user is authorised to run it. If the currently logged-in user is not authorised, this tutorial will show how to ask a different user to log in temporarily in order to authorise the function. This is the general flow that an Enactor POS function follows.
What You Will Learn
- How to create new privileges and register them
- How to validate whether the current user has a given privilege
- How to trigger authorisation from a different user
Prerequisites
- Familiarity with creating Application Processes and using them as Application Process Extensions.
- Understanding of how privileges are configured in Enactor
- EM should be up and running
Instructions
Create a Process Extension
Bring up the Resource Library view and search for the process HandleFunctions2.
Select and open HandleFunctions2_1.0.xml.

Using the Outline view, expand the Actions group and search for CallHandleFunction2Extension.
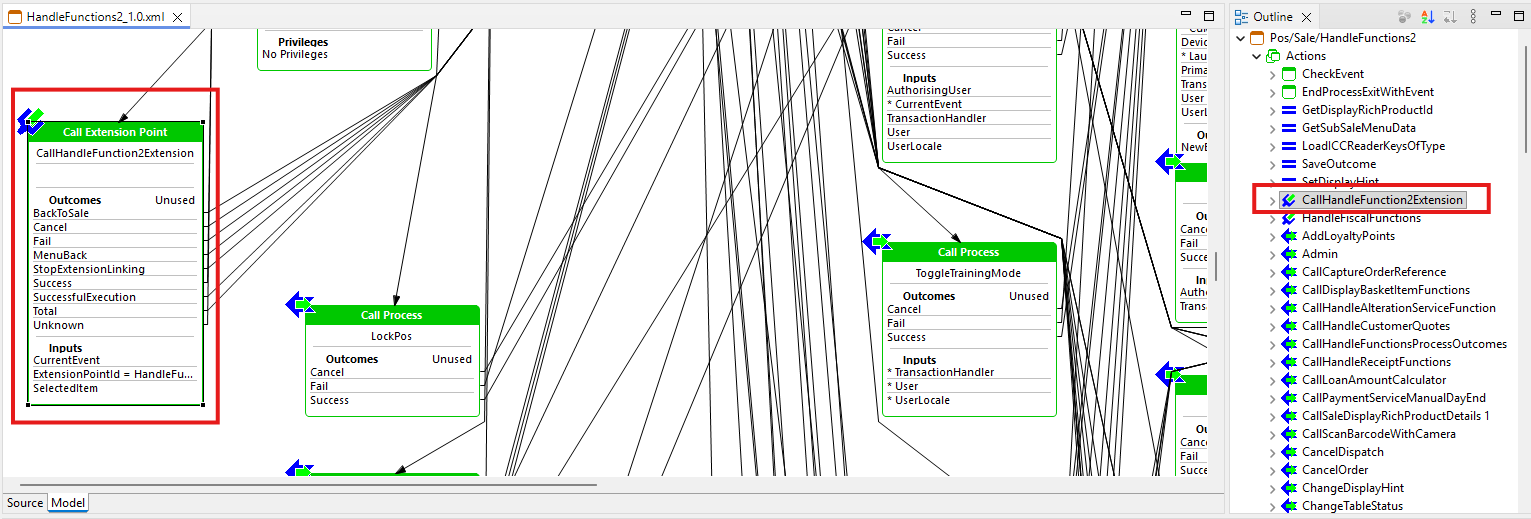
Double-click on CallHandleFunction2Extension, then click Create New Extension Process in the wizard that opens.
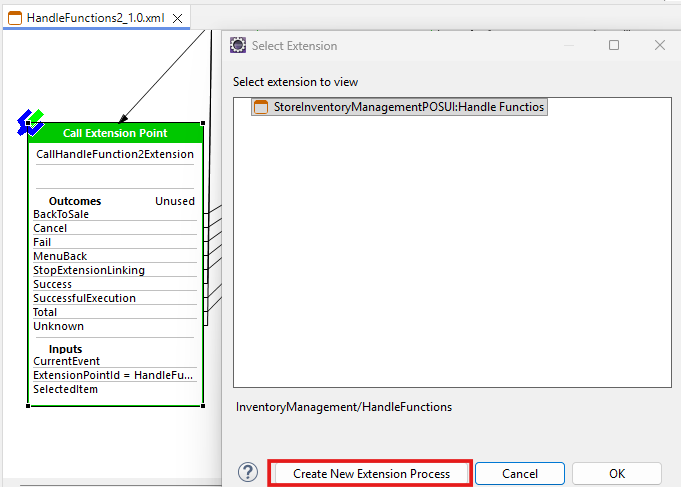
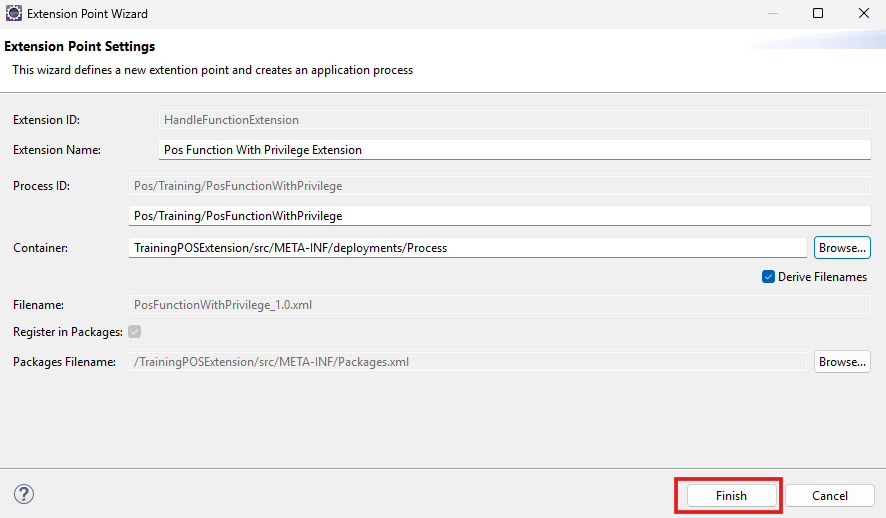
Enter the Extension Name as Pos Function With Privilege Extension and the Process ID as Pos/Training/PosFunctionWithPrivilege, then click Browse to set the container.
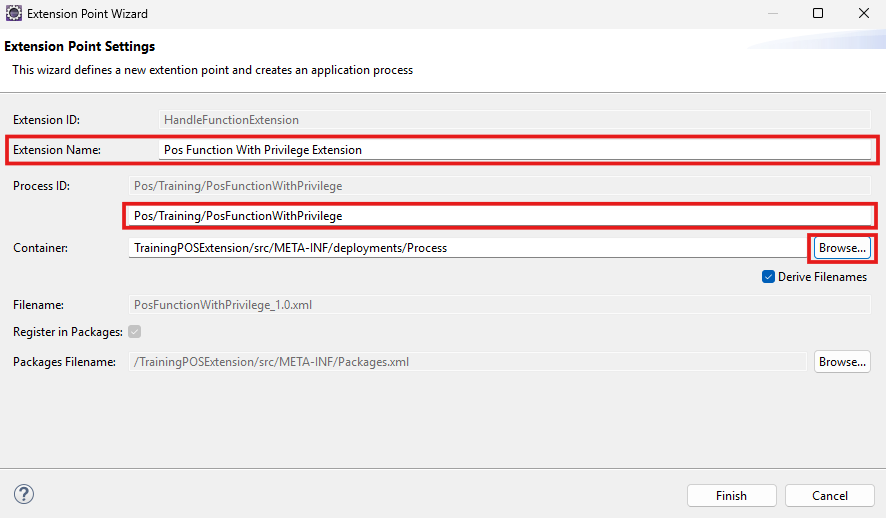
Select the Process in the TrainingPOSExtension folder and click OK.
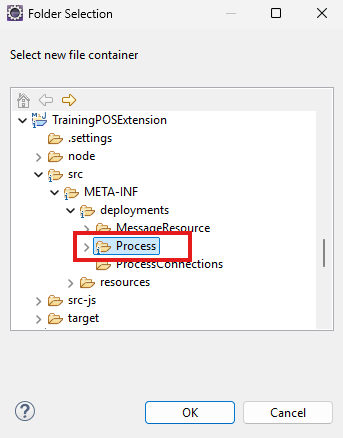
Click Finish to complete.
- Open the newly created
Pos/Training/PosFunctionWithPrivilegeapplication process:-
Add a starting state with the
StateEnteredevent. -
Drop
com.enactor.coreUI.actions.CheckEventActionfrom the Resource Library. -
Add the
WithPrivilegeEventandUnknownevents as outcomes of the action and name itCheckEvent. -
Add an Unknown outcome.
-
The Unknown event should then be linked to an outcome of Unknown.
-
Drag the
CurrentEventinput of theCheckEventActiononto the Inputs of the Process. When a POS function is triggered from the Sales menu, the extension will be called withCurrentEventset to the event configured in the menu.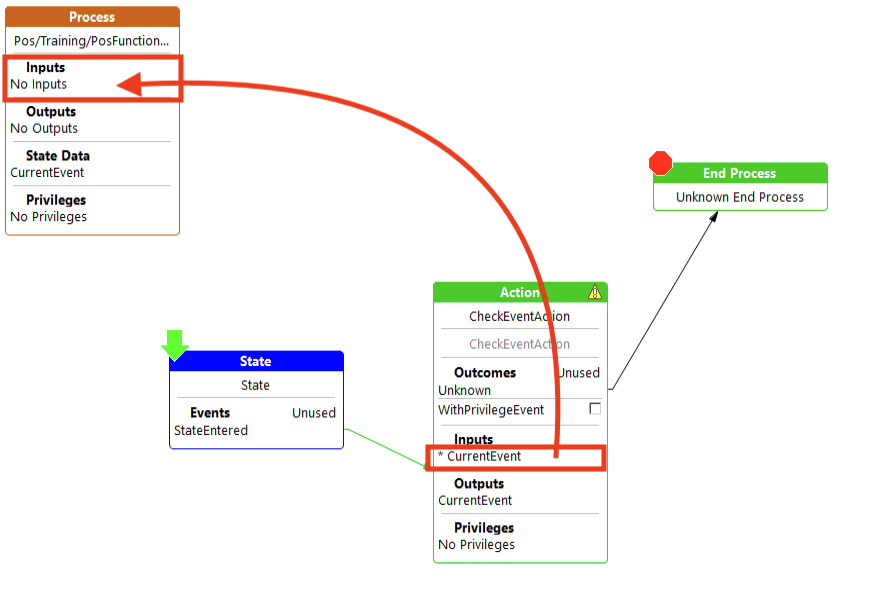
-
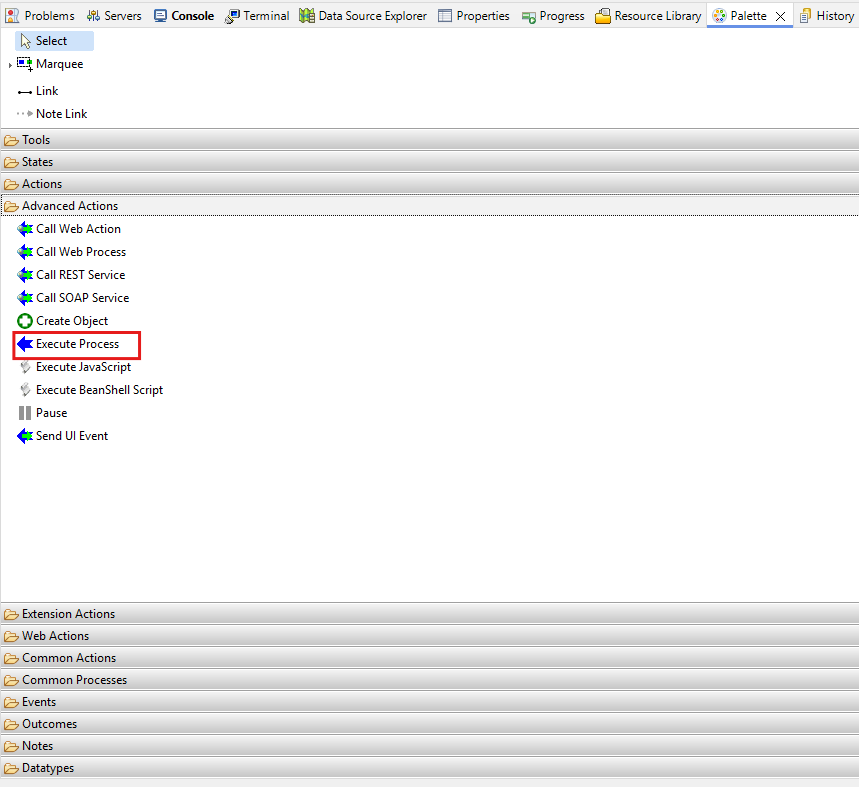
Add Execute Process from Advanced Actions in the Palette.
-
-
Configure the Execute Process action with the following settings:
Field Value Class Name com.enactor.coreUI.actions.CallProcessWithPrivilegesActionExecute Process ID Pos/SignOn/CheckAuthorisationPrivileges enactor.training.AuthoriseWithPrivilegeEvent -
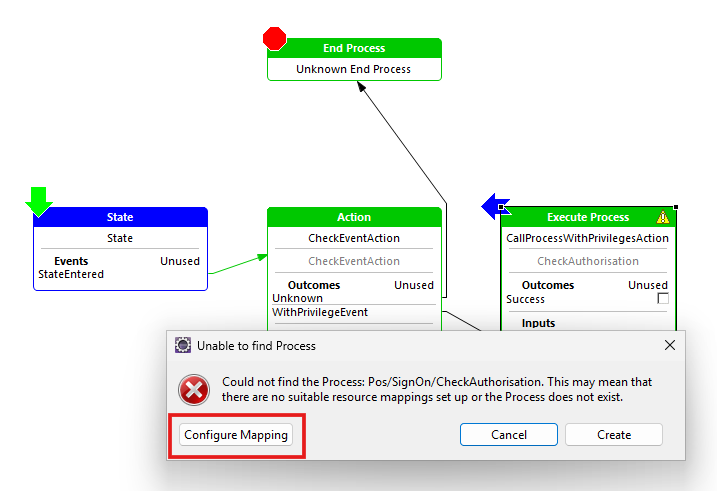
Once it has been added, double-click on the
CallProcessWithPrivilegesActionand clickConfigure Mappingin theUnable to find Processpopup.
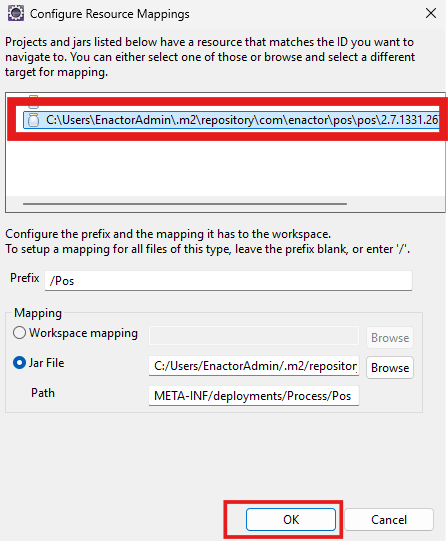
- Select the
C:\User\EnactorAdmin\.m2\repository\com\enactor\pos\pos\...., then clickOK.
-
Pos/SignOn/CheckAuthorisationis now accessible and can be opened without any issues when double-clicking onCallProcessWithPrivilegesAction. -
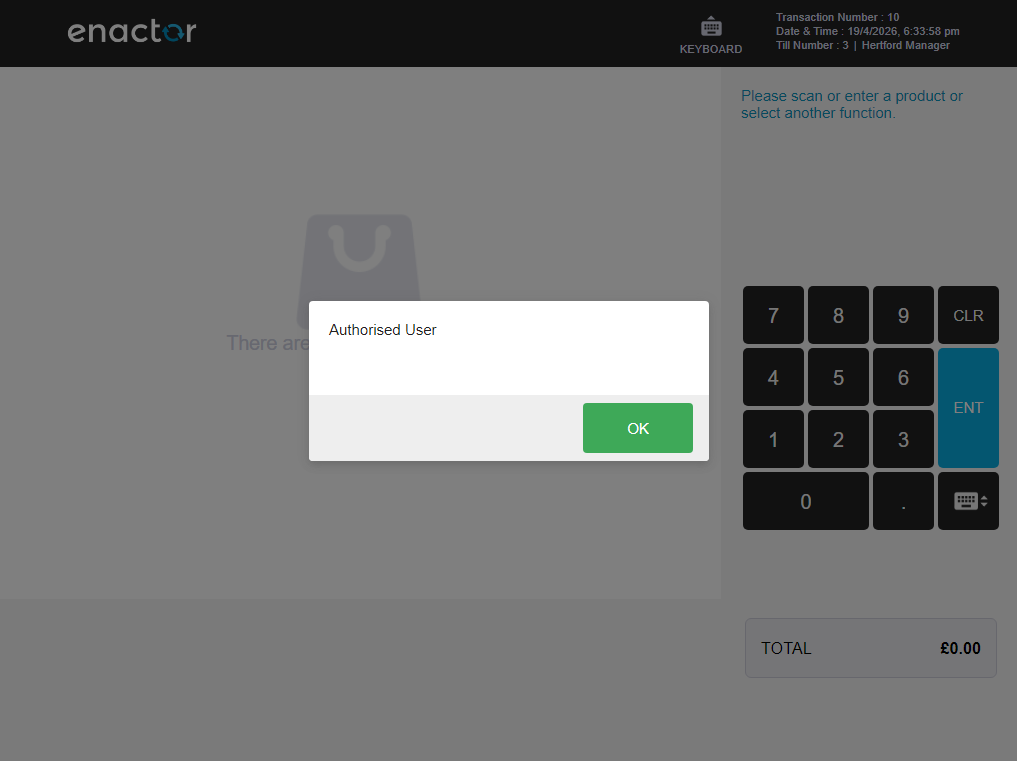
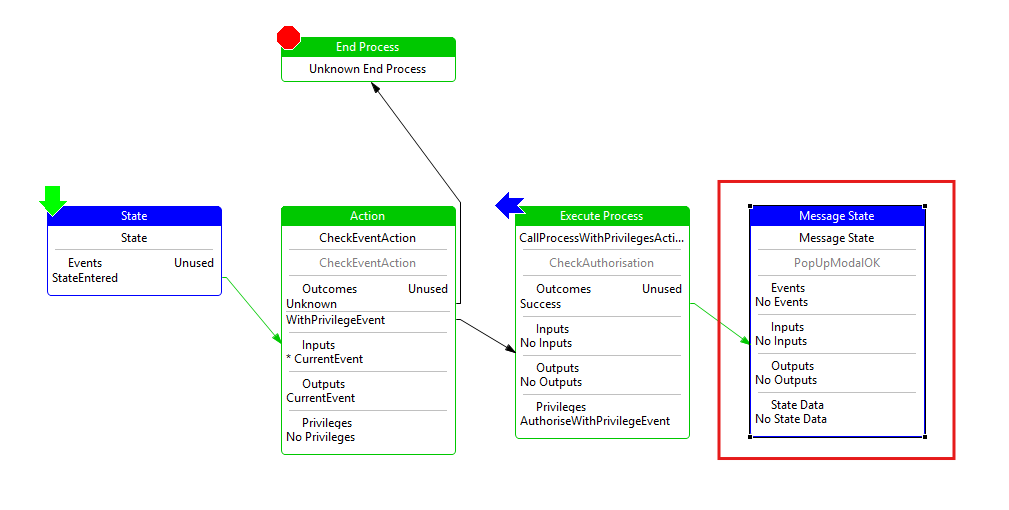
Add a Message State, set the
Message IDtoAuthorisedUserand theMessage BasetoTrainingPOSExtension/TrainingPOSExtensionMessages, then route the success outcome fromCallProcessWithPrivilegesActionto this state.
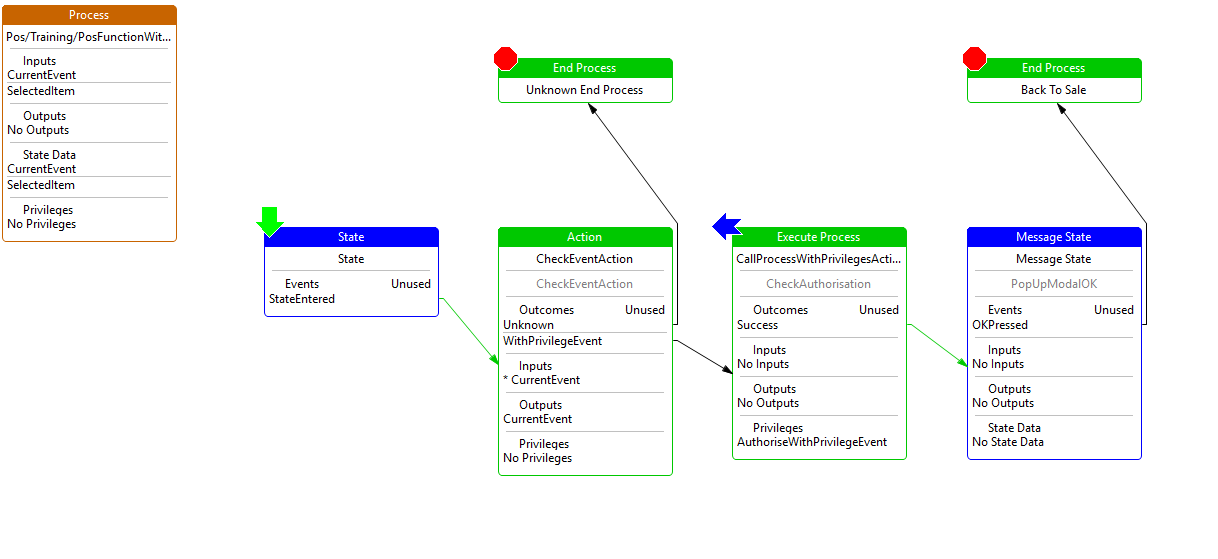
- Add the
OKPressedevent and route the link to theBackToSaleend process.
Add the Privilege to the Message Resource
Add the following parameters to TrainingPOSExtensionMessages.xml:
<ns2:message key="enactor.training.AuthoriseWithPrivilegeEvent.Name">Authorise With Privilege Event</ns2:message>
<ns2:message key="enactor.training.AuthoriseWithPrivilegeEvent.Description">Training privilege for authorising a POS function event</ns2:message>
<ns2:message key="AuthorisedUser">Authorised User</ns2:message>
Add a new button to the POS menu
Log in to the EM.
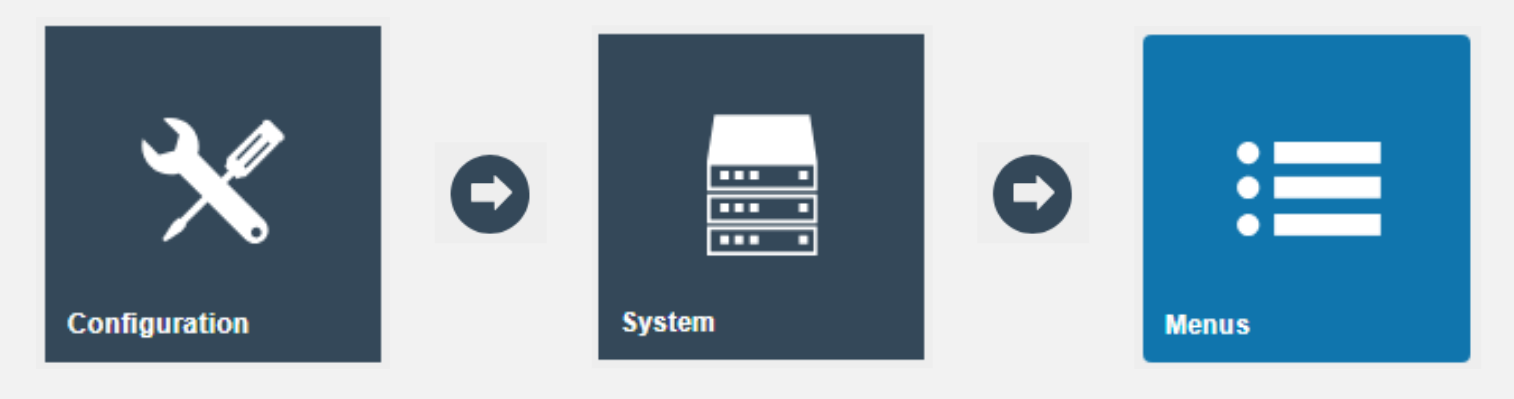
The Menus Maintenance function is accessed using the search or path: Configuration > System > Menus
-
Add the filter values
Menu GroupasDefault Standard POSandMenu IDasSALE, then edit the filtered entry.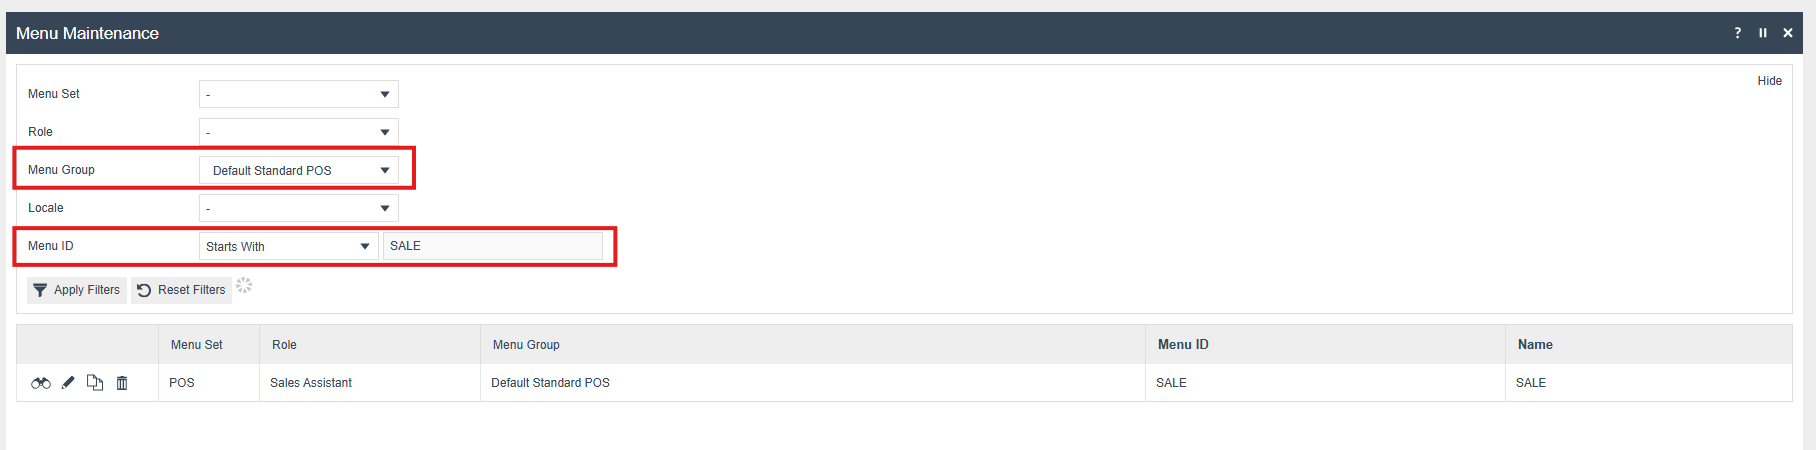
-
Expand
Sales,Loyaltywill be displayed inside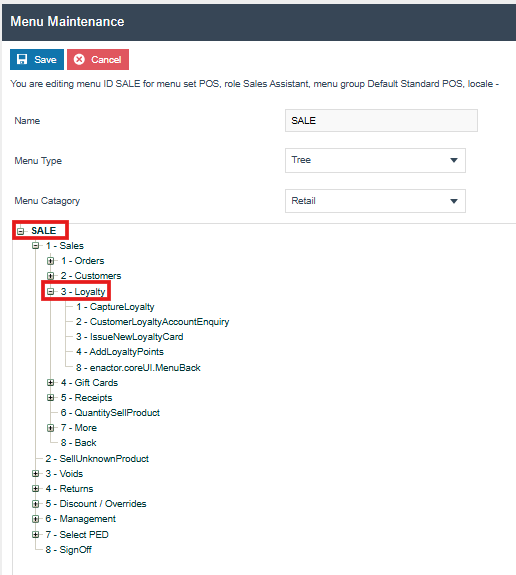
-
Select
Loyaltyand press theAdd...button, then selectAdd a new Button.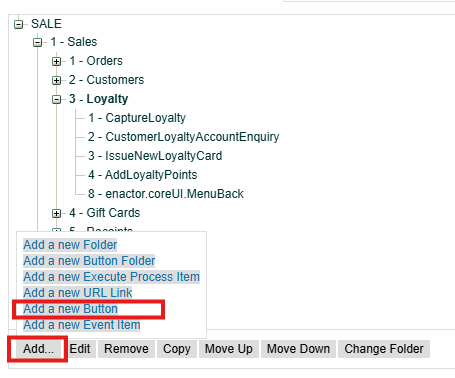
-
Add the new button with the event
WithPrivilegeEvent.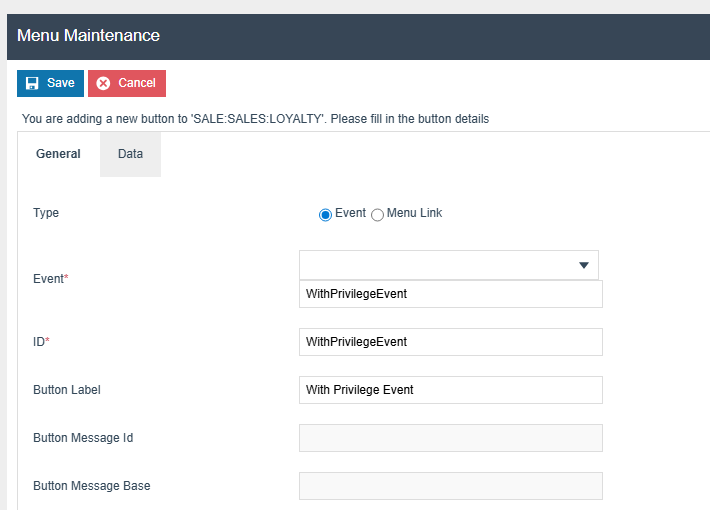
Enable the Privilege for a Specific Role
-
Log in to the EM.
-
The JAR of the
TrainingPOSExtensionneeds to be deployed using the JAR Deployer from the EM for the newly added privilege to appear in the list.
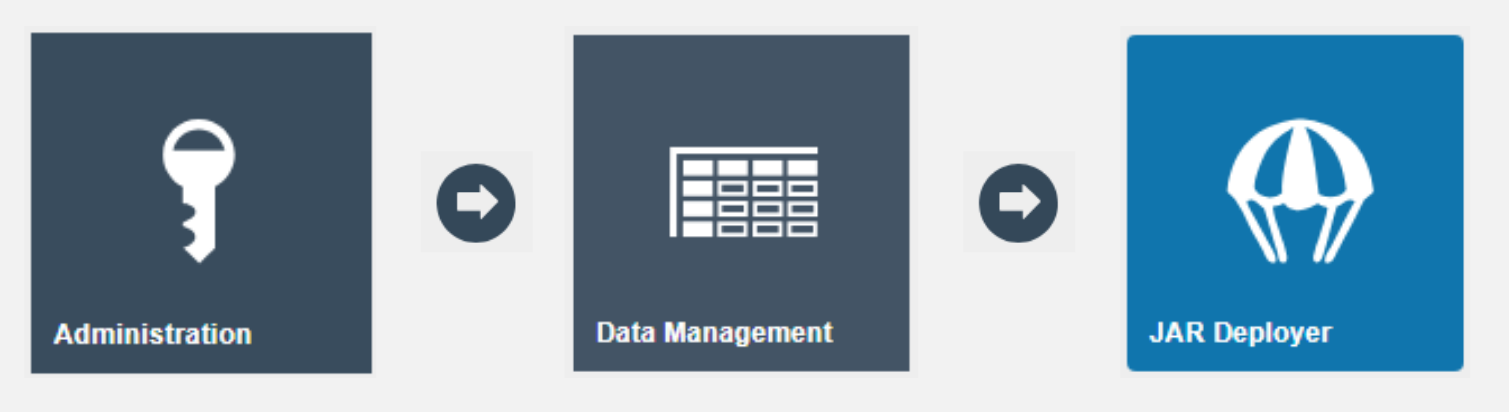
The JAR Deployer Maintenance function is accessed using the search or path:
Administration > Data Management > JAR Deployer
Since the same database is shared between the POS and the EM in the developer setup, and the TrainingPOSExtension changes are on the classpath, restarting the POS will automatically deploy the packages. The newly added privilege will then be visible in the EM.
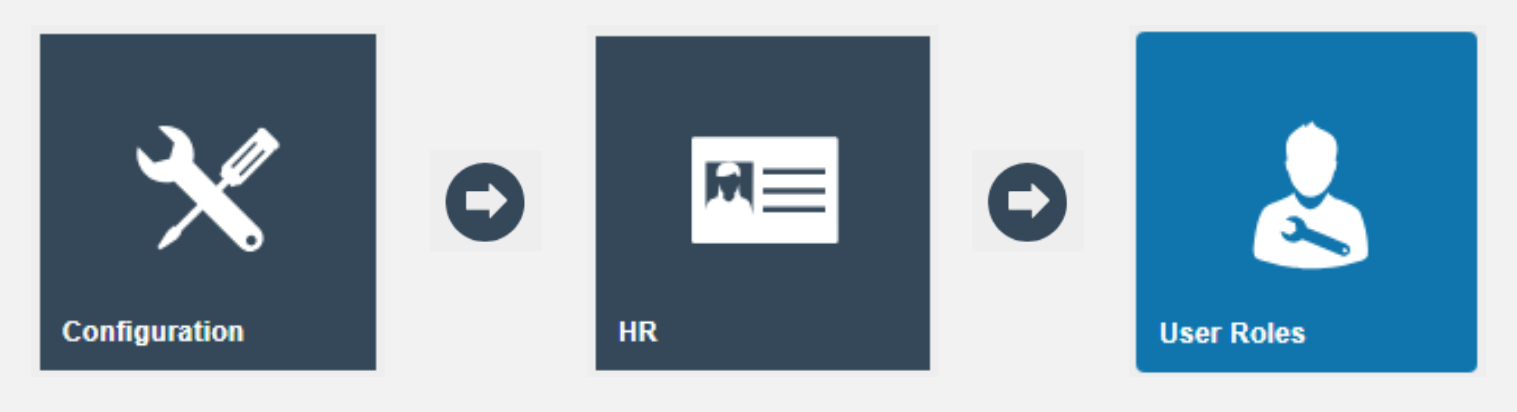
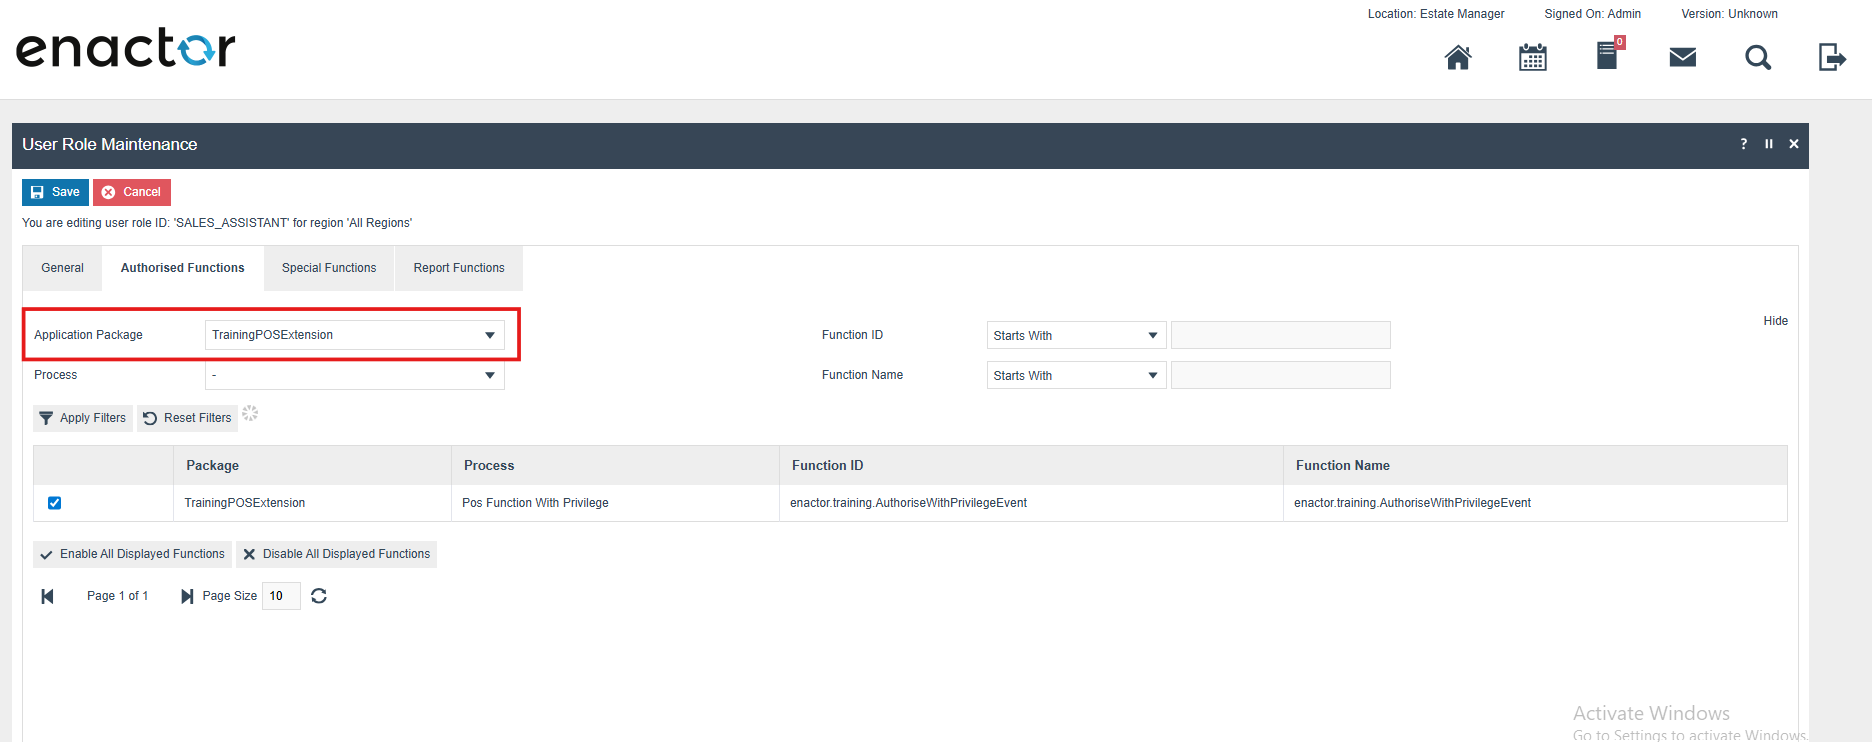
The User Roles Maintenance function is accessed using the search or path: Configuration > HR > User Roles
- Add the filter value
User Role IDasSALES_ASSISTANT, then edit the filtered entry.
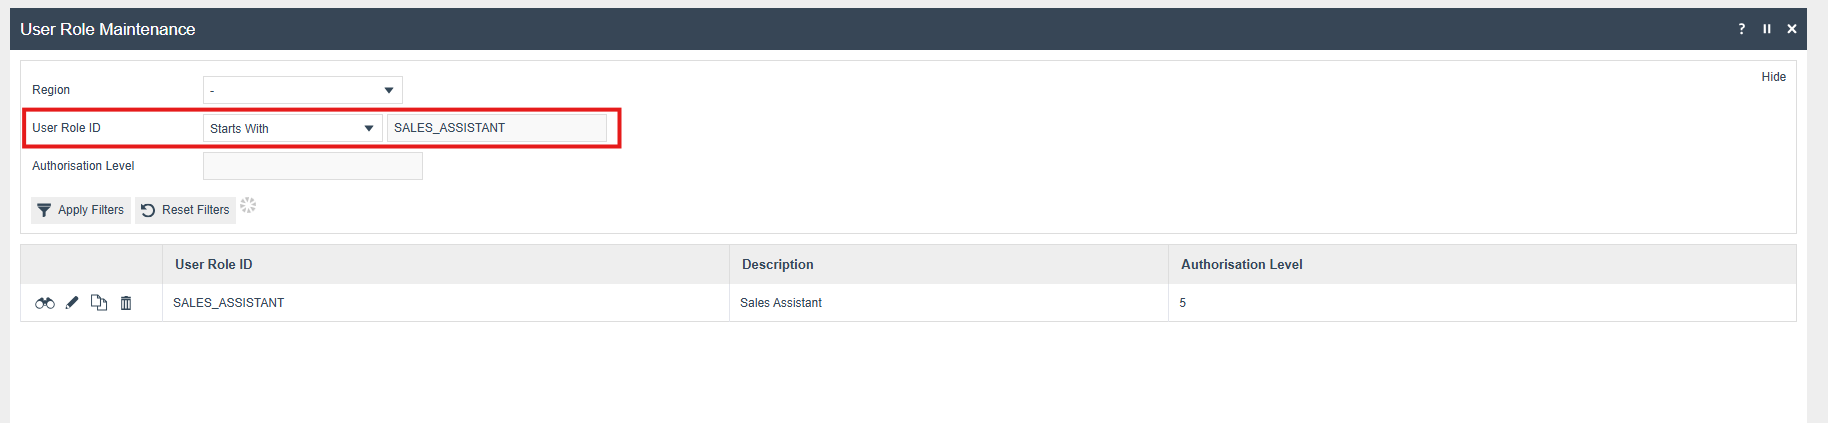
- Select the
Application PackageasTrainingPOSExtensionand enable or disable theenactor.training.AuthoriseWithPrivilegeEventprivilege.
- Without privilege — The authorisation page will be displayed when the With Privilege Event button is pressed.
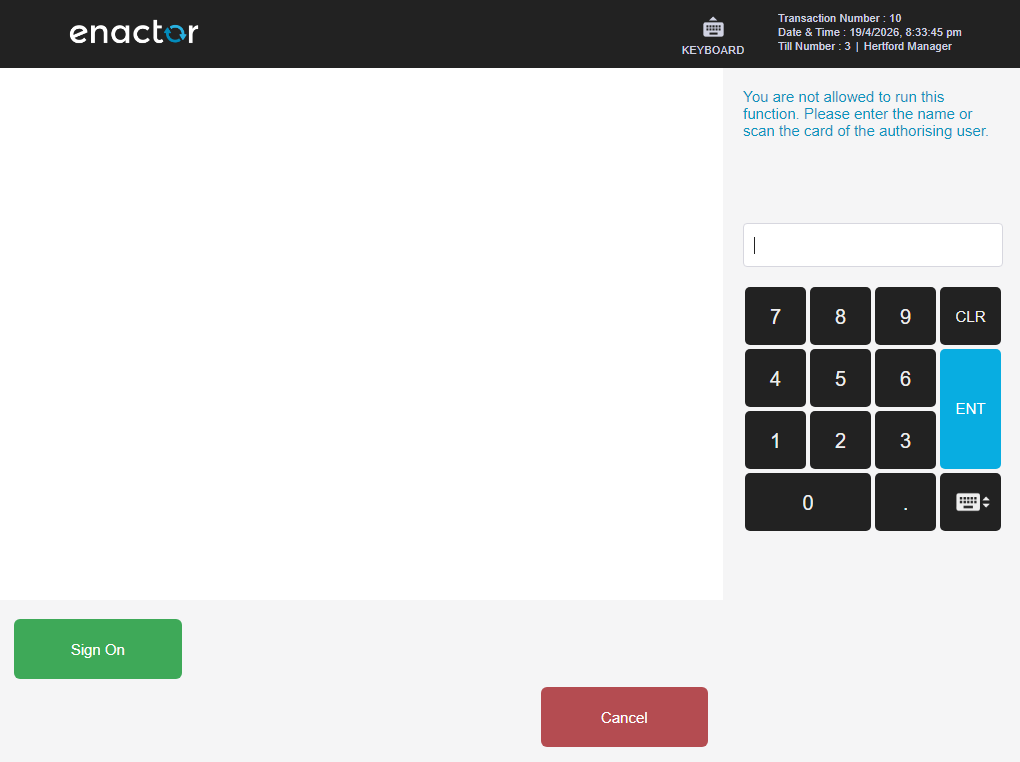
- With privilege — A message will pop up; once the OK button is pressed, the user will be redirected to the sale prompt.