Create a POS Extension
Overview
This tutorial will guide you through creating a React POS extension.
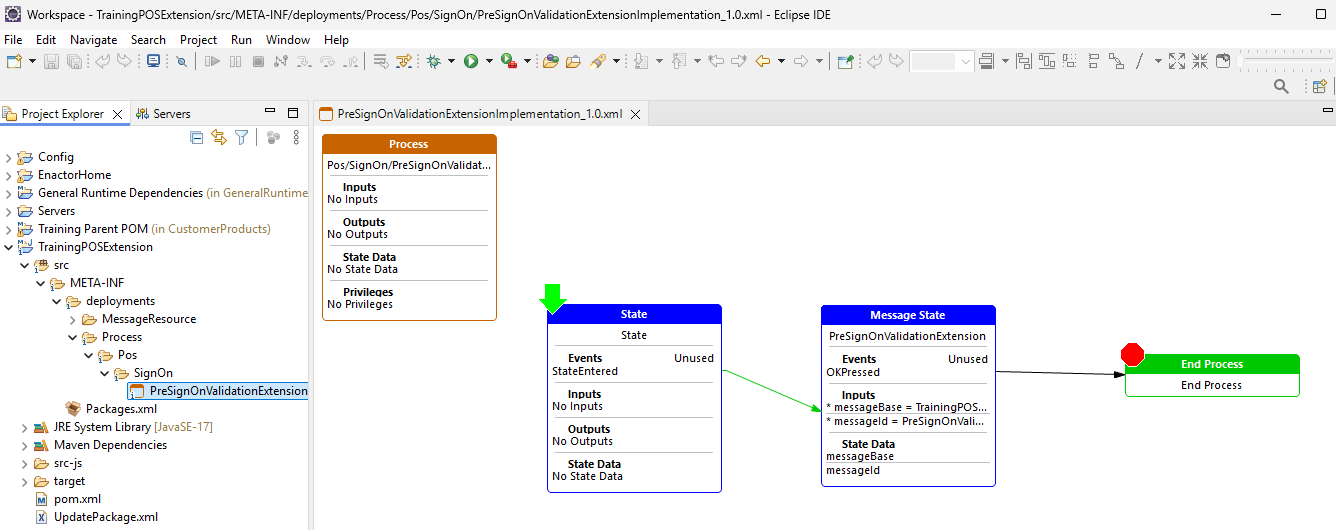
In this exercise, the PreSignOnValidationExtension extension in the Pos/SignOn/SignOnValidation process will be implemented using a new Application Process that includes a new Prompt
What you will learn
How to create a POS Extension using Enactor Extension Wizard
Pre-requisites
Exercises
Create a POS Extension
Launch Eclipse and when prompted for a workspace enter the following path. C:\Development\WorkspaceSetup\Workspace
(Same Workspace as POS Installation)

Click Launch... button
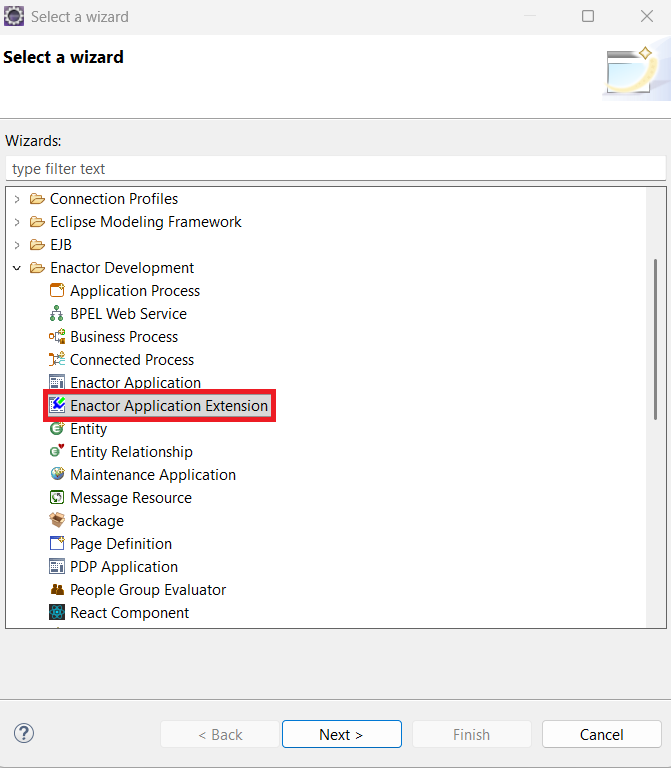
Go to File -> New -> Enactor Development -> Enactor Application Extension and Click Next to Launch the Wizard.
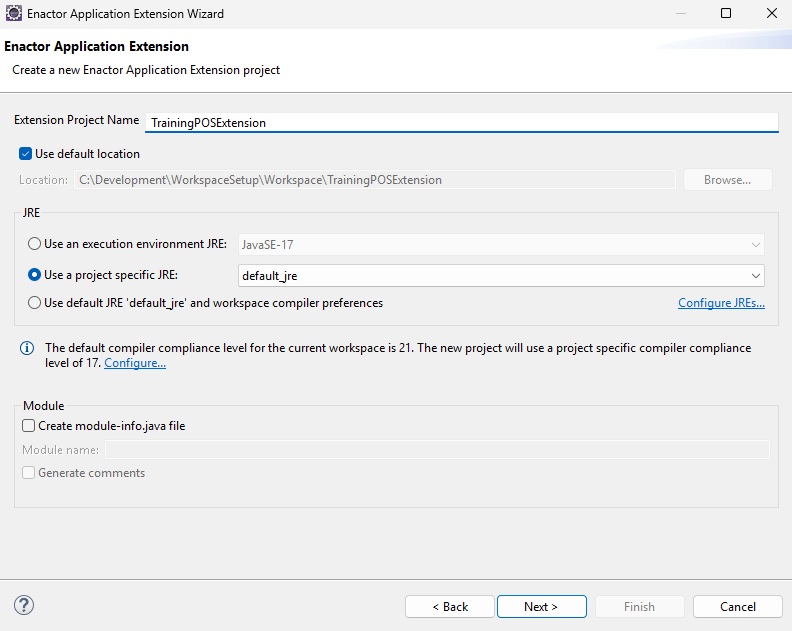
In the Enactor Application Extension Page fill Extension Project Name as TrainingPOSExtension.
Under JRE Select Use a project specific JRE and Select default_jre.
Untick Create module-info.java file.
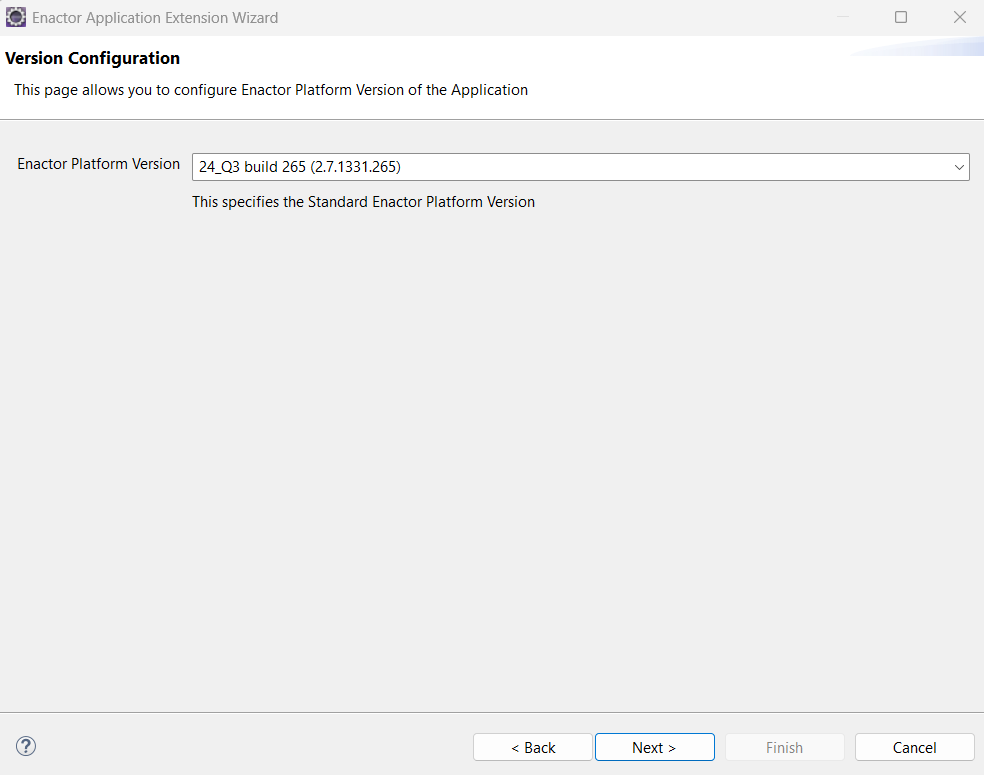
Click Next and navigate to Version Configuration page and Select the Enactor Platform Version 24-Q3 build 265
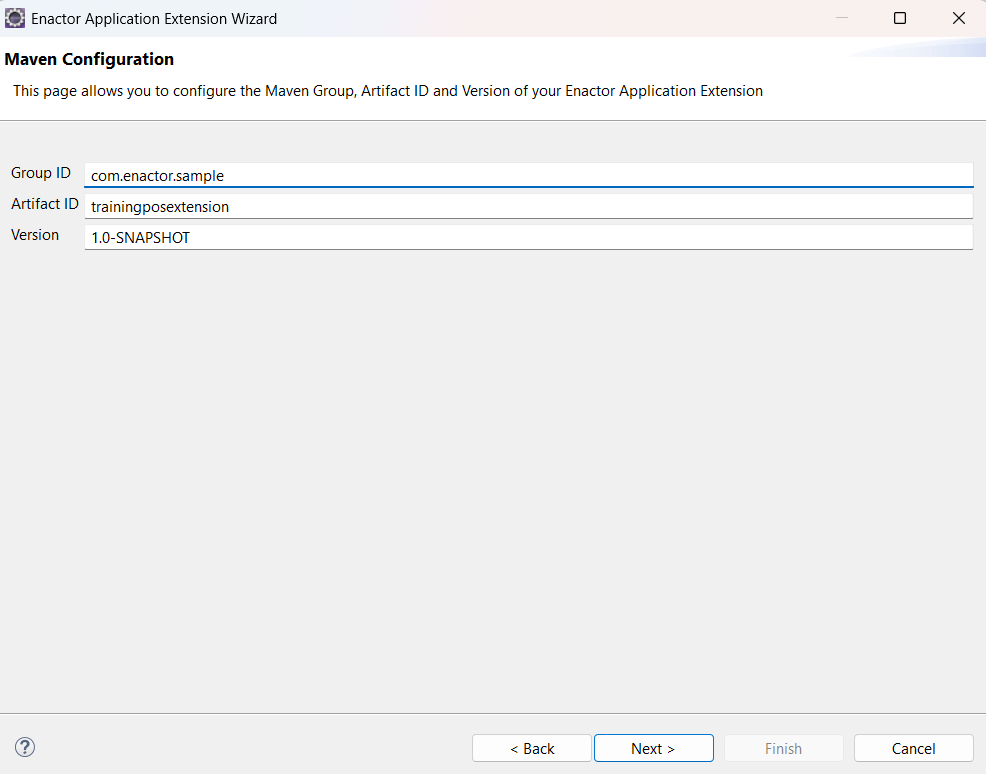
Click Next to go to the Maven Configuration page. Here, default values for Group ID, Artifact ID, and Version are provided. You can leave these defaults as they are, or modify them if you prefer a different group or artifact ID.
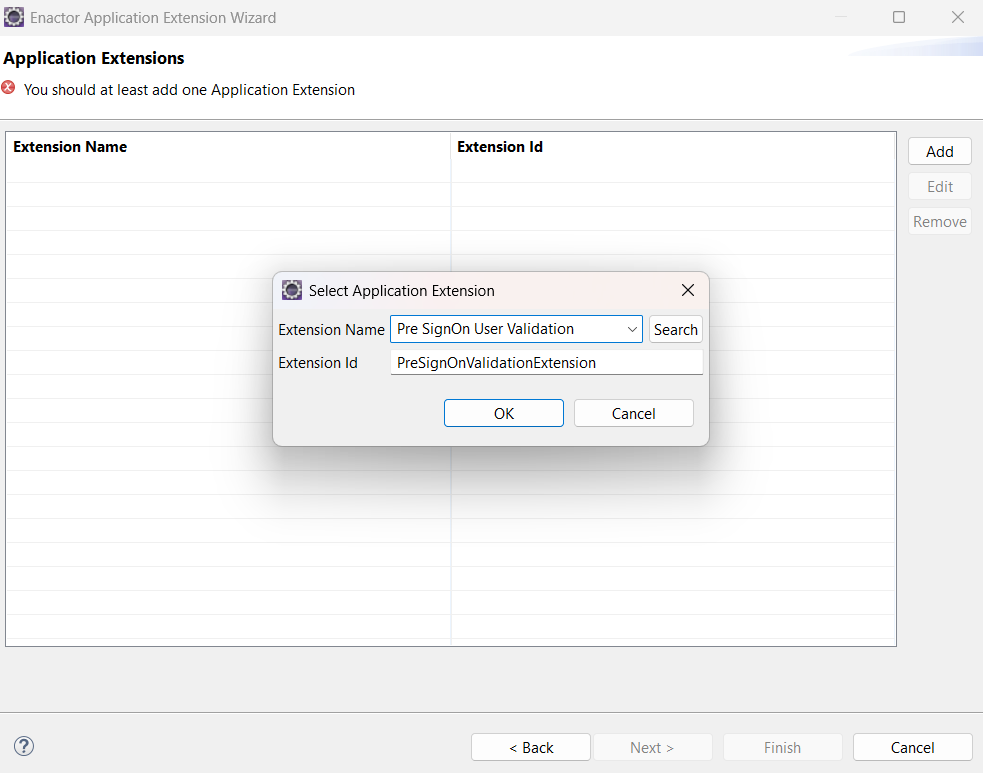
Click Next to go to the Application Extensions page. Click Add to add an Extension.
Select Pre SignOn User Validation from the dropdown and Click OK.

Click Next to navigate to the Extension Process page. To modify the Implementation Process ID, click on the ID and edit it.

Click Finish to generate the Extension.
Build the POS Extension
- To build the generated project, navigate to Run -> Run Configurations -> Maven Build -> MVN Install (TrainingPOSExtension), and click Run
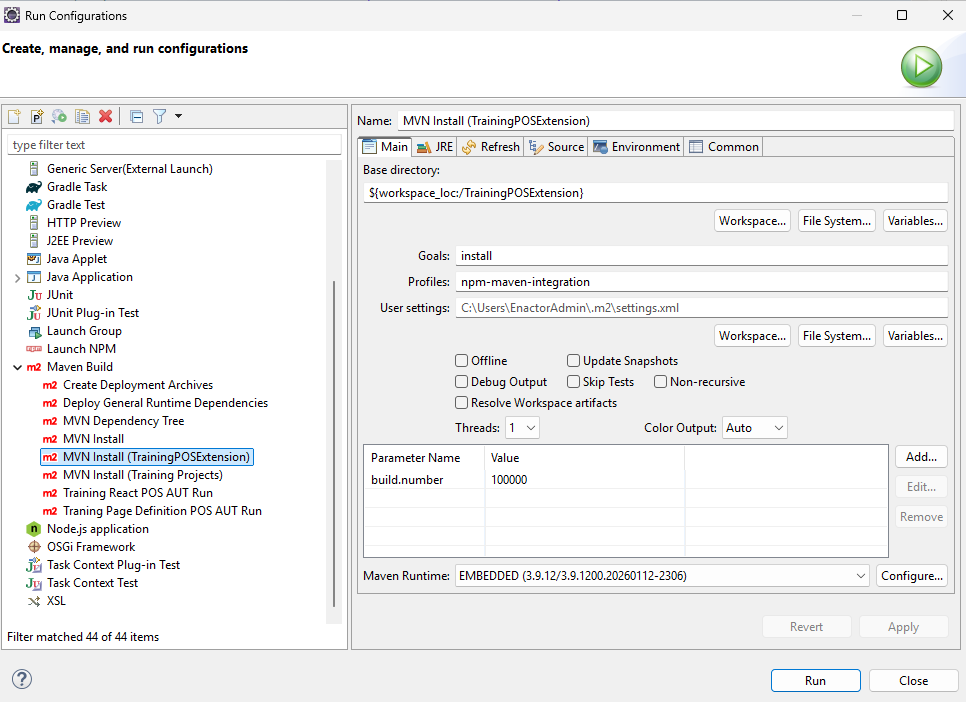
Wait for the build to complete successfully.
Run the POS Extension
Go to Run > Run Configurations > Java Application > Training React POS. Open the Dependencies tab, select Classpath Entries, and click Add Projects.... Choose the TrainingPOSExtension project and click OK.
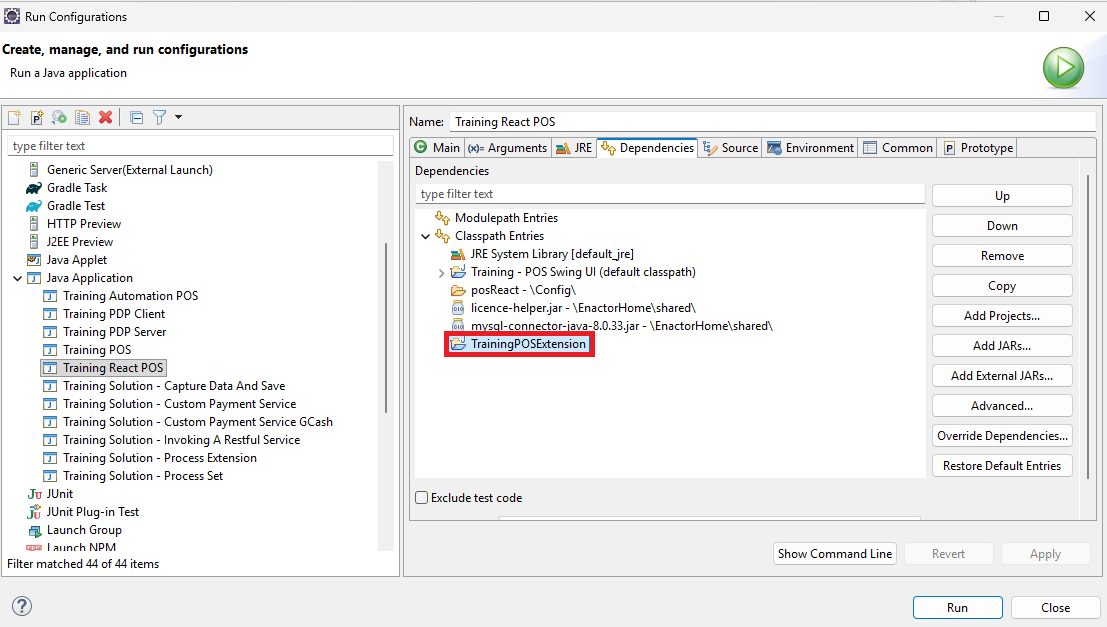
Then click Run to launch the POS.
Once the POS starts, log in. You will observe the following display message from the extension you have just implemented.

Further Reading
Directories / Files of Interest
- Application Processes Container
TrainingPOSExtension/src/META-INF/Deployments/Process
This folder contains the Application Process Implementation for POS Extensions
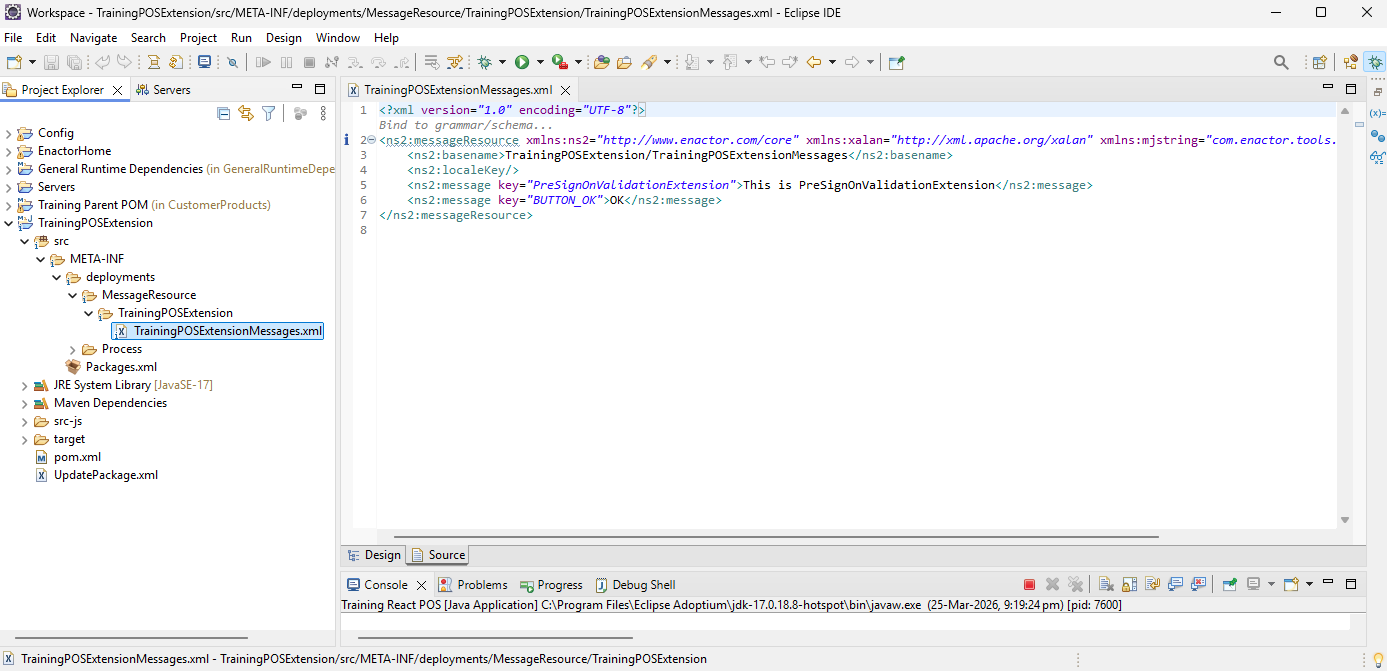
- Message Resources Container
TrainingPOSExtension/src/META-INF/Deployments/MessageResource
This folder contains the Message Resource Implementation for POS Extensions
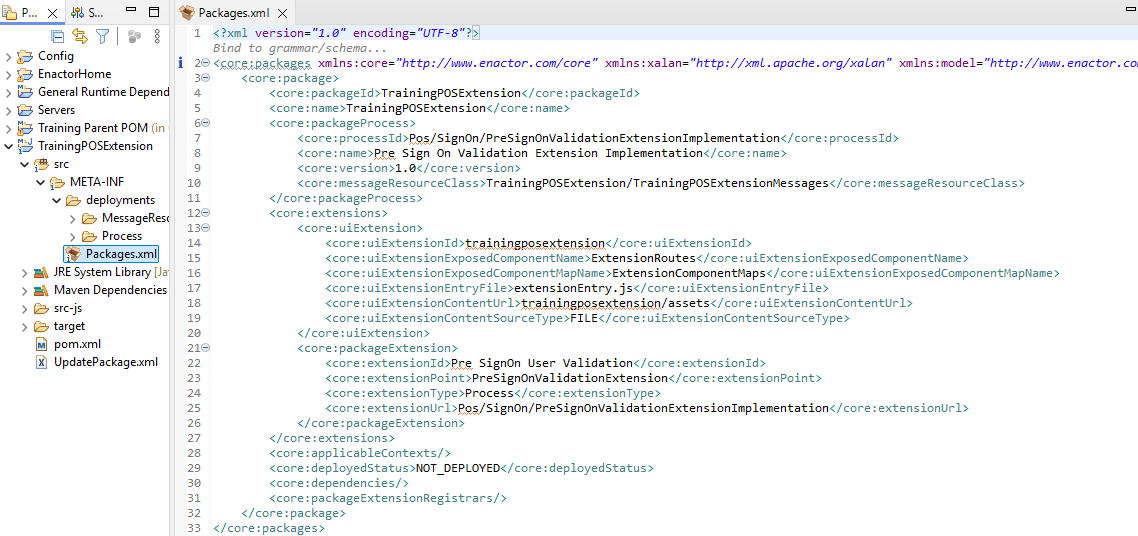
- Packages.xml
TrainingPOSExtension/src/META-INF/Deployments/Packages.xml
The Packages.xml file acts as a centralized metadata registry for POS Extension design elements such as Application Processes, Message Resources, Extensions. It is used by the design-time tools to register and manage POS Extension resources, and by the runtime engine to locate and execute the configured extension implementations.
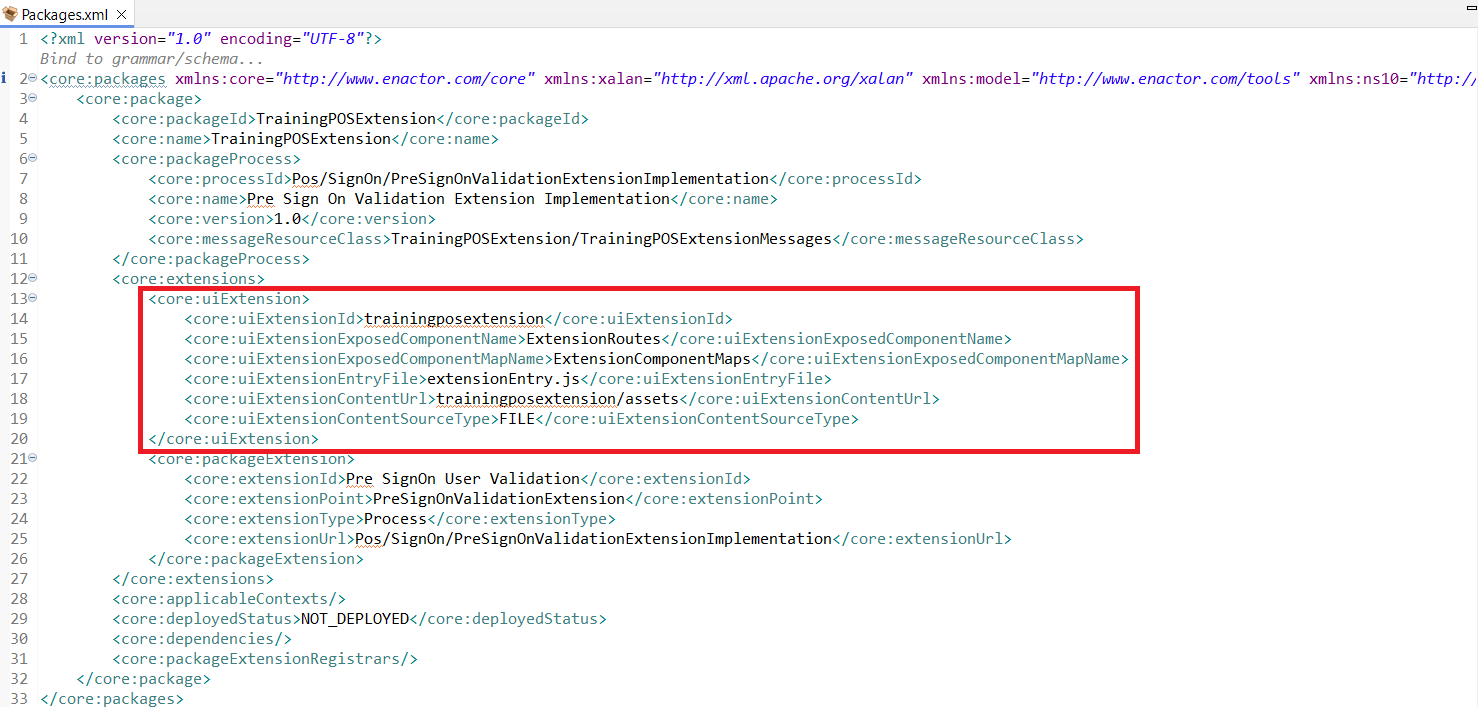
- UIExtension
-
UIExtensionId
- A unique ID for the POS UI Extension. This identifier is used by the POS application to locate and load the external extension module.
-
UIExtensionExposedComponentName
- The name of the component exposed by the POS UI Extension, which will be loaded and rendered by the POS.
-
UIExtensionExposedComponentMapName
- The name of the component Map containing Extension Overrides, exposed by the POS UI Extension.
-
UIExtensionEntryFile
- The entry file of the POS UI extension that the POS Application loads to initialize the extension. This should match the file name exposed by the federation plugin in vite.config.ts
-
UIExtensionContentSourceType
- Specifies the source of the Rect UI Extension content. The content can be loaded either from build files on the filesystem (FILE) or from an external location via an HTTP URL (URL).
-
UIExtensionContentURL
- If the Content Source Type is set to URL, this specifies the URL from which the extension content is loaded.
-
PackageExtension
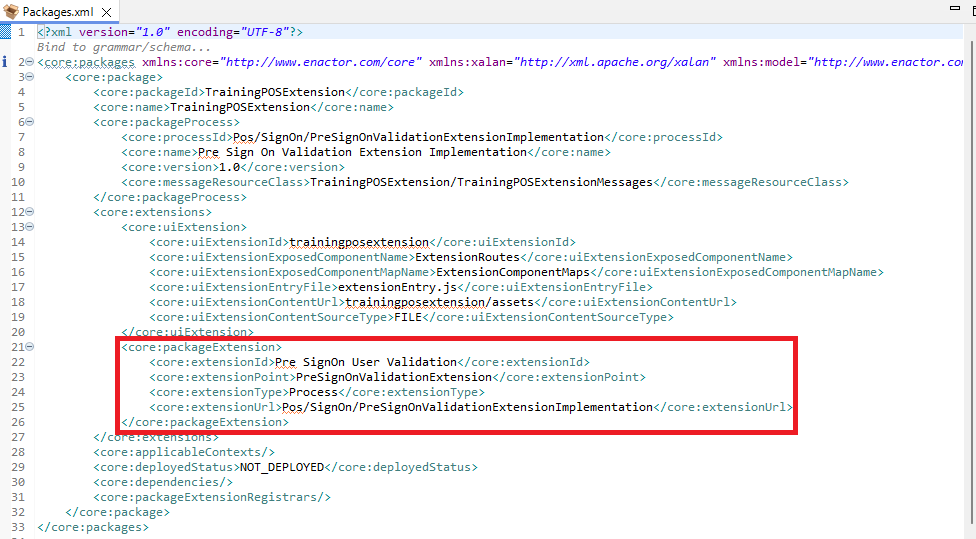
- PackageProcess

- React Components
TrainingPOSExtension/src-js/packages/trainingposextension/src/components
This folder contains the React UI Implementation for POS Extensions
- React Routes
TrainingPOSExtension/src-js/packages/trainingposextension/src/routes
This folder contains the React UI Routes for POS Extensions
- package.json
TrainingPOSExtension/src-js/packages/trainingposextension/package.json
The package.json file defines the metadata, dependencies, and build scripts required for the POS React Extension. It specifies the libraries used by the extension, such as React, Redux, and Enactor bridge components, and includes scripts for building the extension using Vite and copying the generated files into the POS resources directory. This configuration ensures that the extension can be built, packaged, and loaded by the POS application at runtime.
By default, only the base Enactor React dependencies are included.
@enactor/javascript-bridge
@enactor/react-base-components
@enactor/redux-javascript-bridge
@enactor/react-javascript-bridge
If your extension requires additional Enactor libraries, they should be added under the dependencies section to ensure they are available at build time and runtime.
You must also include these new libraries in the vite.config.ts file under the shared configuration so they can be shared between the POS application and the extension at runtime. The defaults are as below.
shared: ['react', 'react-dom', 'react-redux', '@enactor/react-base-components', '@enactor/react-javascript-bridge', '@enactor/react-pos', '@enactor/redux-javascript-bridge', '@enactor/javascript-bridge']
- vite.config.ts
TrainingPOSExtension/src-js/packages/trainingposextension/package.json
The vite.config.ts file configures how the React UI extension is built and loaded. The extensionEntry.js file serves as the entry point for the POS to load the extension, and the exposes section defines which components (like ./ExtensionRoutes) are available to the POS application. Shared dependencies and plugins ensure the extension integrates smoothly, CSS is loaded correctly, and the development server can serve the extension during testing.
- pom.xml
TrainingPOSExtension/pom.xml
The pom.xml file is the Maven Project Object Model for the POS React extension project. It defines the project`s dependencies, build configuration, and plugin settings required to compile, package, and deploy the extension. Maven uses this file to manage JavaScript bridge libraries, Enactor runtime dependencies, and other resources needed for the extension to integrate with the POS application.
- UpdatePackage.xml
TrainingPOSExtension/UpdatePackage.xml
UpdatePackage.xml file defines the configuration required to bundle the extension as an application update ZIP. It specifies which files and resources should be included so the POS can deploy and update the extension correctly.