Develop a POS Extension in VS Code
This tutorial takes an extension project generated by the Enactor wizard, opens it in VS Code, and develops React components against a local single page POS application which uses the actual POS shell, running on a Vite dev server, with your extension's routes and component overrides merged in.
Why the Single Page Application
Before this, developing a React extension meant building the federation remote and deploying it into a POS host on every change. That workflow has four problems:
- No hot reload.
- The code is transpiled, so the debugger shows
a,b,c,dinstead of your function names. - After saving you have to wait for the full build, or the POS serves you no extension code at all.
- Even a minimal build takes around 7 seconds.
The generated dev/ application removes all four. It is a dev only app and it never ships, and the
extension it loads is identical to the one federation exposes.
What you will learn
How to run the local POS Single Page Application from VS Code and develop extension React components against it, with hot reload and real source names in the debugger.
Pre-requisites
- Web POS is Setup
- Training POS Extension is Generated
Generate the extension project
Create the extension project with the wizard as normal - this tutorial does not repeat it. In short:
- File > New > Enactor Development > Enactor Application Extension, then Next.
- Name the project TrainingPOSExtension, choose the platform version, accept the Maven defaults.
- Add the extension points you need on the Application Extensions page and click Finish.
The full walkthrough, including every wizard page and the generated deployment artefacts, is in Create a POS Extension.
What the wizard generates
The React side of the extension lives under
TrainingPOSExtension/src-js/packages/trainingposextension/:
trainingposextension/
├── src/                              ← THE EXTENSION (the real deliverable)
│   ├── routes/routes.jsx                  → exposed as './ExtensionRoutes'
│   ├── componentOverrides/
│   │   ├── componentsMap.jsx              → exposed as './ExtensionComponentMaps'
│   │   └── SignOnHeader.jsx
│   ├── components/ExtensionState/…
│   └── assets/css/enactor.scss
│
├── dev/                              ← THE SPA application (dev-only)
│   ├── main.jsx                           the local "fake POS host"
│   ├── index.html
│   ├── platform-theme.scss
│   ├── federation-shared-bootstrap.js
│   └── .env
│
├── vite.config.mts                   ← production federation build
├── vite.config.dev.mts               ← local spa build
└── package.json
Two directories, two roles:
src/is the extension. It is the actual extension project and supports module federation.dev/is a local stand-in for the POS host. It exists so developers can run it with the federated content already merged in, making development much easier.
The dependency arrow points one way only: dev/ imports from src/, never the reverse. Nothing in
src/ references dev/, which is why the production build never even reads the dev files.
Open the project in VS Code
File > Open Folder... and select the extension project from the file system.
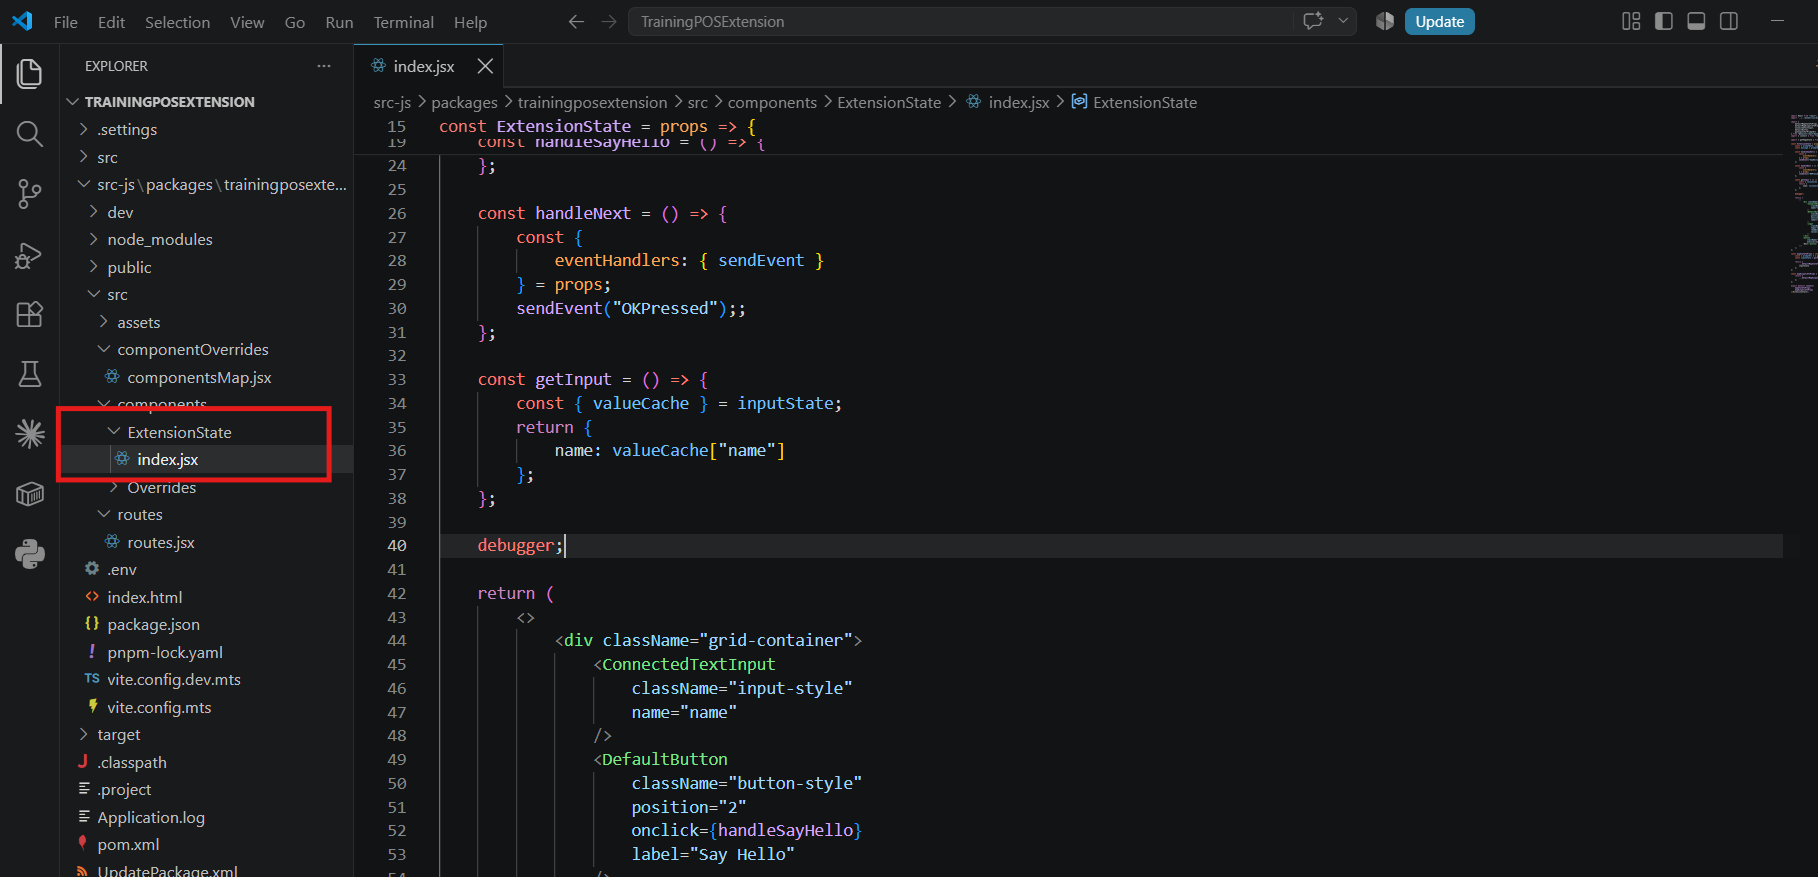
Once you open the extension project EXPLORER view should be like this.

Open the integrated terminal with Terminal > New Terminal (`Ctrl+Shift+``).
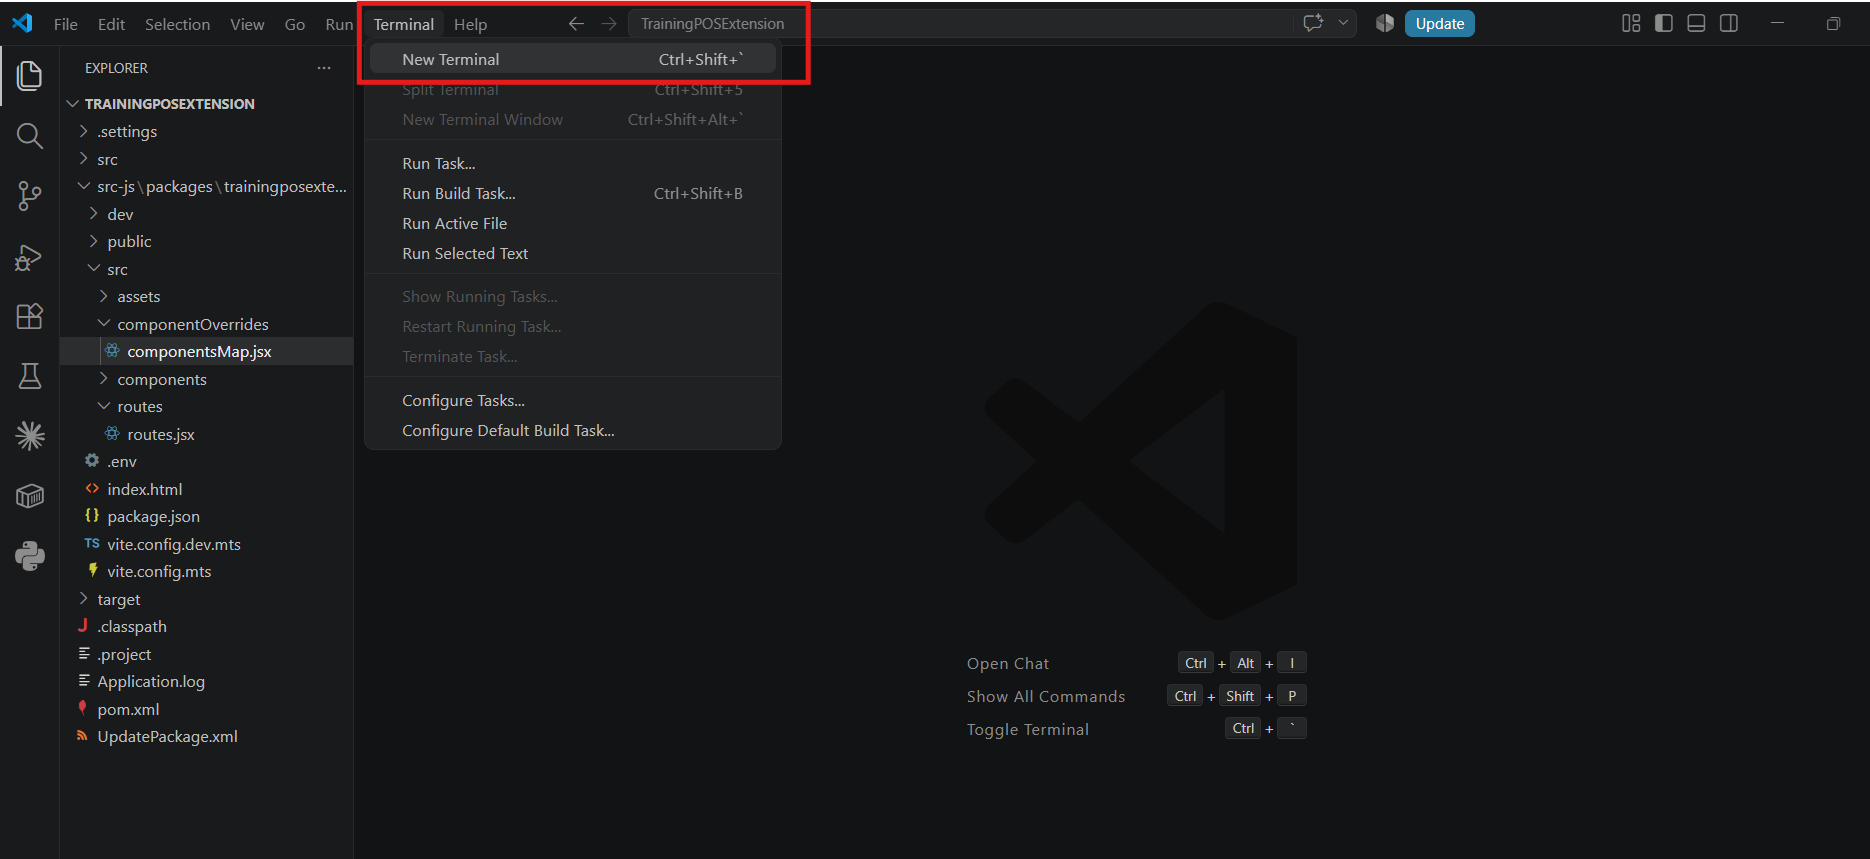
Then you should navigate into the react project inside src-js/packages
cd src-js/packages/trainingposextension/
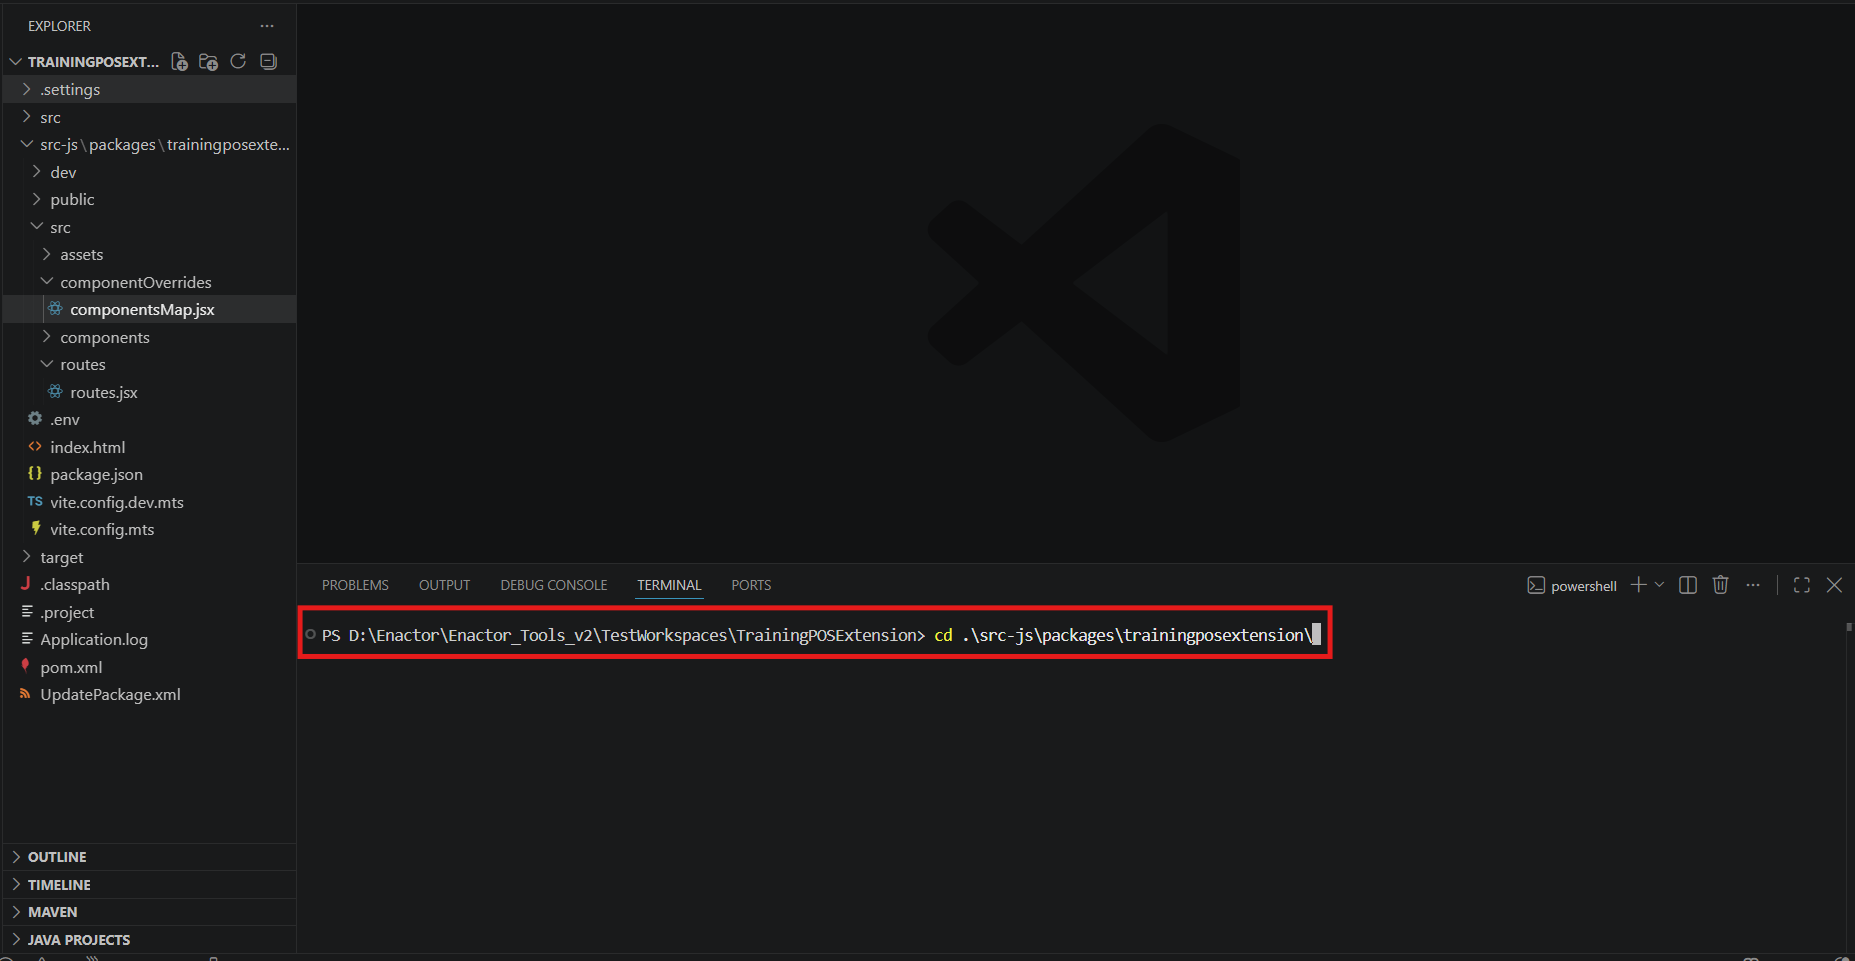
Then install dependencies from the React package directory:
pnpm install
Start the local POS Single Page Application
Start the Vite dev server against the dev config:
pnpm run dev
The script runs Vite against the dev config vite --config vite.config.dev.mts and the server
comes up on port 5173 by default.
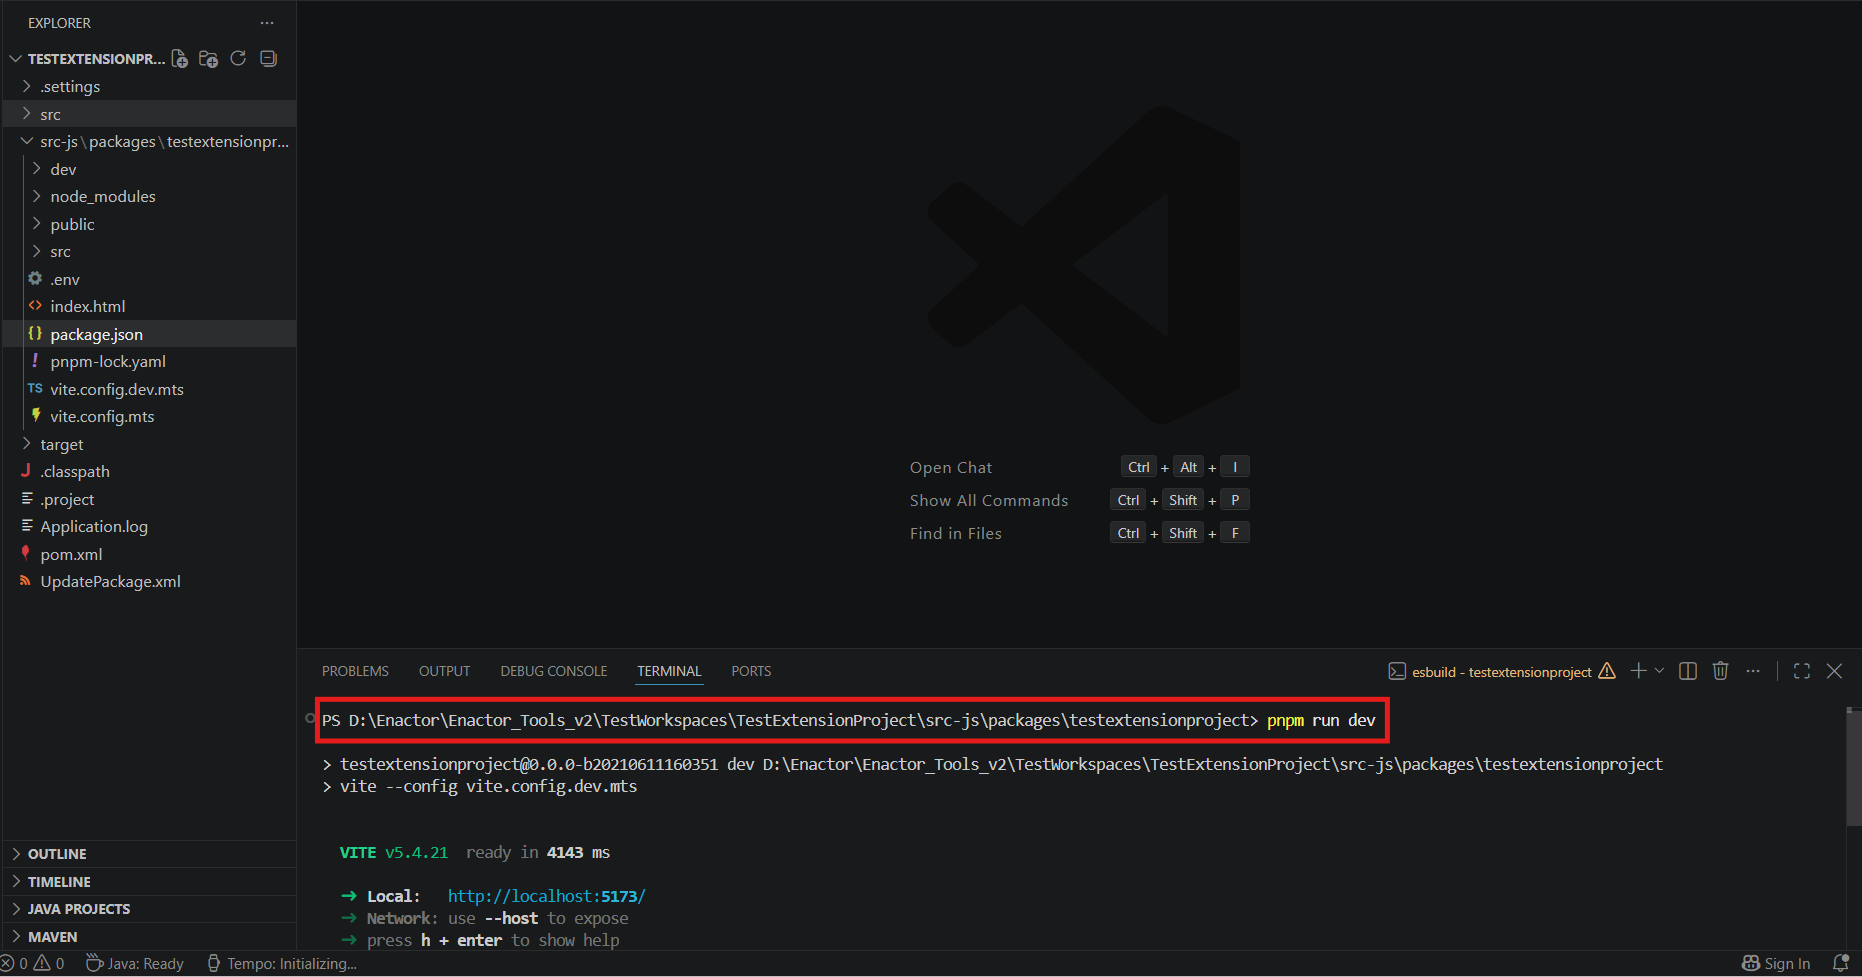
Copy the URL the server prints once it's up and running, then paste it into the web browser running the Web POS (you should have a running Web POS to do this step).
Follow this to build the Web POS
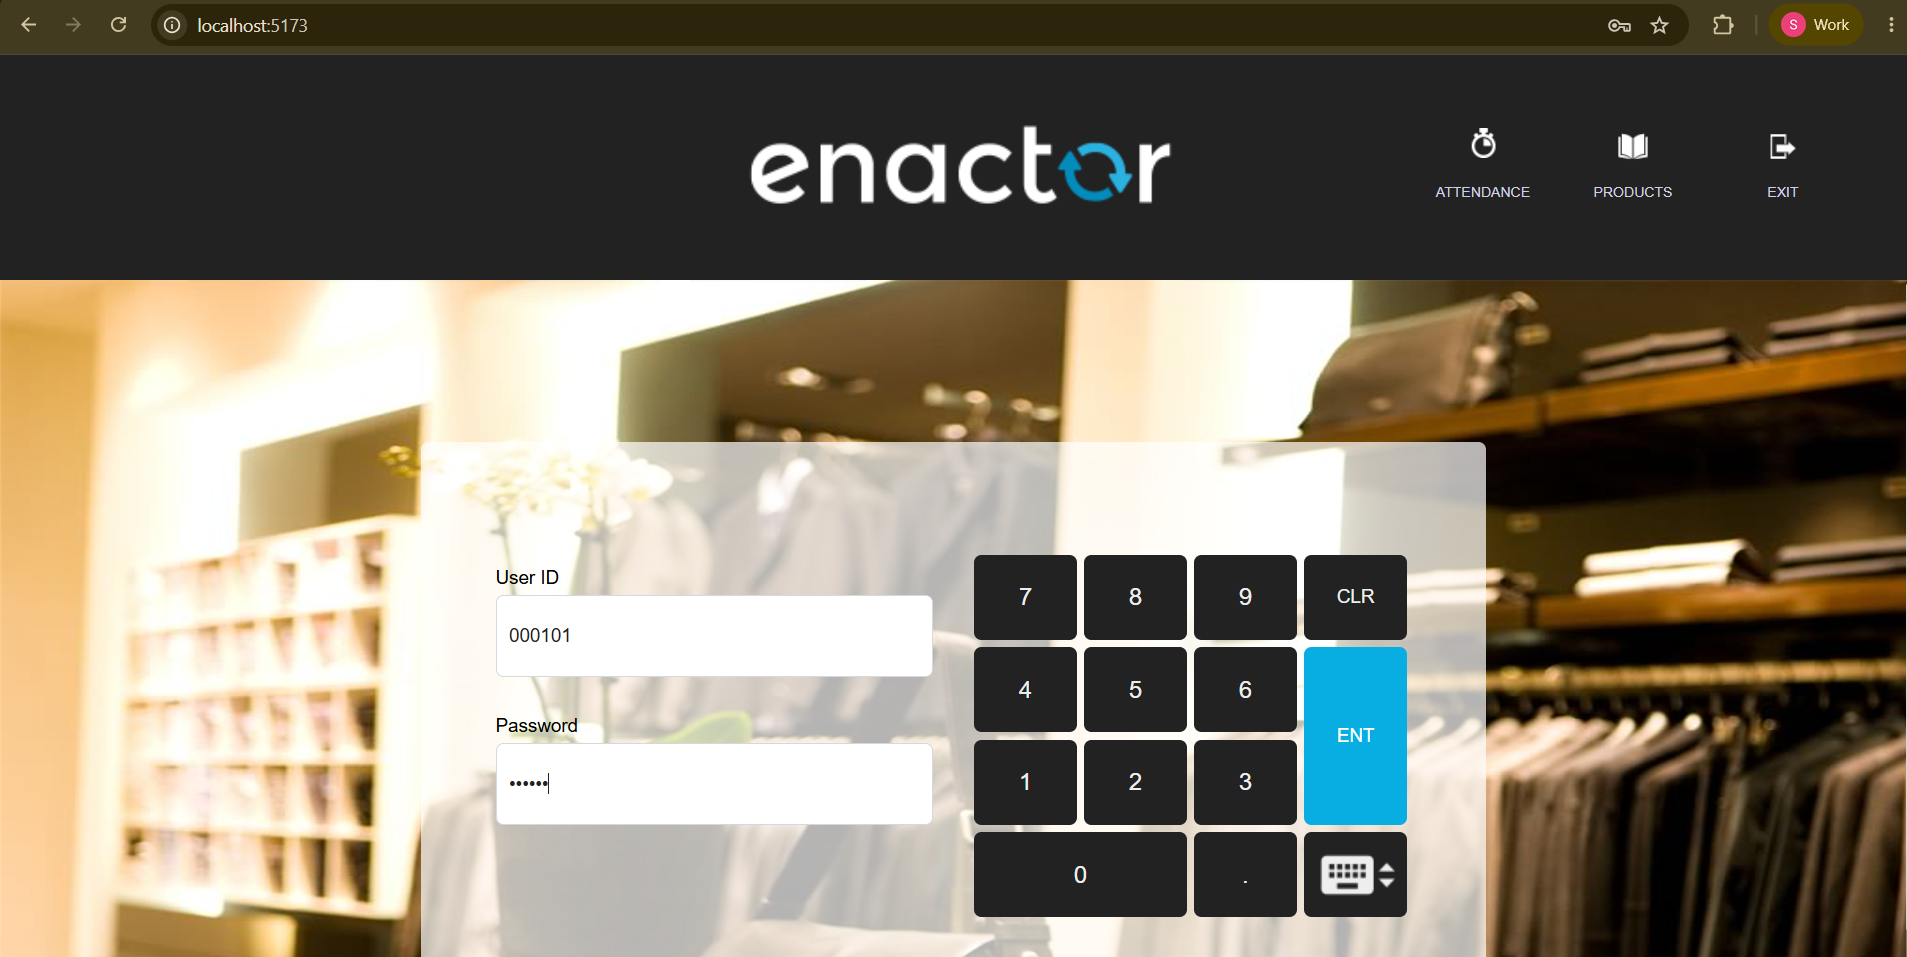
The Single Page Application opens on a connection page. Confirm the Device ID, host name, host port and Process Id, then click Submit. These values are similar to what you used when running the web pos in the tutorials above.
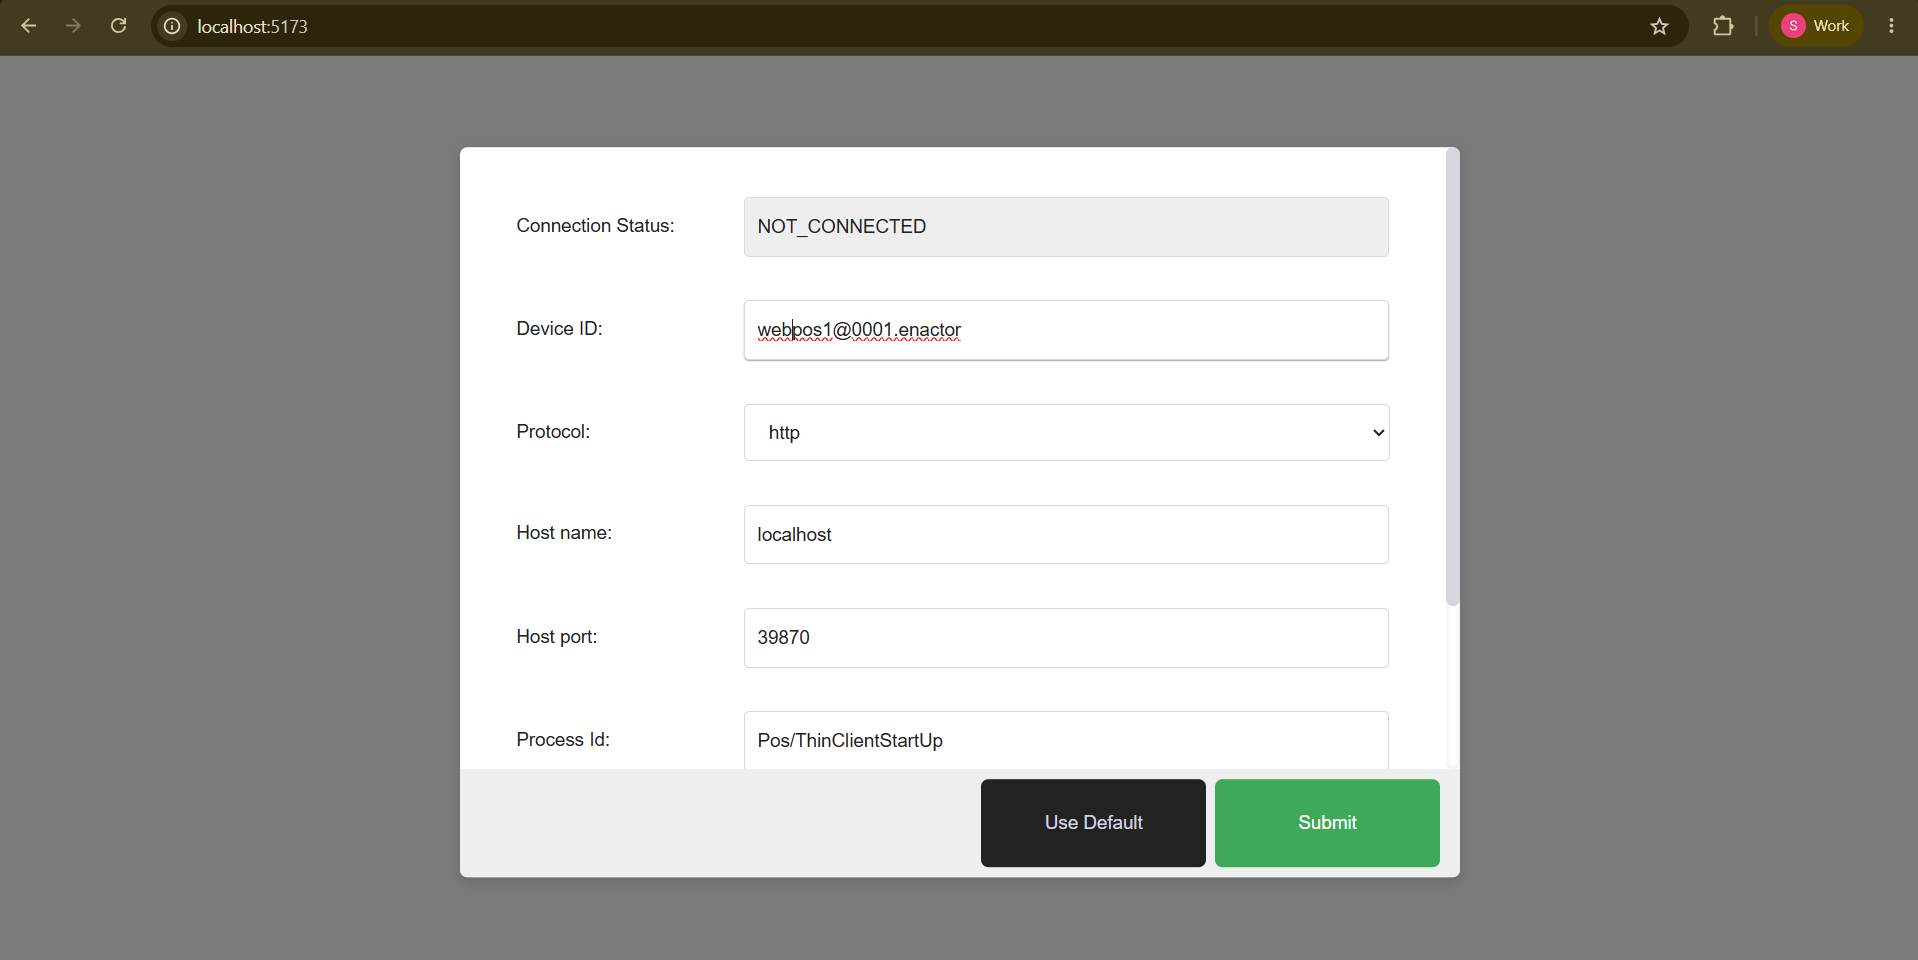
The POS shell then loads, with your extension merged in.
How the dev Single Page Application mirrors production
In production your extension is a guest. The POS host application (react-pos-all-app) loads
extensionEntry.js over module federation and pulls the two exposed modules into its provider
tree.
In dev, dev/main.jsx becomes the host. It builds the Redux store, assembles the POS provider
tree, then imports those same two modules directly, rather than over federation:
import extensionRoutes        from "@ext/routes/routes";              // = './ExtensionRoutes'
import extensionComponentMaps from "@ext/componentOverrides/componentsMap"; // = './ExtensionComponentMaps'

const routes        = Object.assign({}, EnactorRoutes, extensionRoutes);
const componentsMap = Object.assign({}, extensionComponentMaps);
The Single Page Application consumes exactly the same modules federation exposes, only by direct import. What you see in the dev server is what the POS will load.
The two builds stay apart because:
- Separate config files -
vite.config.mtsfor production,vite.config.dev.mtsfor the SPA. - Different roots, so different module graphs. The dev config sets
root: dev/, so its graph starts atdev/index.html->dev/main.jsx. The production graph starts at the federationexposesentries insrc/. - No federation plugin runs in the dev config at all.
- Output isolation. The production build writes
dist/, thencopy:to:resourcesplaces it underMETA-INF/resources/. The SPA builds nothing. You never runvite buildagainst the dev config.
Develop a React component
With the dev server running, edit a component under src/ and the browser hot-reloads. Because
nothing is transpiled for production, breakpoints land on your own function names.
Add a new prompt route
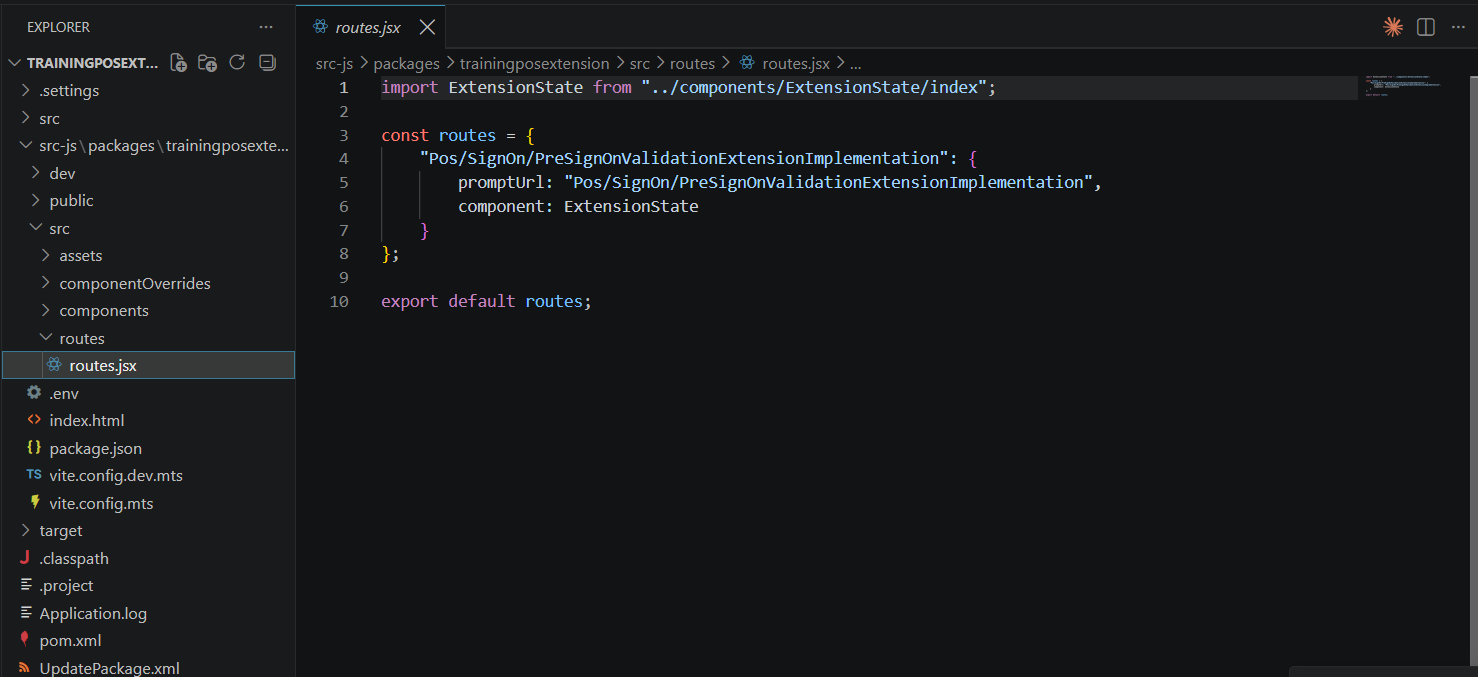
New prompts are registered in src/routes/routes.jsx the module exposed as ./ExtensionRoutes.
You can observe how the route against its prompt URL and the SPA picks it up on save.
For writing the prompt component itself, follow the existing tutorials the component code is identical, only the feedback loop changes:
- Creating a React prompt for a inputs form
- Create a React Prompt with Selection
- How to customise React POS for the component reference
Debugging
Since the dev server serves untranspiled source, the component tree and the call stack both show real names.
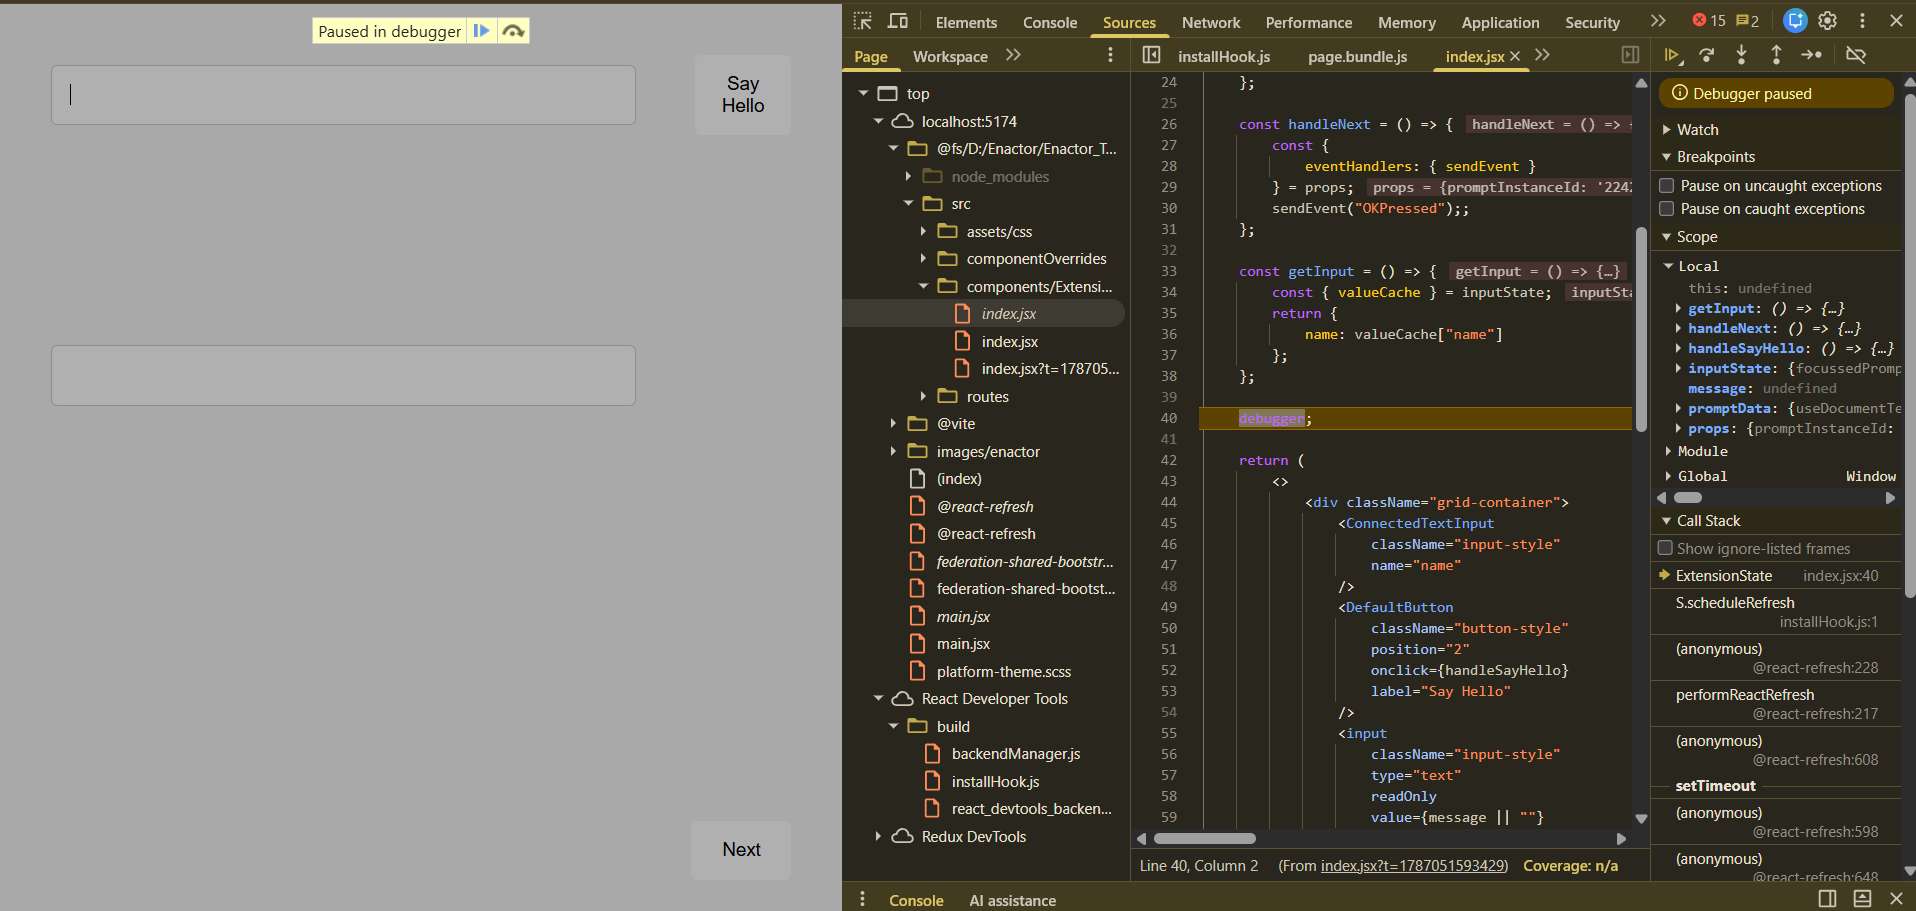
To stop on a line, add a debugger; statement to your component and save.
Trigger that code in the POS and the browser breaks on it. The Sources panel shows your own file
under src/, the Call Stack names the component (ExtensionState), and Scope lists your real
variables - not the a, b, c, d of a transpiled build.
Build and deploy the real extension
The Single Page Application is for development only. To produce the artifact the POS actually loads, build the project as normal Run > Run Configurations > Maven Build > MVN Install (TrainingPOSExtension) which runs the production federation build and copies the output into the extension's resources.
Deployment is unchanged: see Deploy POS Extension.
The tutorials that follow were written against the older workflow, where you build the extension and deploy it into a POS host to see each change. You do not have to work that way. Their steps still apply exactly as written. Only the way you run and reload the POS differs. So you can follow any of them using the local Single Page Application from this tutorial instead.