React POS Extension
Overview
This tutorial will guide you how to create a React POS extension.
In this exercise, we will implement the PreTenderingExtension extension found in the Tendering_1.0.xml process with a new Application Process containing a new prompt.
What you will learn
- How to view an Application Process using Resource Library
- How to implement a Process Extension
- How to implement a React UI Extension
- How to run a React UI Extension
Pre-requisites
- Ensure the Training Workspace is set up and the Training React POS is up and operational. (Refer Training Workspace Setup)
Exercises
Import React UI Extension Project
- Download React UI Extension Project zip : ReactUIExtension.zip and extract it.
- Open your Eclipse Development Workspace and Import the React UI Extension Project as a Maven Project to the workspace
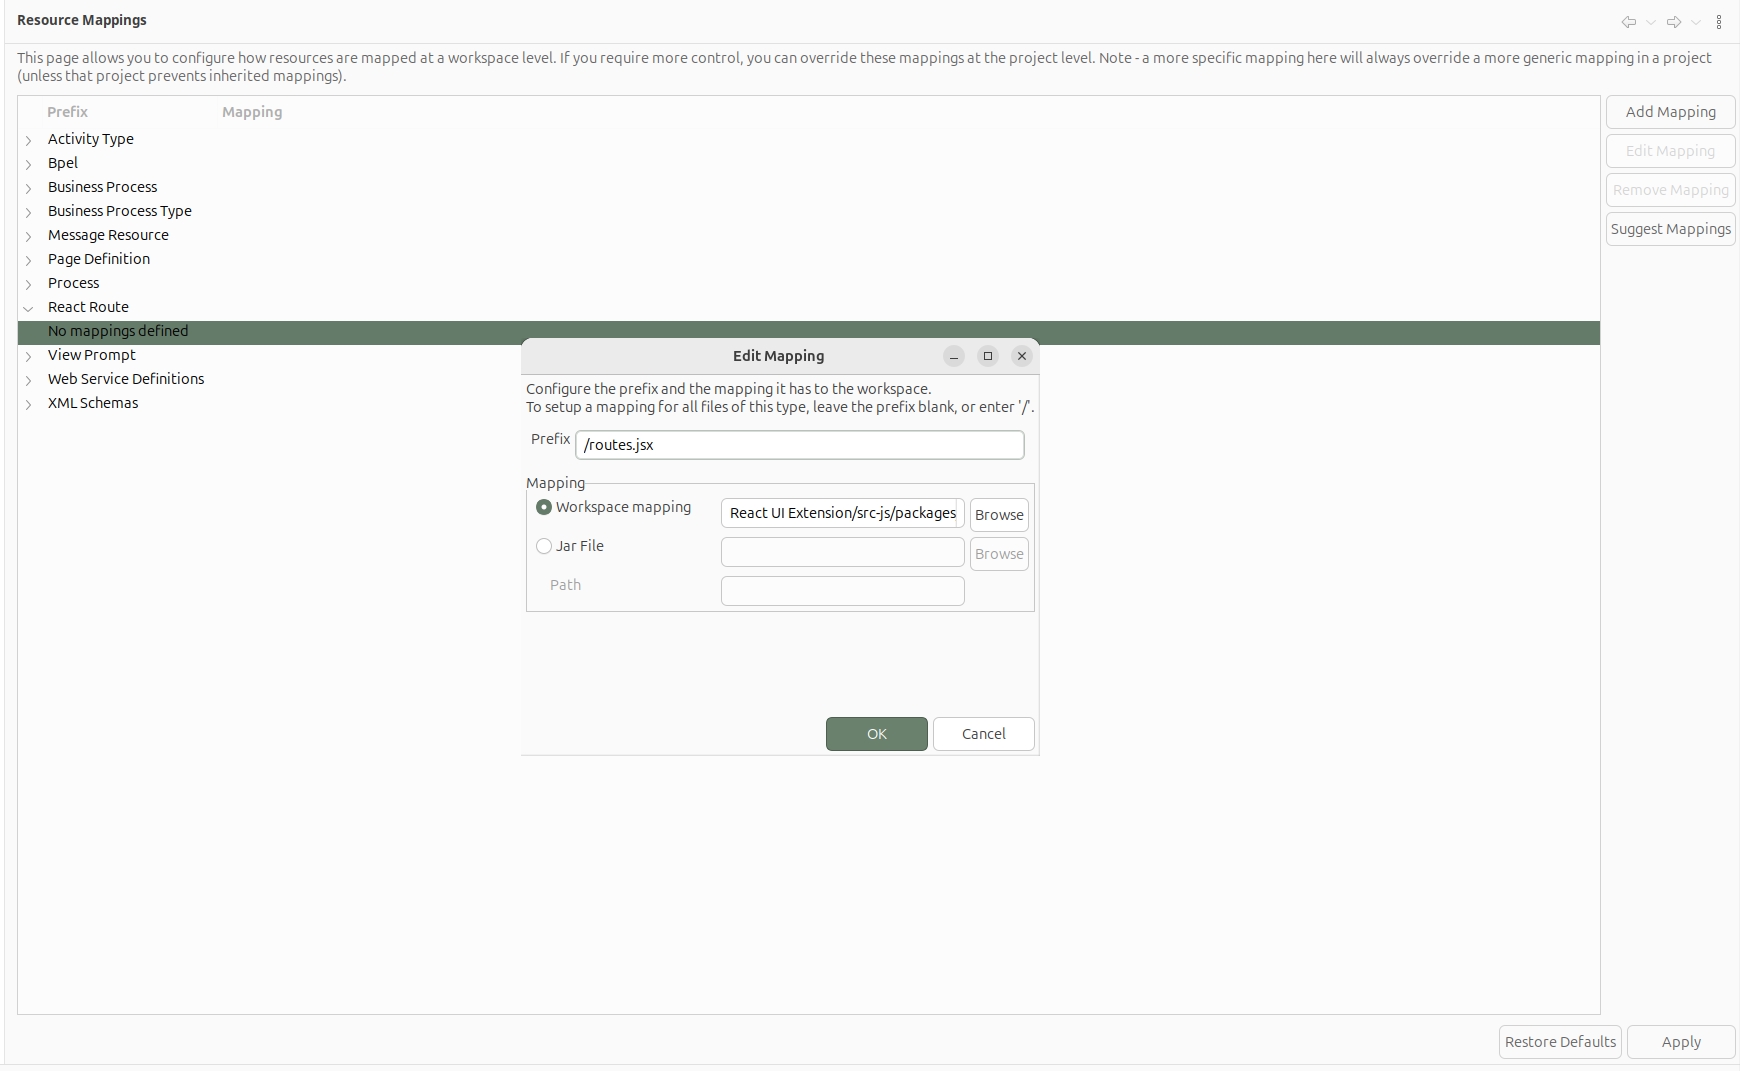
- In your workspace click, Window -> Pereferences -> Enactor Development -> Resource Mappings and Add New React Mapping. Browse
React UI Extension/src-js/packages/react-ui-extension/src/routesas mapping and/routes.jsxas prefix.
Navigate to Tendering Application Process
Follow below steps to locate the Tendering Process.
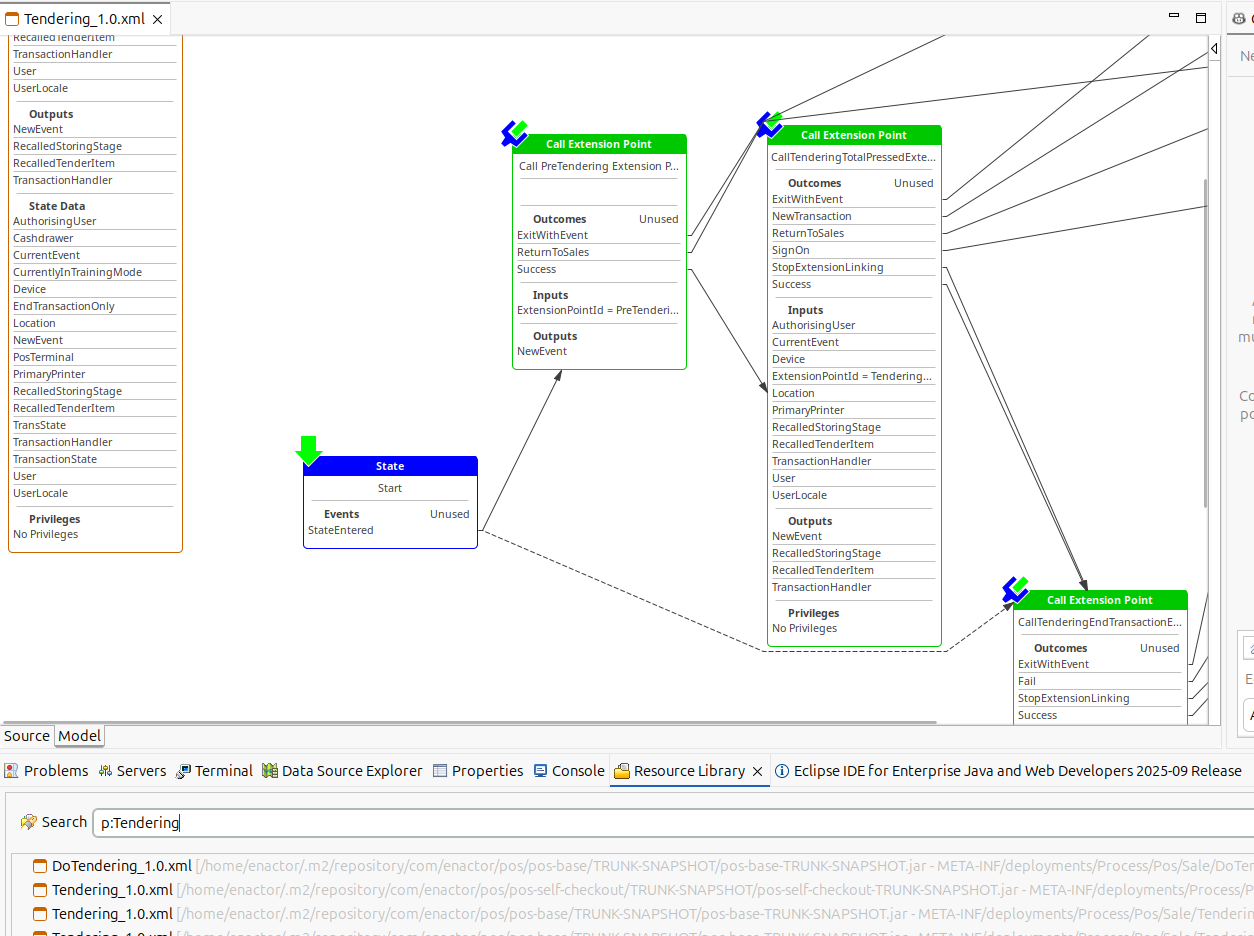
- Go to Resource Library Search view (Window -> Show View -> Resource Library) and In the search box, type
P:Tenderingand press Enter.
-
Double-click on the
Tendering_1.0.xmlprocess (In POS - Base project) to open it. -
Go to the Outline of the Tendering_1.0.xml process and select the extension named
Call PreTendering Extension Point
Create the New Extension Process
-
Double-click on the extension point to open the Extension Point Wizard.
-
Click the
Create New Extension Processbutton.

-
In the Extension Point Settings window,
-
Extension Id will be auto populated.
-
Fill Extension Name as
Pre Tendering Extension. -
Enter Process ID as
PreTenderingExtension. -
Browse and select the container location as
React UI Extension/src/META-INF/deployments/Process -
Ensure the Derive Filenames checkbox is checked.
-
Register in Packages should be checked.
-
Browse and select the Packages Filename as
React UI Extension/src/META-INF/Packages.xml -
Click Finish.
-

Verify Application Process Registration
-
Confirm that a new Application Process named PreTenderingExtension_1.0.xml has been created under,
React UI Extension/src/META-INF/deployments/Process -
Confirm that the Packages.xml has following entries

Implement PreTenderingExtension Application Process
-
Open
PreTenderingExtension_.0.xmlusing the Application Process Editor -
Open the Palette view by navigating to Window -> Show View -> Other, then search for and open Palette.
-
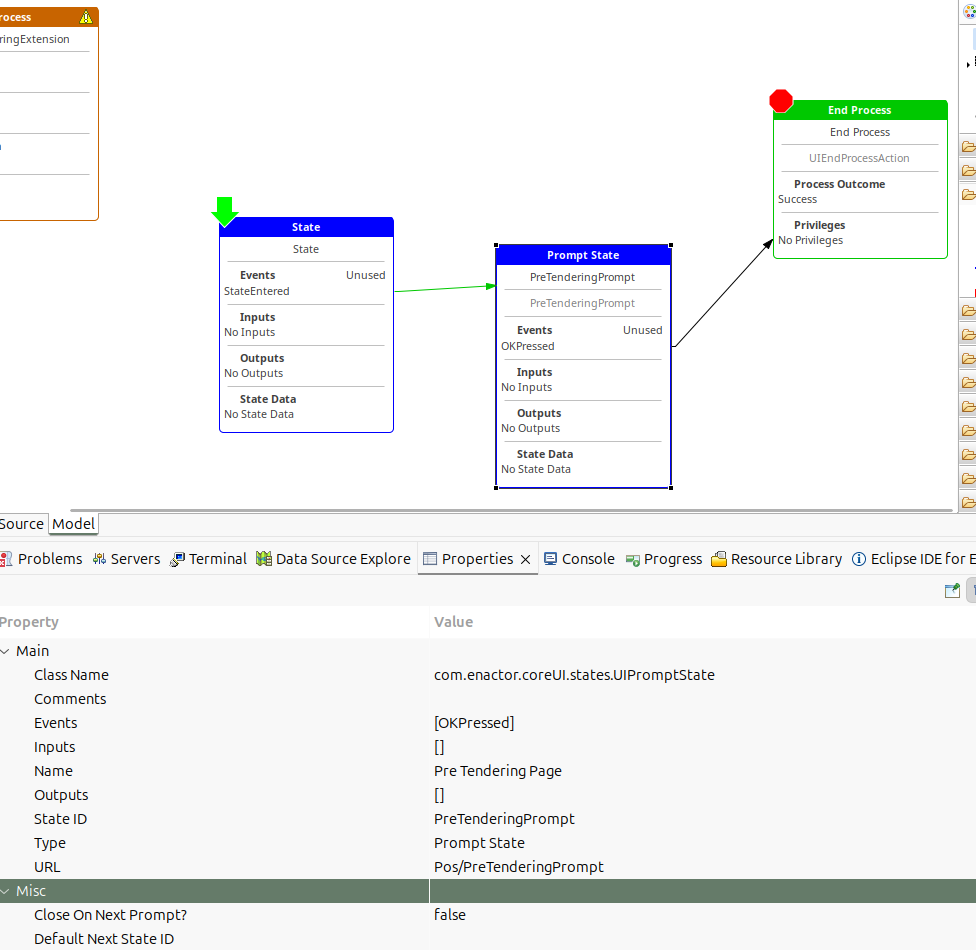
From the Palette, under
States, drag State and Prompt State onto the process, then underActions, drag End Process onto the process. -
Set Prompt State Properties and make sure final Application Process is as below.
Implement the React Page
-
Double-click on the prompt state or Right Click -> Enactorr -> Create React Component to create the new React Page (For more details refer Create a New React Component)
-
New React Component Wizard will Open
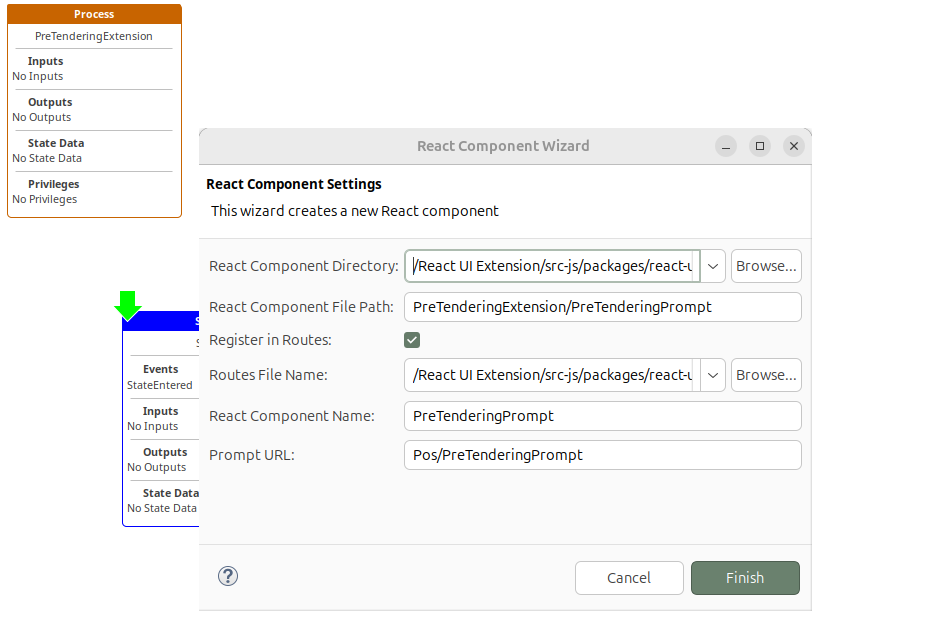
- Default Values will be Populated and click Finish to generate a Default React Page
Run React UI Extension
- After completing the React page, build the React Extension project using the following command
mvn clean install -Pnpm-maven-integration - Once the build is complete, locate the generated UI Extension JAR file in the project's target directory and add it to the classpath of your Development POS
- Launch the Development POS
- Perform a Sale transaction and click Total — the new extension will execute, and your POS will display the default React page that was generated.
- Customize the screen as needed.

You can find a sample React UI Extension with some screens at the link below. ReactUIExtensionSample.zip