Creating a prompt with prompt input
This will explain how to implement a React page for a Page Definition in the Customer Extension React Pos project.
This will guide you to implement a React prompt for a given Page Definition prompt with the prompt input.
Preparation
First of all, you need to have an unimplemented prompt for this task. Here we will provide a process and a prompt for that. Basically, we will override an existing process (Pos/Product/QuantitySellItem) to start work on.
Download Preparation.zip from Creating a prompt for a inputs form
-
Go to eclipse workspace.
-
Open the Training Build - POS project if haven’t open it yet.
-
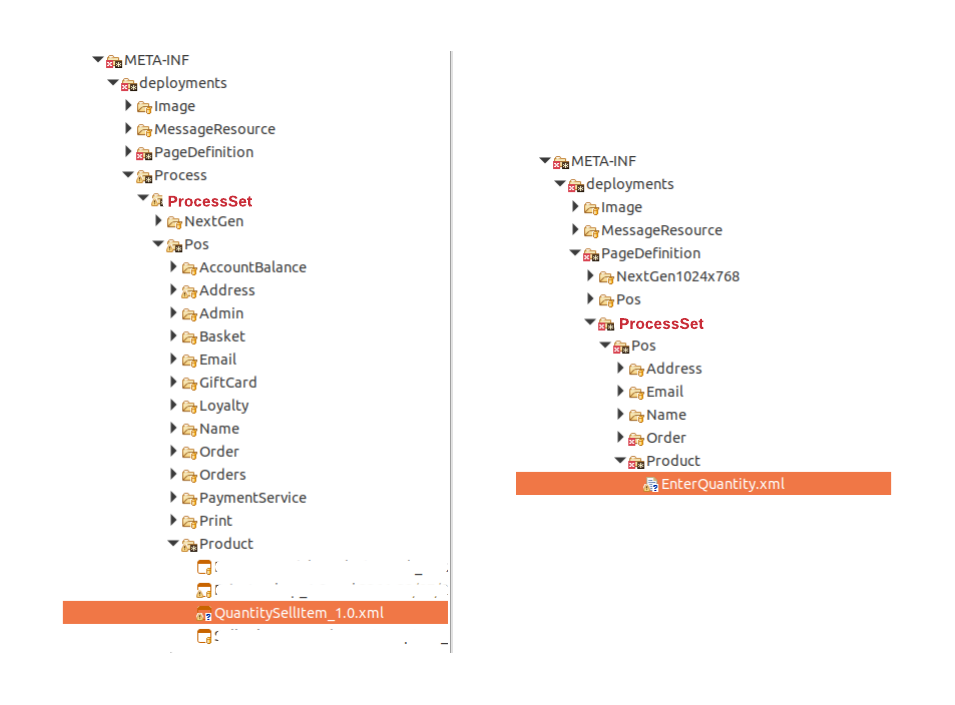
In project explorer, Navigate to
/Training Build - POS/src/META-INF/deployments/Process/Training/Pos/Product -
Copy and paste QuantitySellItem_1.0.xml to this location.
-
Again in project explorer, Navigate to
/Training Build - POS/src/META-INF/deployments/PageDefinition/Training/Pos/Product -
Copy and paste EnterQuantity.xml to this location.
You may need to create folders in the path if they are not there already.
-
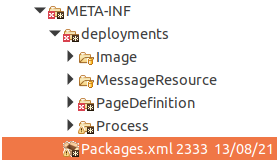
Open the Packages.xml file in Training Build - POS project.
-
Register the newly added process by adding following under
core:packagein this file.
<core:packageProcess>
    <core:processId>Training/Pos/Product/QuantitySellItem</core:processId>
    <core:name>Quantity Sell Item</core:name>
    <core:version>1.0</core:version>
</core:packageProcess>
- Maven update the Training Build - POS in offline mode.
-
Restart your PDP Server.
-
Go to the web pos in http://localhost:3000 and clear cookies and refresh the page.
-
Submit the config page and go to Sign On page.
-
Enter Pos User credentials and press Enter.
-
In the Sale menu go to Sale → Quantity Sale (QTY Sale).
If you don’t see a button like above you may need to configure it in EM. Use the following properties to configure a button.
-
event - QuantitySellProduct
-
label - QTY Sale (keep messageId and messageBase as empty)
-
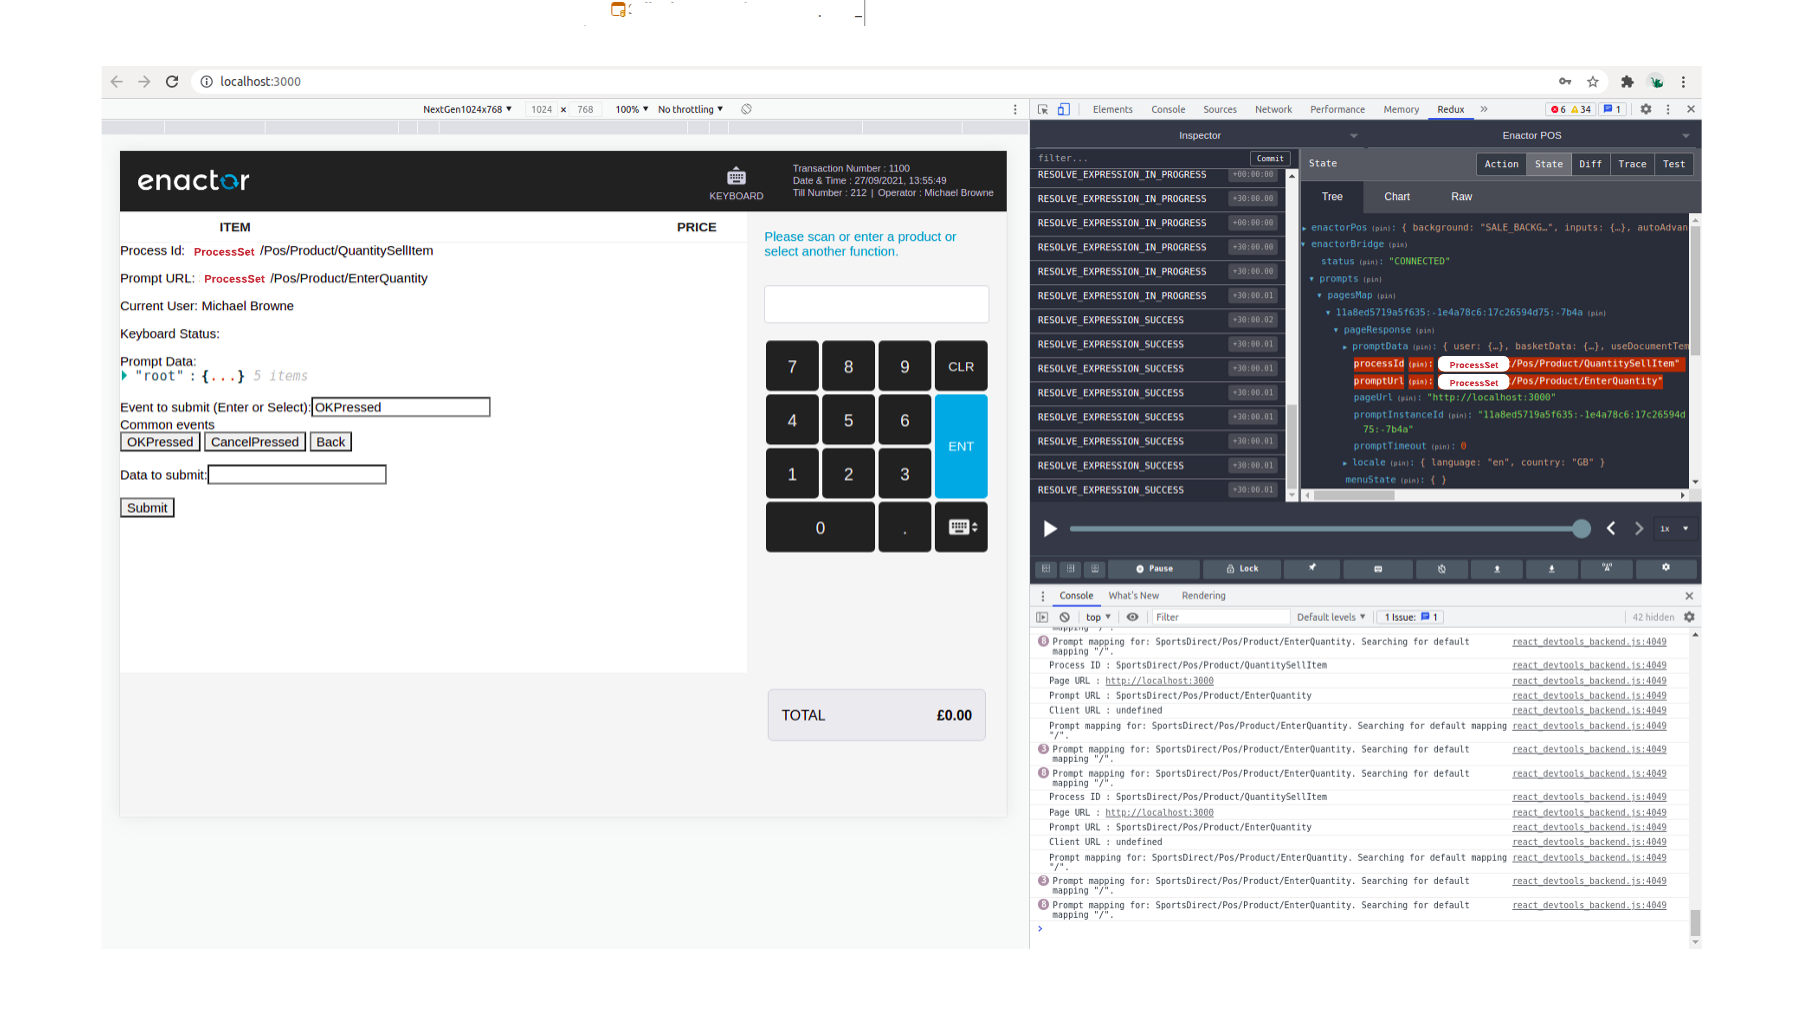
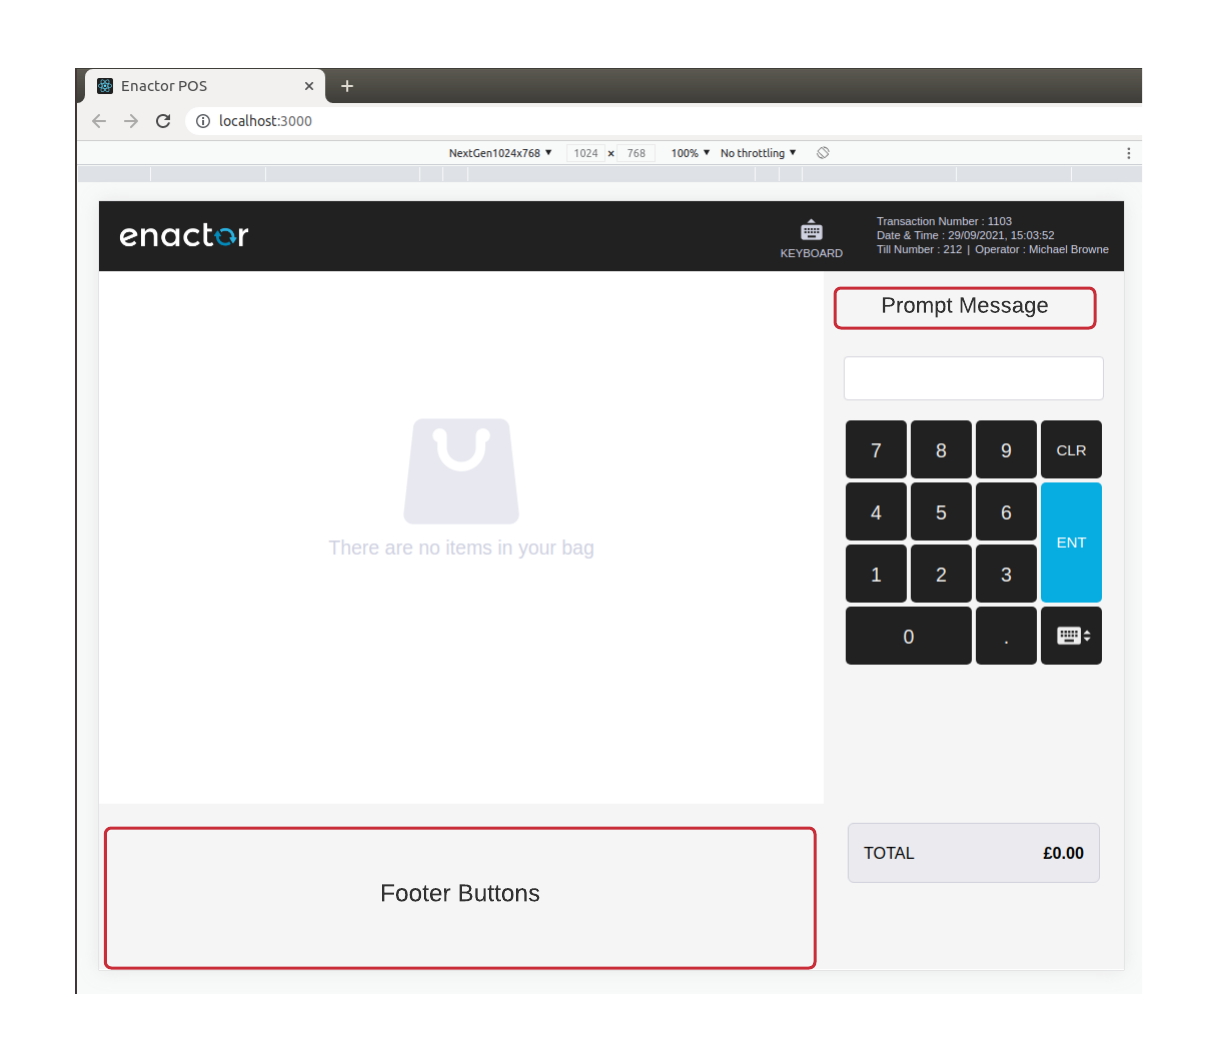
When you click on that QTY Sale button you will be navigated to this unimplemented prompt as shown.
Adding an empty page and a route
In the Training Build - React Pos project that you have already opened in the vscode editor,
- Navigate to
/src-js/packages/training-react-pos/src/Componentsfolder.
All the UI components are put in this Components folder.
-
Create a new folder called Product
-
Inside the Product folder, create a new EnterQuantity folder
-
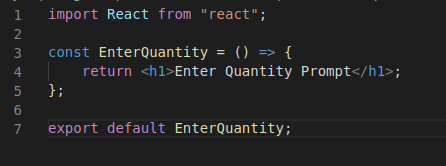
Inside that folder create a new file called index.js.
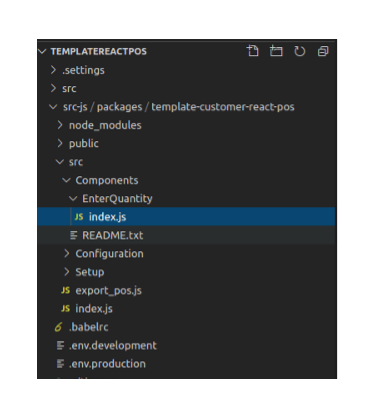
- Add the following as the content in the index.js file and Save it.
import React from "react";

const EnterQuantity = () => {
  return <h1>Enter Quantity Prompt</h1>;
};

export default EnterQuantity;
- This is a React function component which returns some text.
Next, we need to add a route for this prompt
-
Navigate to /src-js/packages/training-react-pos/src/Configuration folder.
-
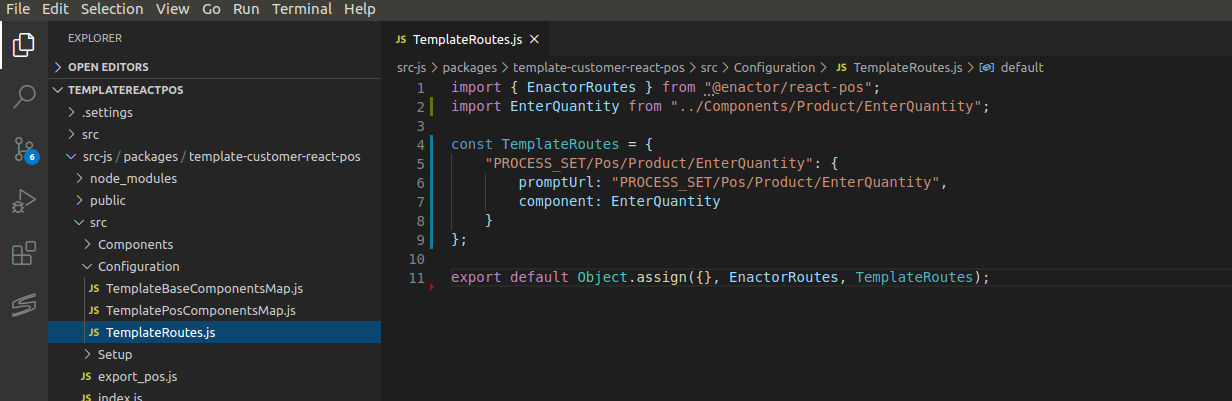
In TrainingRoutes.js file, add a route for the new component we created in index.js file as shown.
import EnterQuantity from "../Components/Product/EnterQuantity";

"Training/Pos/Product/EnterQuantity": {
    promptUrl: "Training/Pos/Product/EnterQuantity",
    component: EnterQuantity
}
- Save the file.
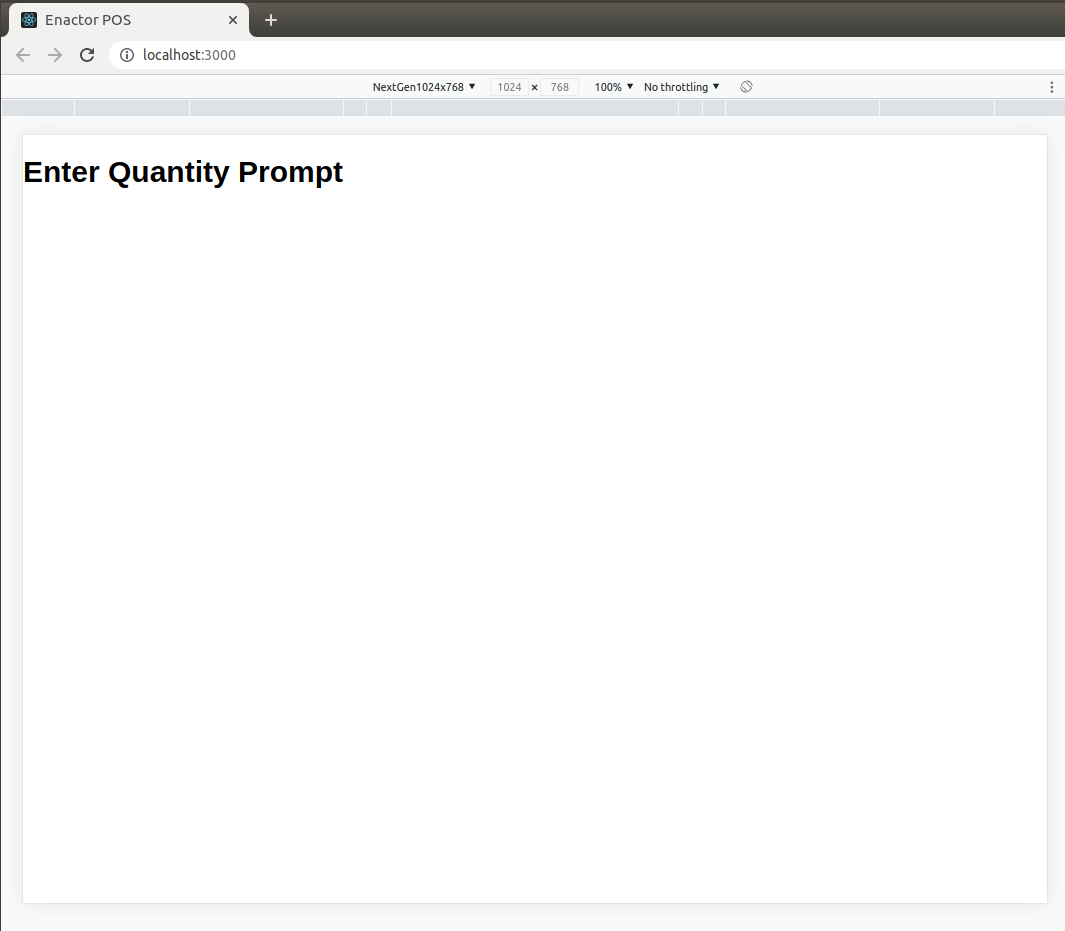
- Now check the web pos running in your browser. It should show the “Enter Quantity Prompt“.
If a white screen / a loading icon is shown, remove the browser cookies and refresh the page. And then navigate to the Quantity Sale prompt.
Implementing the UI
Help
The finished javascript file to use a reference
To navigate to the EnterQuantity process using the menu. When on the Sale screen
- Sales → Quantity Sell Item
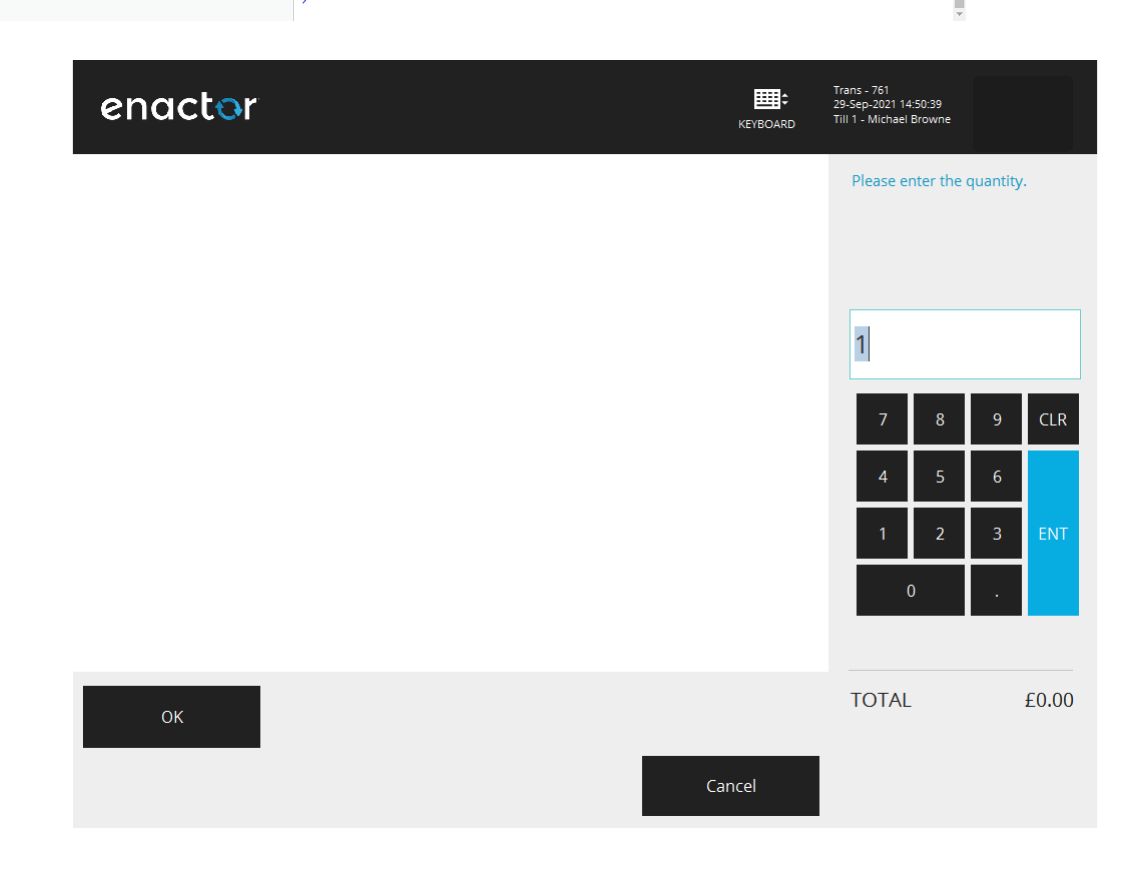
If you navigate to the EnterQuantity in Page Definition pos, it will be a simple prompt where it has a prompt input and number keypad on the right, and two buttons in the footer and basket in the left middle area. To implement this prompt we will use predefined components and functions.
Always refer to the Page Definition XML file if you want to replicate it in React Pos.
For the above described senario there is a default layout component called SaleShellContainer which can be configured as per the EnterQuantity prompt needs.
-
Import SaleShellContainer from the @enactor/react-pos package.
-
Return the component as below.
import React from "react";
import { SaleShellContainer } from "@enactor/react-pos";

const EnterQuantity = () => {
  return <SaleShellContainer />;
};

export default EnterQuantity;
-
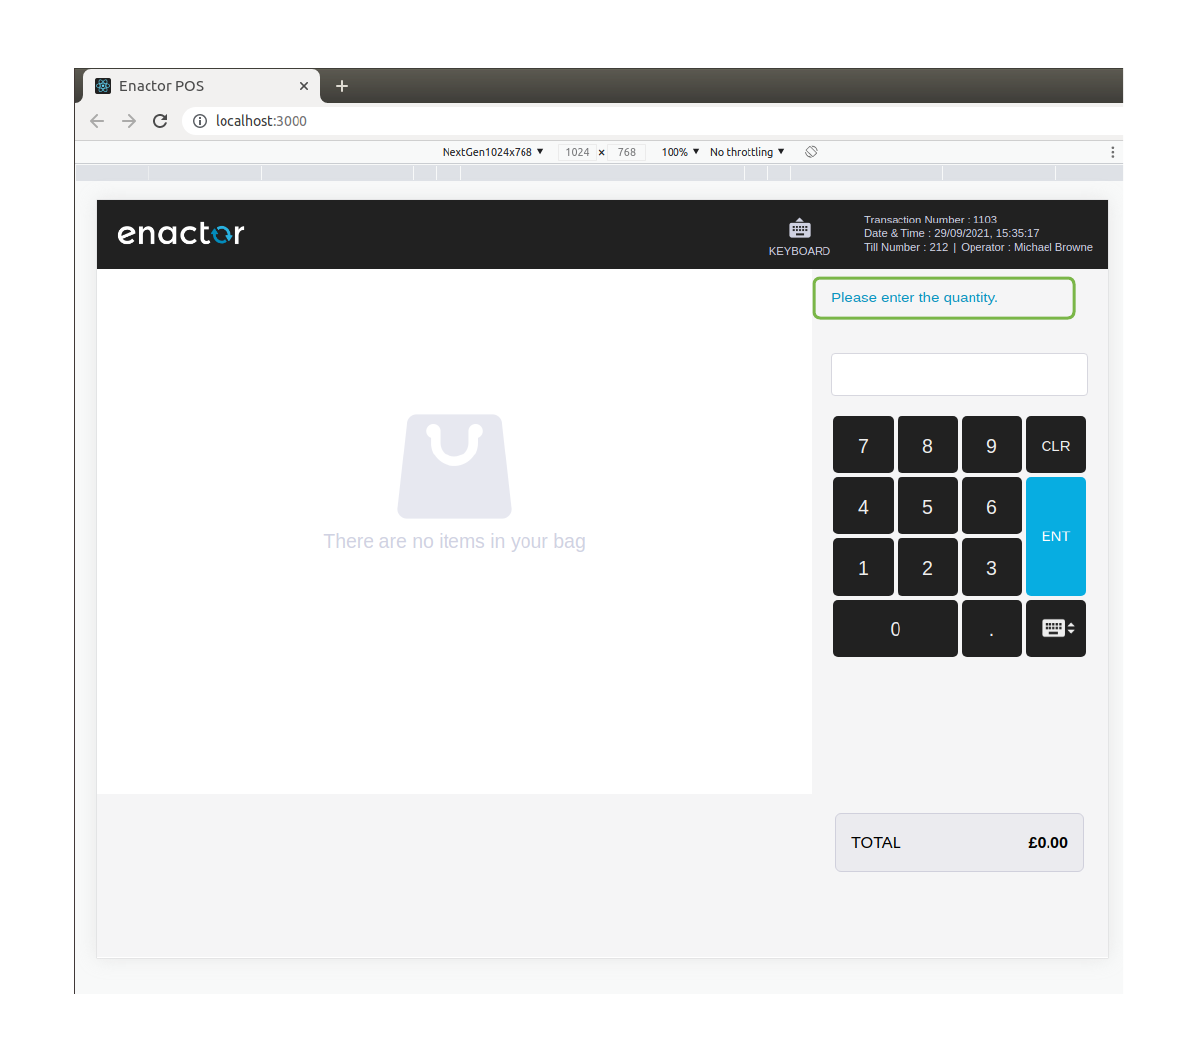
Save the file and check the web pos it will be updated like the screen capture in RHS.
-
We have got prompt input, number pad and Total label.
-
Still prompt message, footer buttons are are missing. We can configure them.\
-
If you check the EnterQuantity.xml page definition, you should find messageBase and messageId as below.
-
messageBase -
Pos/Product/ProductMessages -
messageId -
ENTER_QUANTITY
-
-
You can give these as the props to the
SaleShellContainerto resolve the required message text as below.
import React from "react";
import { SaleShellContainer } from "@enactor/react-pos";

const MESSAGE_BASE = "Pos/Product/ProductMessages";
const MESSAGE_ID = "ENTER_QUANTITY";

const EnterQuantity = () => {
  return (
    <SaleShellContainer messageBase={MESSAGE_BASE} messageId={MESSAGE_ID} />
  );
};

export default EnterQuantity;
- Save and check the prompt message has appeared now.
- To get the footer buttons we can defined the buttons in a array and provide again as a prop as below.
import React from "react";
import { SaleShellContainer } from "@enactor/react-pos";

const MESSAGE_BASE = "Pos/Product/ProductMessages";
const MESSAGE_ID = "ENTER_QUANTITY";

const EnterQuantity = () => {
  const defaultButtons = [
    {
      menuItemPosition: 1,
      className: "ftr-button ok",
      messageBase: "Pos/General/PosMessages",
      messageId: "BUTTON_OK",
    },
    {
      menuItemPosition: 8,
      className: "ftr-button cancel",
      messageBase: "Pos/General/PosMessages",
      messageId: "BUTTON_CANCEL",
    },
  ];

  return (
    <SaleShellContainer
      messageBase={MESSAGE_BASE}
      messageId={MESSAGE_ID}
      fallbackMenuButtons={defaultButtons}
    />
  );
};

export default EnterQuantity;
- No need to implement this if a menu is configured in Estate Manager for this prompt.

Sending events
-
We have just created the UI structure above but the prompt is not yet functional. We need add more things for that.
-
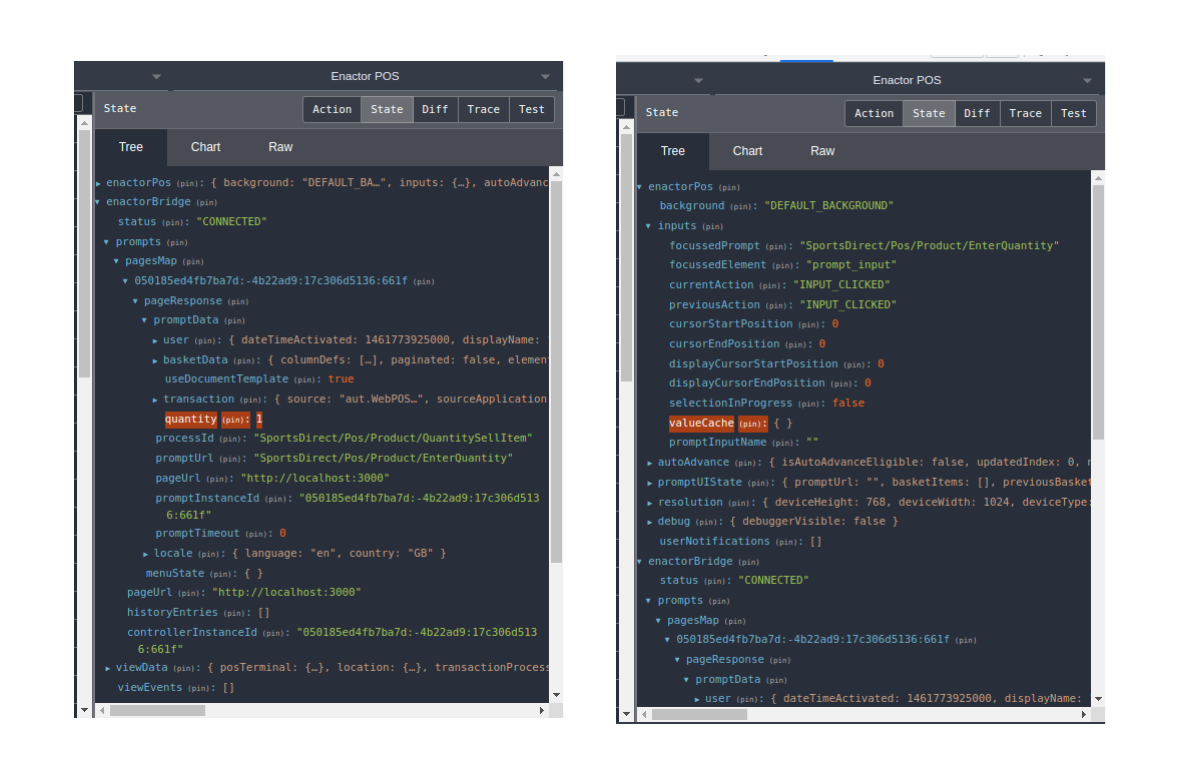
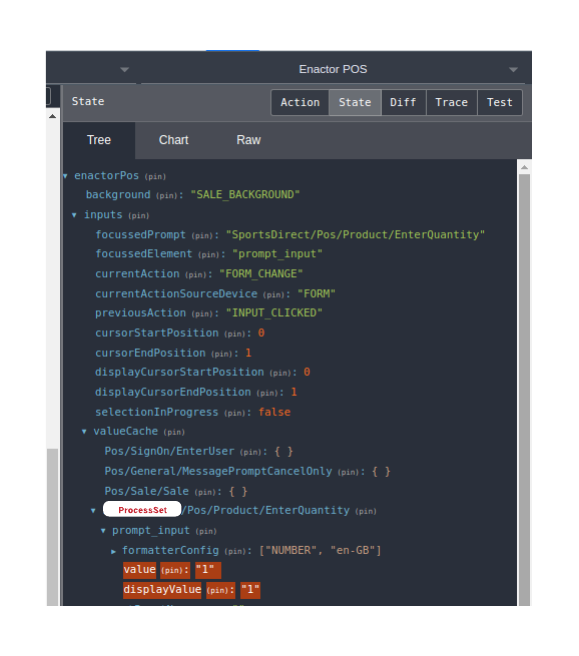
If you check the the Page Definition as given above prompt input is initialized with 1 as the quantity. To do the same we need to get the default value from the enacotorBridge as shown in the screen capture and set to the valueCache in enactorPos.
enacotorBridge is sync with application process state (prompt state and view state ...etc).
enactorPos is to handle other state information kept in react application side.
Lets wrap EnterQuantity component using redux connect function to get the prompt data access and to have some default actions to dispatch for this scenario.
- Update your index.js to using below code snippet.
import React, { useEffect } from "react";
import { connect } from "react-redux";
import { SaleShellContainer } from "@enactor/react-pos";
import {
    defaultMapStateToProps,
    defaultMapDispatchToProps,
    formChangeAction,
    PROMPT_INPUT,
    NUMBER_TYPE
} from "@enactor/react-base-components";

const MESSAGE_BASE = "Pos/Product/ProductMessages";
const MESSAGE_ID = "ENTER_QUANTITY";

const EnterQuantity = props => {

    const {
        promptUrl,
        onLoad,
        promptData = {}
    } = props;

    useEffect(() => {
        const { quantity: initialQuantity = "" } = promptData;
        onLoad(
            promptUrl,
            PROMPT_INPUT,
            0,
            initialQuantity.toString().length,
            initialQuantity.toString()
        );
    }, []);

    const defaultButtons = [...];

    return (
        <SaleShellContainer
            messageBase={MESSAGE_BASE}
            messageId={MESSAGE_ID}
            fallbackMenuButtons={defaultButtons}
            formatterConfig={[NUMBER_TYPE]}
        />
    );
};

const mapDispatchToProps = (dispatch, ownProps) => {
    return {
        ...defaultMapDispatchToProps(dispatch, ownProps),
        onLoad: (
            promptUrl,
            focussedElement,
            cursorStartPosition,
            cursorEndPosition,
            value
        ) => {
            dispatch(
                formChangeAction({
                    promptUrls: [promptUrl],
                    focussedElement,
                    cursorStartPosition,
                    cursorEndPosition,
                    value
                })
            );
        }
    };
};

export default connect(
    defaultMapStateToProps,
    mapDispatchToProps
)(EnterQuantity);
Let’s go through what we have added here.
-
In SaleShellContainer
formatterConfigprop is set to[NUMBER_TYPE]to make the input to only accept numbers. -
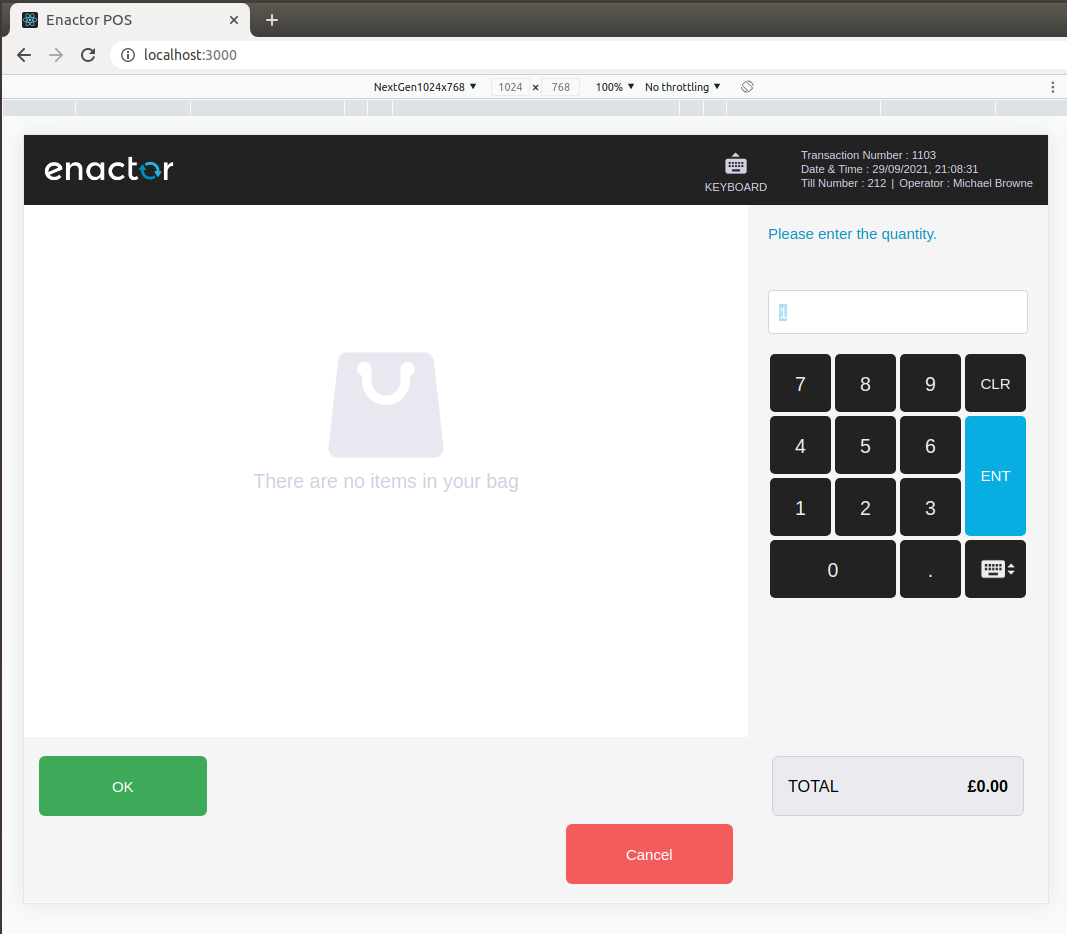
Now you should see the prompt input is updated with 1 as the initial quantity.
-
promptUrl and promptData are coming from default props.
-
onLoad action was explicitly provided for this prompt as you can see in the mapDispatchToProps function.
-
onLoaduses theuseEffectcallback with empty dependancy array makes thePROMPT_INPUTto be set in valueCache when component gets mounted.
-
Next we need to handle sending the quantity with OKPressed event.
-
For that add the following action to the return object of
mapDispatchToPropssimilar toonLoad. -
Define
handleValueSubmitfunction inside the component. -
Fill up the component with the missing elements referring to following code snippet.
...
import { sendEventWithInput } from "@enactor/react-base-components";
...
...

const PAYLOAD_ATTRIBUTE_NAME = "quantity";
const DEFAULT_VALUE = 1;

const EnterQuantity = props => {

    const {
        eventHandlers: { sendEvent },
        onEvent,
        ...
        ...
    } = props;

    const defaultButtons = [
        {
            ...
            ...
            onClickHandler: () => onEvent(promptUrl, "OKPressed")
        },
        {
            ...
            ...
            onClickHandler: () => sendEvent("CancelPressed")
        }
    ];

    const handleValueSubmit = quantity => {
        const {
            eventHandlers: { sendEvent }
        } = props;
        if (quantity) {
            quantity = quantity.trim();
        }
        if (!quantity || quantity == "") quantity = 0;
        sendEvent("OKPressed", { quantity });
    };

    return (
        <SaleShellContainer
            ...
            ...
            onSubmit={handleValueSubmit}
        />
    );
};

const mapDispatchToProps = (dispatch, ownProps) => {
    return {
        ...defaultMapDispatchToProps(dispatch, ownProps),
        ...
        ...
        onEvent: (promptUrl, event) =>
            dispatch(
                sendEventWithInput(
                    event,
                    promptUrl,
                    PROMPT_INPUT,
                    PAYLOAD_ATTRIBUTE_NAME,
                    DEFAULT_VALUE
                )
            )
    };
};

...
Let’s check what we have added now.
-
handleValueSubmitfunction is provided as a callback to onSubmit prop which will be called with the prompt input value and that is sent using sendEvent function. -
If you type a quantity and press enter button in the number pad ENT or the physical keyboard Enter button this onSubmit callback is called.
-
onEventis another action which will take the promptUrl (Training/Pos/Product/EnterQuantity) and the input name (PROMPT_INPUT) we typed and sendeventwith input as data. -
We have updated the
onClickHandlers for the buttons. OK button usesonEventas it needs to sent input data while Cancel button only a button that sends an event.
If you follow the document up to this far, now your component is fully working similar to the Page definition.