Create a New Enactor Desktop Application with React UI
Overview
This tutorial will guide you how to create a React Hello World Application using the Enactor Application Wizard.
What you will learn
-
How to create a React Application with Enactor Application Wizard.
-
How to run the React Application.
Pre-requisites
An Eclipse Installation with Enactor Tools Plugin
Exercises
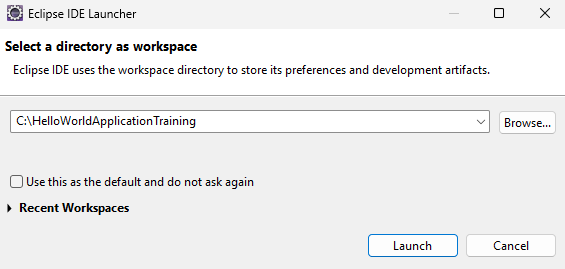
Launch Eclipse Application
Launch Eclipse and When prompted for a Workspace enter C:\HelloWorldApplicationTraining
Installing the Enactor Tools Licence
The Enactor Tools Licence is applied to an individual workspace in Eclipse.
To Install the Enactor Tools Licence, Open the Licence Information window by selecting Help Menu → Licence information...
Click Install New Licence...button
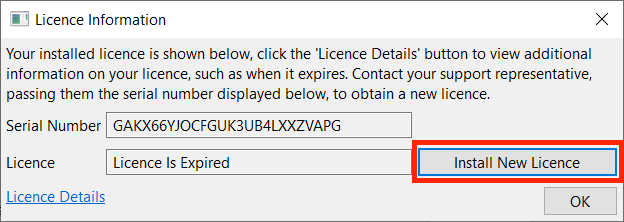
Select your Enactor Tools Licence
Once selected, click OK...button
Eclipse Maven Settings
To use the Maven Dependency manager with Enactor you will first need to set up Maven.
Create a new Maven respository directory named .m2 within you user account directory C:\Users\<USER_NAME>\.m2
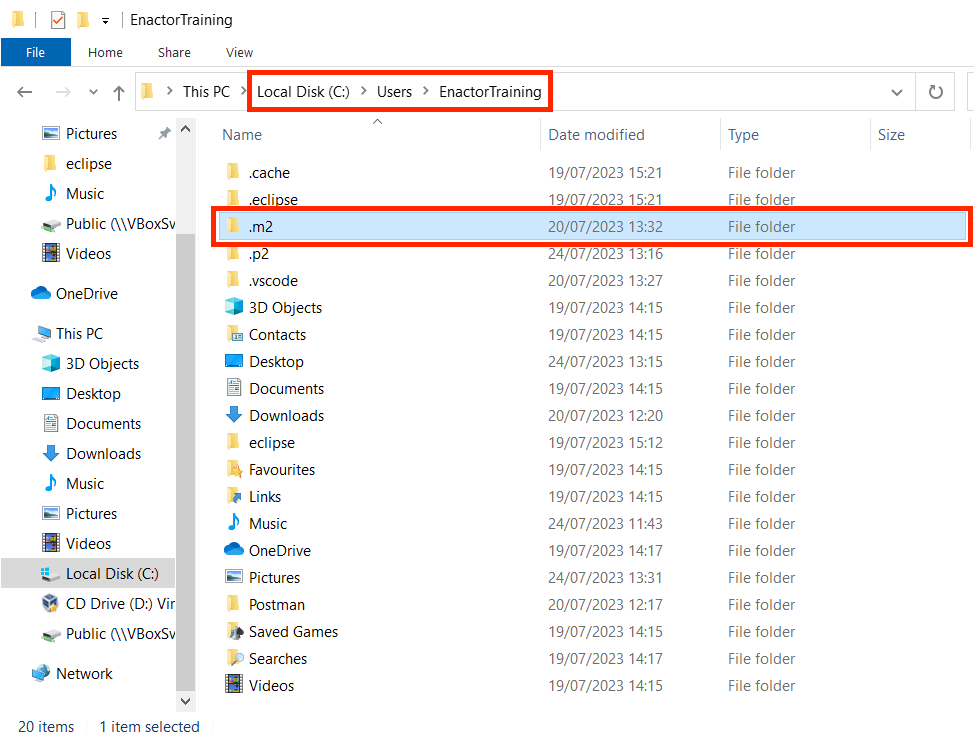
From your OS file system, copy the checkout setting.xml file found within /WorkspaceSetup/Config/maven to the newly created .m2 directory.

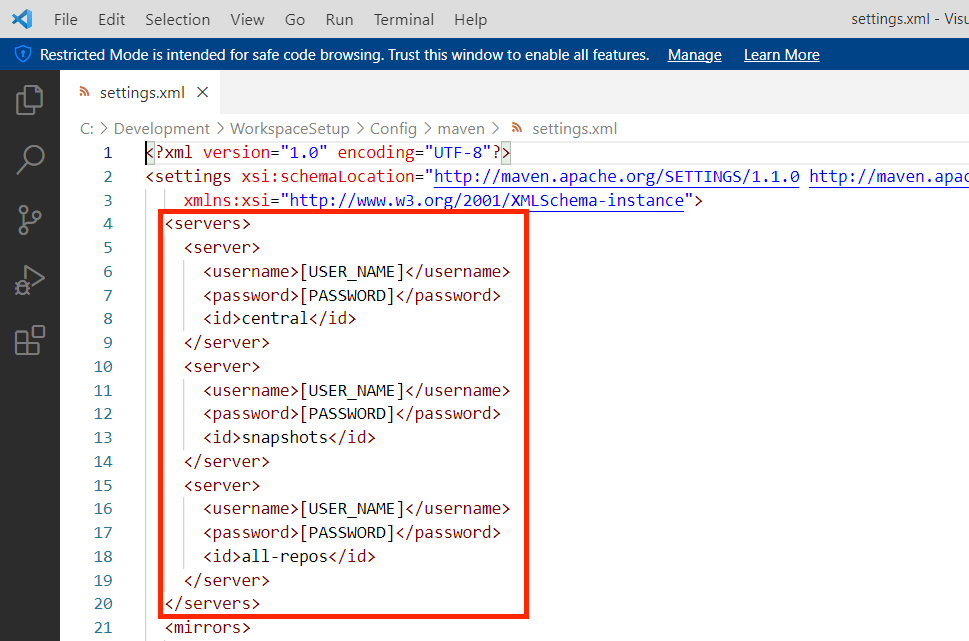
Edit the settings.xml file and replace the following placeholders USER_NAME and PASSWORD with your Enactor Active Directory Credentials
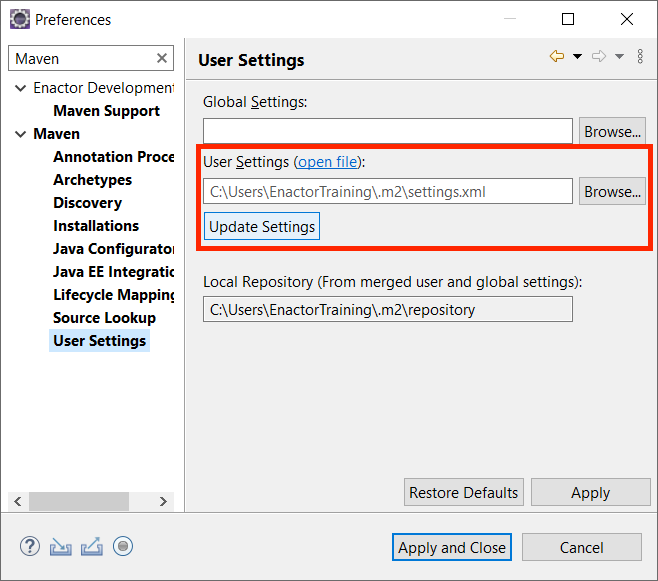
Open the Eclipse Preferences menu and enter Maven in the search bar.
Select the Maven → User Settings

Confirm that your settings.xml appears in the User Settings Field and that the local Repository Field is also populated
Eclipse JRE Settings
Open the Eclipse Preferences menu
Select Java → Installed JREs
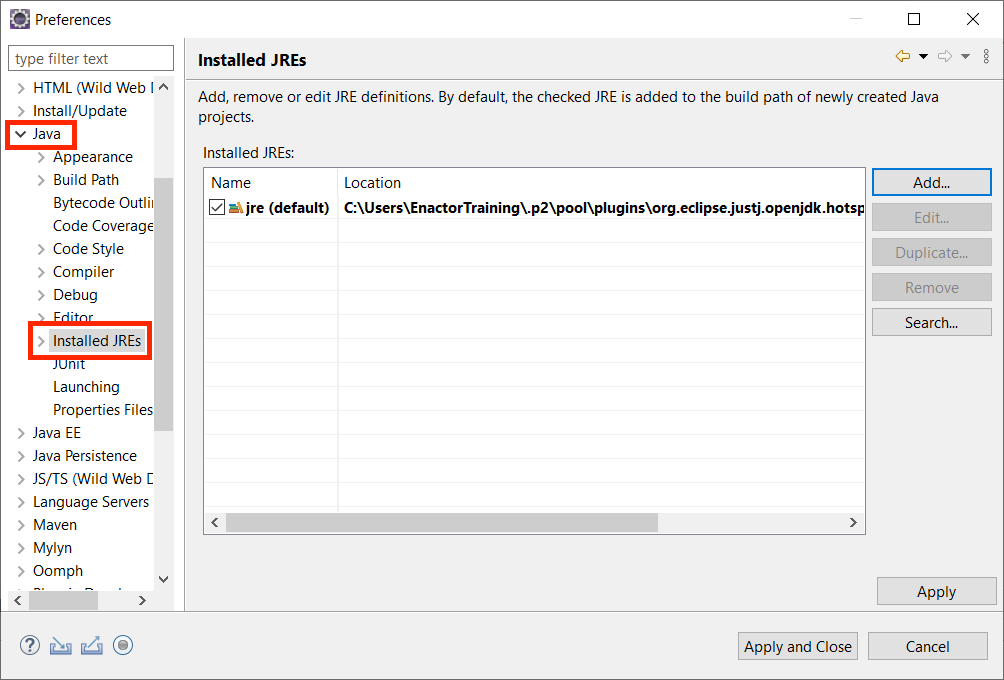
Click Add...button
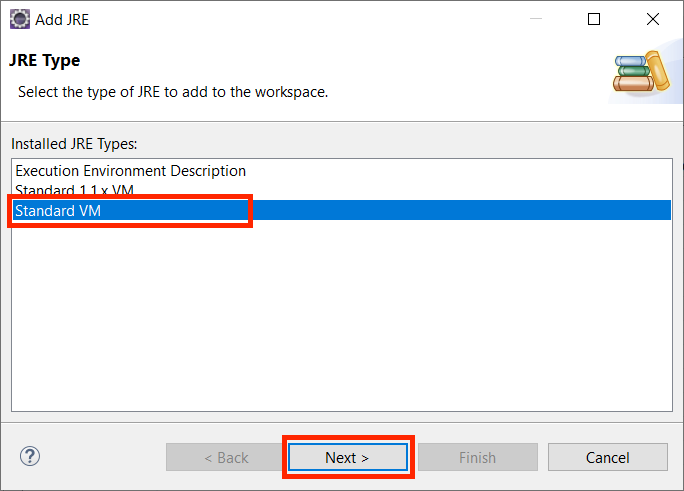
Select Standard VM for the installed JRE Type
Click Next...button
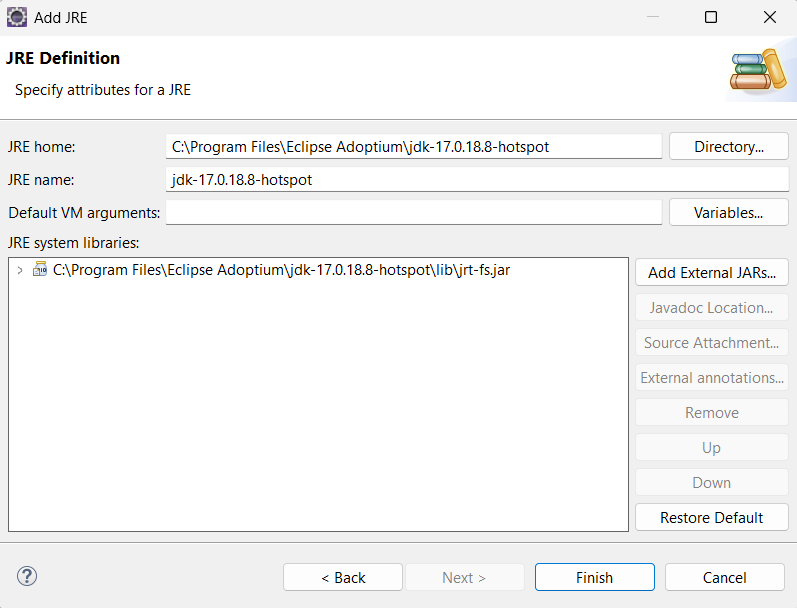
Update the JRE home text box by browsing / entering the location of the JDK home directory
Update the JRE name text box by entering default_jre
Click Finish...button
Check the default_jre to make it the default JRE eclipse should use
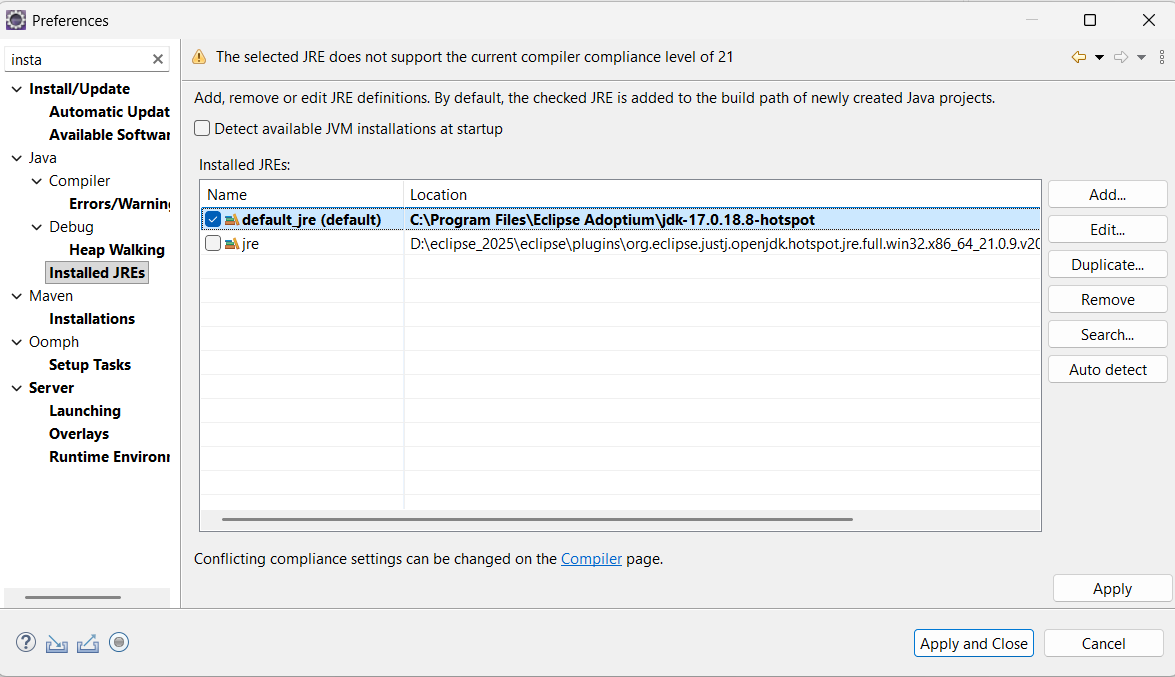
Click Apply and Close
Generate React Application
Go to File -> New -> Other -> Enactor Development -> Enactor Application and Click Next to Launch the Wizard.
 .
.
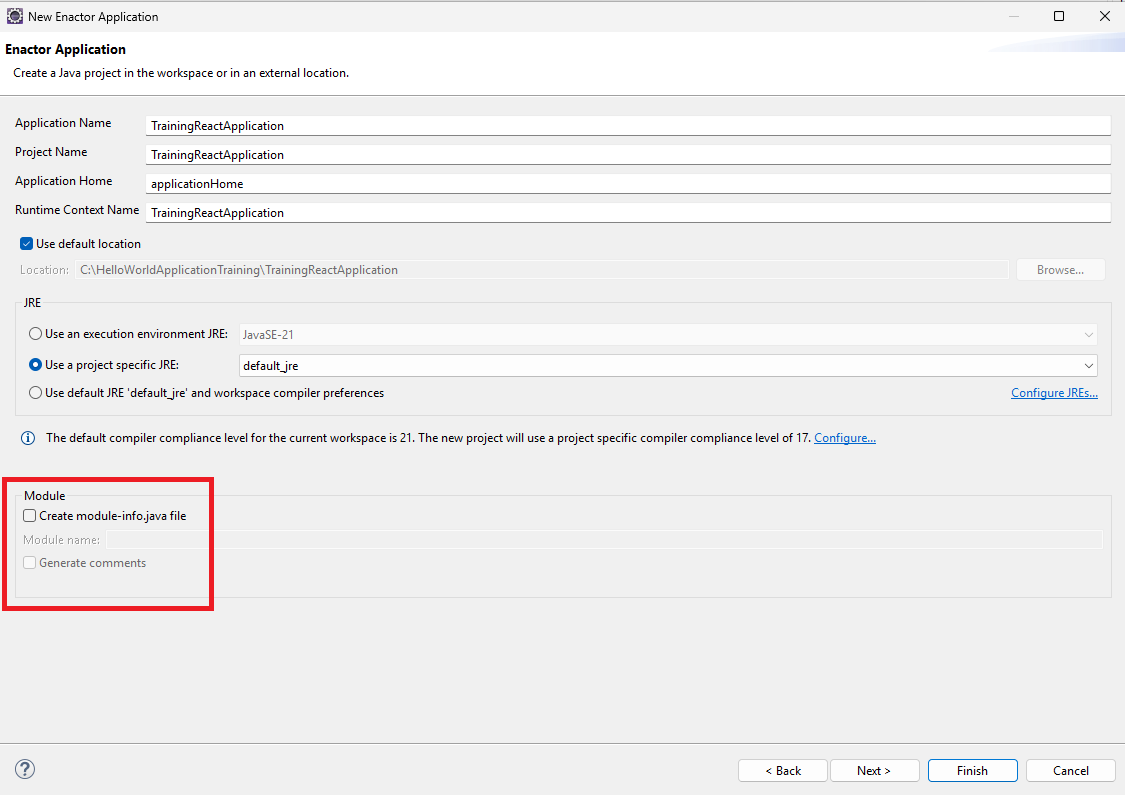
In the Application settings Page fill Application Name as TrainingReactApplication.
Under JRE Select Use a project specific JRE and Select default_jre.
Untick Create module-info.java file.
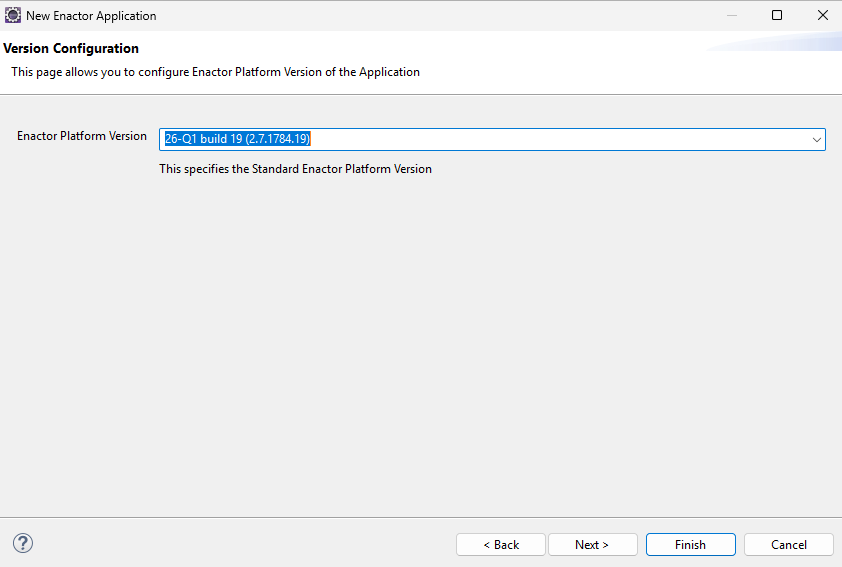
Click Next and navigate to Version Configuration page and Select the Enactor Platform Version 26-Q1 build 19
Click Next to go to the Maven Configuration page. Here, default values for Group ID, Artifact ID, and Version are provided. You can leave these defaults as they are, or modify them if you prefer a different group or artifact ID.

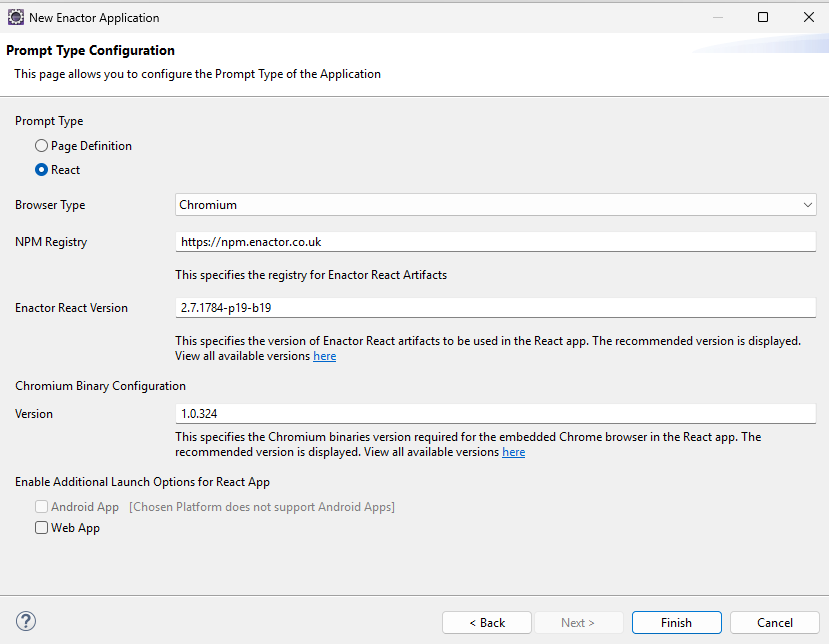
Click Next to go to the Prompt Type Configuration page. The React prompt type is selected by default. Leave the default configuration as it is.
Click Finish to generate the Application.
Build the React Application
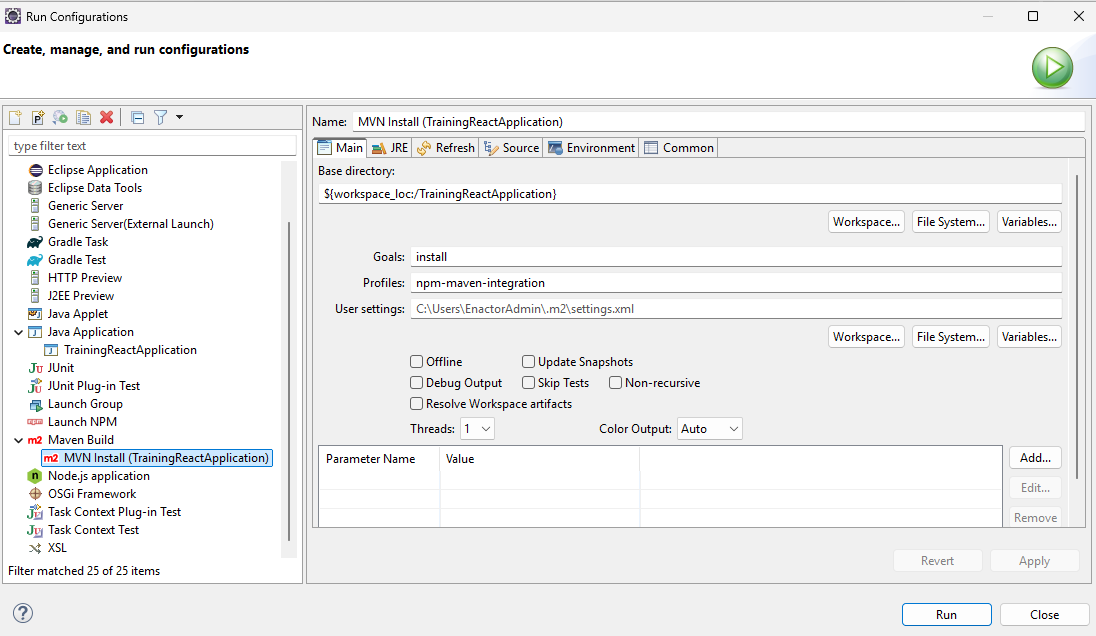
To run the generated Application, first build the project via Run Configuration → Maven Build → Maven install (TrainingReactApplication) and click Run.
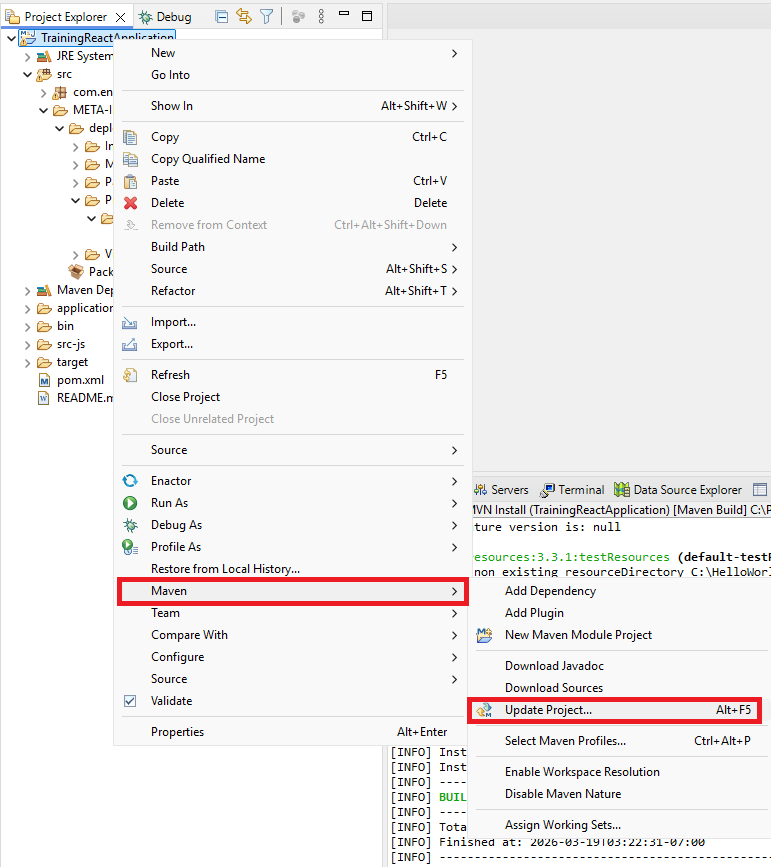
After build is completed, right click on the TrainingReactApplication project and click Maven -> Update Project.
Run the React Application
Since Node is installed on your machine, the application will automatically run in Live Deployment Mode. To use this mode, the React content should be served using the Node Development Server.
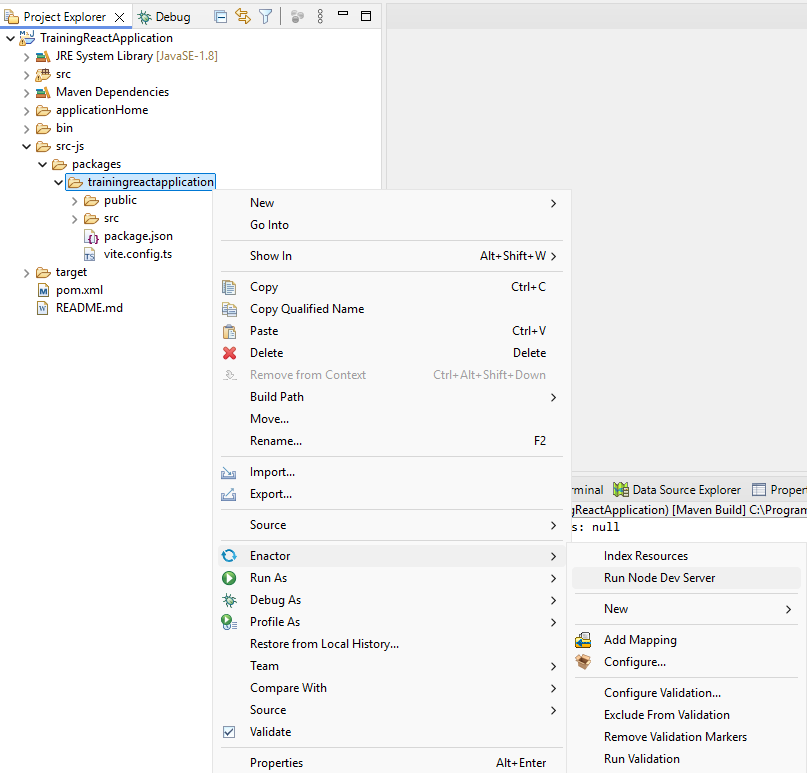
Navigate to src-js -> packages -> trainingreactapplication . right click, Enactor -> Run Node Dev Sever option.
Click OK.

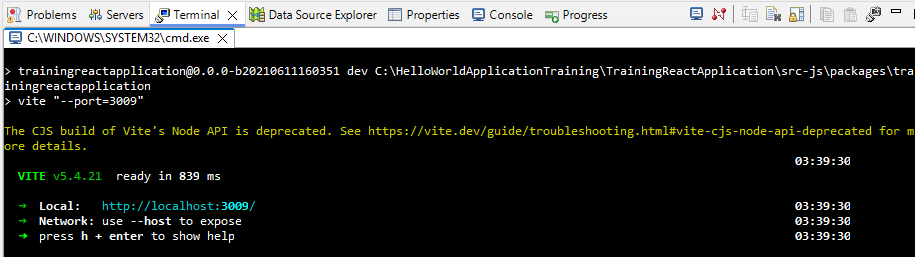
This will launch a Node Dev Server
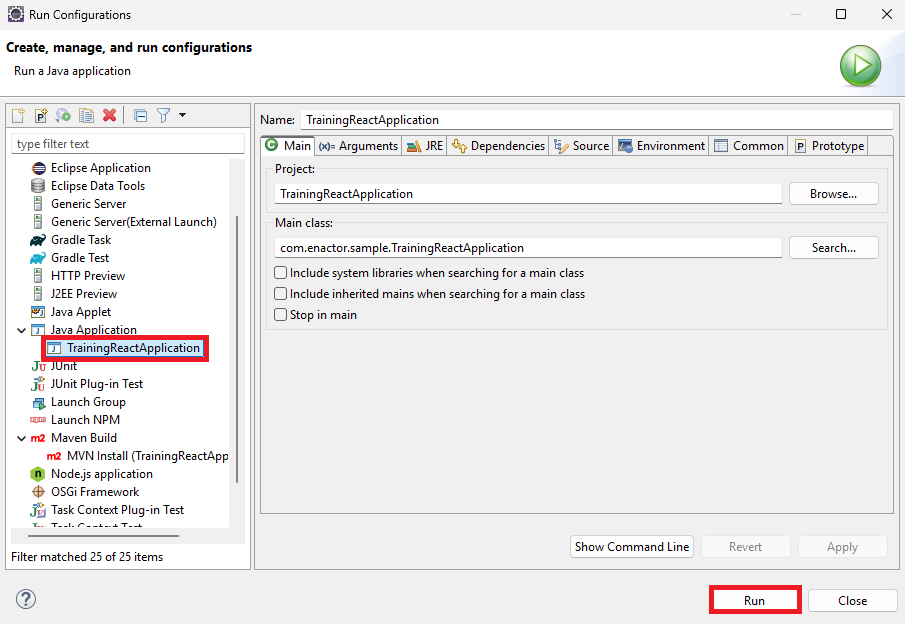
Go to the Run -> Run Configuration -> Java Application and select TrainingReactApplication and Click Run
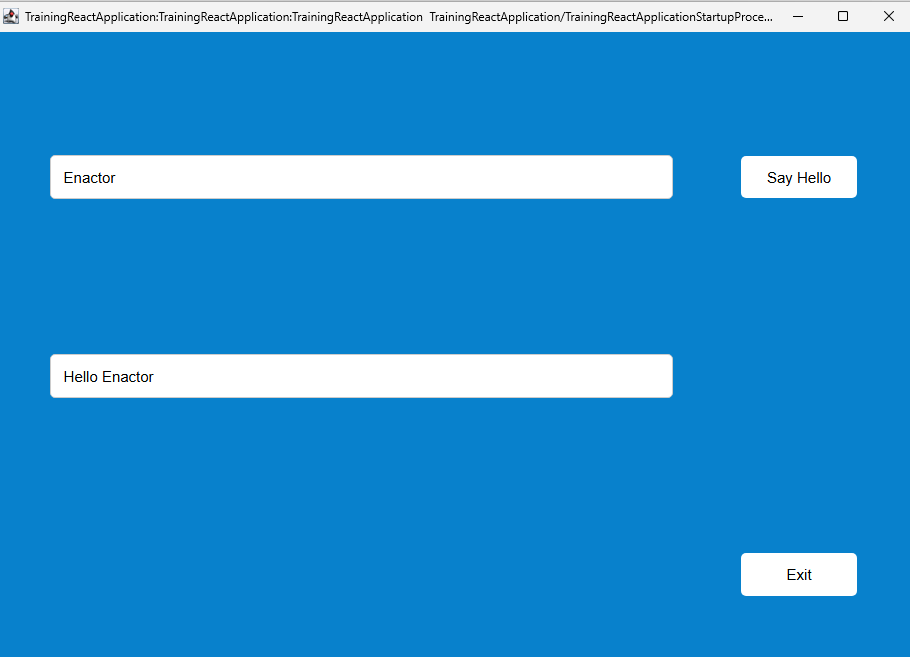
The Application will launch as shown. Enter your name in the text box and click Say Hello to display the greeting message.
If Node is not installed on your machine, the application will run in Prebuilt Deployment Mode, and there is no need to launch the Node Development Server.