How to Configure and use Attributes
Attributes are used to add custom data to supported entities without code changes.
- The definition of an Attribute is configured in the Estate Manager's Attribute / Option Set Maintenance application.
- The value for an attribute is defined in the entity maintenance application.
This tutorial focuses on how to load such attributes from code in the POS application.
Common Entities Supporting Attributes
The following entities support attributes and this tutorial can be applied to those entities.
- Customer
- IIN Range
- Loyalty Tier
- Location
- MM Group
- POS Terminal
- Product
- Promotion
- Tender
- Voucher Type
- User
Entity Names of Attribute Types
Entity name is used in code level with the specific attribute type
| Attribute Type | Entity Name |
|---|---|
| Customer | customerAttributeSet |
| IIN Range | iinRangeAttributeOptionSet |
| Loyalty Tier | loyaltyTierAttributeOptionSet |
| Location | locationAttributeOptionSet |
| MM Group | mmGroupAttributeOptionSet |
| POS Terminal | posTerminalAttributeOptionSet |
| Product | productAttributeOptionSet |
| Promotion | promotionDisplayAttributeOptionSet |
| Tender | tenderAttributeOptionSet |
| Voucher Type | voucherTypeAttributeOptionSet |
| User | userAttributeOptionSet |
Configuration
Attribute / Option Set Maintenance
In the Estate Manager (EM), navigate to Configuration > Merchandise > Attribute / Option Sets
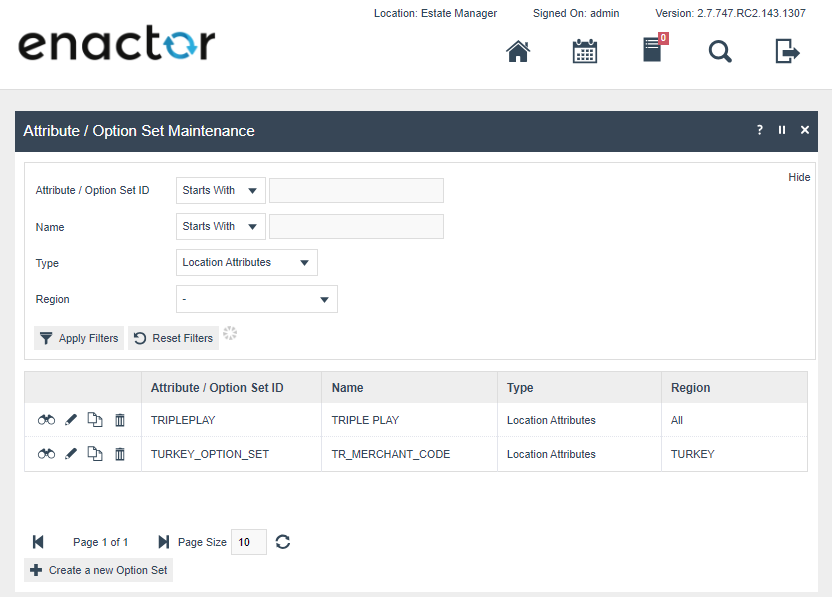
Creating a new Attribute Set
- Navigate to Attribute / Option Set Maintenance
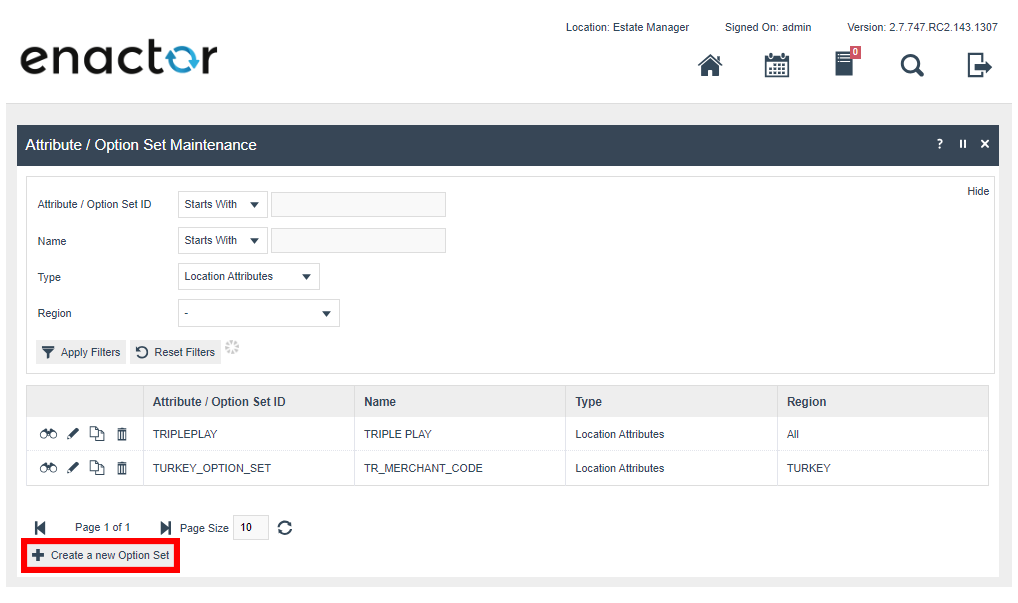
- Click Creat a new Option Set Button
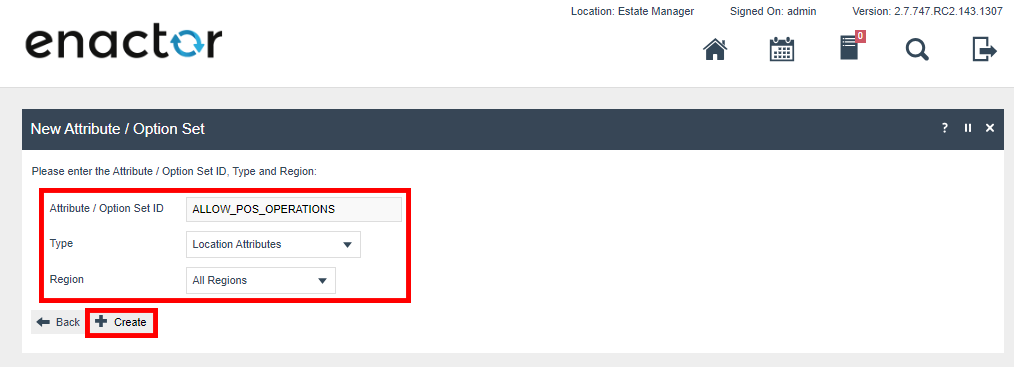
- Fill in Attribute / Option Set ID, Type, and Region according to your requirement.
- Click "Create"
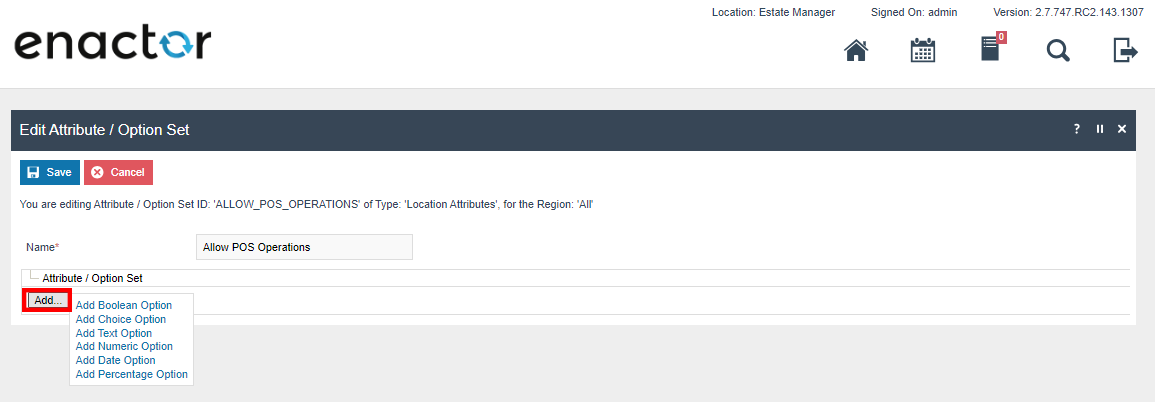
- Give a human readable name to your attributes
- Click "Add" button and select attribute type you need
- Fill In attribute ID and human readable attribute name
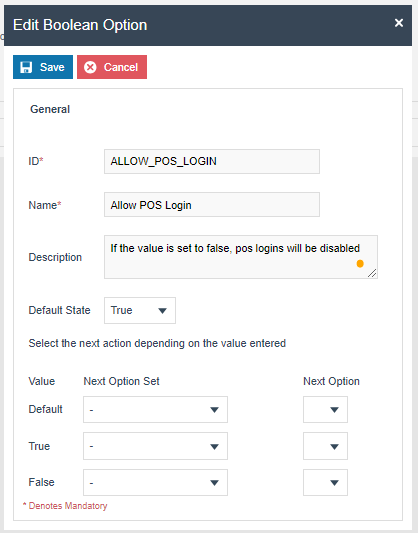
- Click "Save" on the pop up window to add the attribute
- Click "Save" on Edit Attribute / Option Set page to save the attributes
Instructions
Loading attributes in an application process
Attributes are loaded in two steps
- Creating the list criteria
- Loading the attributes using the list criteria
Creating the list criteria
Action: com.enactor.commonUI.list.processes.AddListFilterAction
Inputs:
| Input Name | Type | Value |
|---|---|---|
| enactor.coreUI.DefaultValue | java.lang.String | Entity Name of the Attribute |
| enactor.coreUI.FilterId | java.lang.String | Type |
| enactor.coreUI.FilterType | java.lang.String | TextValueFilter |
Example: If a product attribute is being loaded, value of enactor.coreUI.DefaultValue should be set to "productAttributeOptionSet"
Output:
| Output Name | Type | Value |
|---|---|---|
| enactor.coreUI.ListCriteria | com.enactor.core.servers.IListCriteria | The list criteria that can be used to load attributes |
Loading the attributes using the list criteria
Action: com.enactor.commonUI.list.processes.LoadListAction
Inputs:
| Input Name | Type | Value |
|---|---|---|
| enactor.coreUI.EntityName | java.lang.String | optionSet |
| enactor.coreUI.EntityNamespace | java.lang.String | Name Space of the Entity |
| enactor.coreUI.ListCriteria | com.enactor.core.servers.IListCriteria | Output of AddListFilterAction |
Namespace is defined in the entity's Java class
Example: LocationAttribute.Java
Java class contains the following XML element
@XmlRootElement(name = LocationAttribute.ENTITY_NAME, namespace = PackageInfo.NSURI_MFC)
Notice namespace = PackageInfo.NSURI_MFC
The value of PackageInfo.NSURI_MFC is "http://www.enactor.com/mfc"
When loading location attributes, the value of enactor.coreUI.EntityNamespace should be set to "http://www.enactor.com/mfc"
Output:
| Output Name | Type | Value |
|---|---|---|
| enactor.coreUI.List | java.util.List | Loaded attributes list |
Loading attributes in a Java class
Each attribute has a corresponding server. The server is used to get data. A generale IServer<IAttributeKey, IAttribute> can also be used to get attributes.
The following code snippet is an example on getting location attributes using ILocationAttributeServer in Java.
//	Get the inputs
String locationId = "0001";

//	Load location server
ILocationAttributeServer locationAttributeServer;
try {
    locationAttributeServer = EntityServerProxy.getServer(LocationAttribute.ENTITY_QNAME);
} catch (UnknownServerException ex) {
    logger.log(Logger.LOG_ERROR, "Failed to obtain server for " + LocationAttribute.ENTITY_QNAME, ex);
    return CoreUIOutcomes.FAIL_OUTCOME;
}

//Making the filter
MatchTextValueFilter filter = new MatchTextValueFilter(ILocationAttributeServer.FILTER_LOCATION_ID);
filter.setComparisonOperator(ComparisonOperators.EQUALS);
filter.setValue(locationId);
List<IListFilter> filters = new ArrayList<>();
filters.add(filter);

//Making the list criteria
ListCriteria listCriteria = new ListCriteria();
listCriteria.setFilters(filters);


Map<String, Object> result = new LinkedHashMap<>();
try {
    List<IKeyedListElement> list = locationAttributeServer.listAll(listCriteria);
    //list object can be used to iterate over loaded attributes
    for (IKeyedListElement element : list) {
        ILocationAttributeKey locationAttributeKey = (ILocationAttributeKey)((ListElement)element).getKey();
        ILocationAttribute locationAttribute = locationAttributeServer.load(locationAttributeKey, LockType.READ_LOCK);
        Map<String, Object> values = locationAttribute.getValues();
        //values object is a data map for attribute items and values
        //values object can be used inside Java to meet any requirements
    }
} catch (DatabaseException ex) {
    logger.log(Logger.LOG_ERROR, "Error loading location attributes", ex);
    return CoreUIOutcomes.FAIL_OUTCOME;
}
return CoreUIOutcomes.SUCCESS_OUTCOME;
Example Use case
Requirement - A customer needs to stop POS logins from some (0002,0005) locations. The customer has stores in 5 locations (0001 to 0005).
Background knowledge - In the sign on process (Pos/SignOn/SignOn_1.0.xml), "HandleServiceMode" extension is called after a user login and before ending the process.
Configurations
- A
locationAttributeOptionSetis defined in Attribute / Option Set Maintenance app.- Name of the Attribute set is "Allow POS Operations".
- The Attribute set as a boolean attribute called "Allow POS Login".
- The default value for the "Allow POS Login" boolean flag is
true.
- In the Location Maintenance app, perform following changes.
- Edit 0002 location.
- Navigate to "Attributes" tab.
- Set the "Allow POS Login" to false.
- Click "Save" button to save the changes.
- Edit 0005 location.
- Navigate to "Attributes" tab.
- Set the "Allow POS Login" to false.
- Click "Save" button to save the changes.
Platform code changes
No platform changes are required
Customer code changes
- Register a process for "HandleServiceMode" extension point ID.
- In the new process, retrieve the location's "Allow POS Operations" attribute set using a method mentioned in this document.
- Check the value of "Allow POS Login" boolean flag:
- If the value is
true, return the Success Outcome - If the value is
false, add a pop up message to mention pos logins are disabled in the location.
- If the value is